
How To
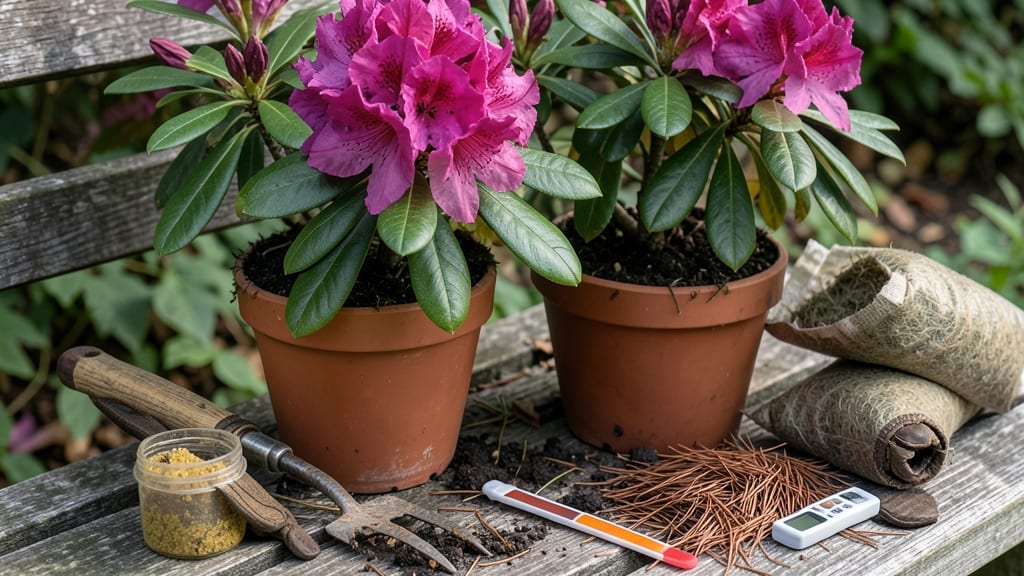
Azaleas demand soil so acidic they practically pucker—think pH 4.5-5.5, where most plants just sigh and give up. 🌸 I learned the hard way that even the prettiest azalea roots rot if the soil stays neutral, no matter how much you water.
The fix? A mix of peat moss, pine needles, and sulfur that keeps the soil perpetually sour, just like their native forest floors. Start with a soil test kit (they're cheap and save you from guesswork).
If your soil tests above 5.5, you're fighting an uphill battle—azaleas won't thrive until you drop that pH. Organic routes like aged pine needles or pine bark fines work slowly but safely, while elemental sulfur delivers fast results (just mix 1 pound per 100 square feet into the top 6 inches of soil).
By late spring, you'll see the difference: deep green leaves, buds forming, and flowers that last weeks longer than neighbors' azaleas. The secret isn't just the amendments—it's consistent monitoring. Test every 3-4 months, especially after rain, because acidic soil washes away faster than you'd think.
Works for rhododendrons too, and even blueberries if you're ambitious. The key is patience—soil acidity isn't a one-time fix, but once you get it right, your azaleas will reward you for years.
📚 In This Guide
- What you need
- Instructions
- Tips and common mistakes
- Wrapping up and next steps
What you need
- ● Peat moss (or sphagnum peat): 3–5 gallons (enough to amend a 5-gallon pot or 1 cubic yard of garden soil). Look for sphagnum peat moss for the highest acidity.
- ● Pine needles or wood chips: 2–3 inches of fresh or aged needles (or 1–2 bags of pine bark fines). Avoid treated wood!
- ● Sulfur (elemental or aluminum sulfate): For elemental sulfur: 1–2 pounds per 100 sq. ft. of garden soil (or 1 tbsp per 5-gallon pot). Works slowly (weeks to months).
- ● For aluminum sulfate: 5–10 lbs per 100 sq. ft. (or 1 tbsp per gallon of water for a foliar spray). Faster results but use sparingly.
- ● Garden fork or tiller: For mixing amendments into garden beds (12–18 inches deep).
- ● Gloves and dust mask: To protect your hands and lungs when handling sulfur or peat moss.
- ● pH test kit: Digital or liquid test strips to monitor soil pH (aim for 4.5–6.0 for azaleas).
- ● Composted pine bark: Adds organic matter and acidity over time. Mix in 1–2 inches per season.
- ● Cottonseed meal: A slow-release nitrogen source that also acidifies soil (1–2 cups per 10 sq. ft.).
- ● Coffee grounds: Sprinkle a thin layer (½ inch) around plants—great for pots but use sparingly in gardens.
- ● Vinegar (white, 5% acidity): For quick fixes in pots (1 cup per gallon of water, use sparingly!).
- ● Rainwater or distilled water: Tap water can raise pH over time—use filtered or acidic water if possible.
Step-by-Step guide to acidifying soil for azaleas
Here's the foolproof method I use to create the perfect acidic environment for thriving azaleas.
🌱 Step 1: Test Your Current Soil pH
Before adding anything, grab a soil pH test kit—they're cheap and save you from guessing. Azaleas need soil between 4.5 and 6.0, with 5.0-5.5 being ideal. Dig a 6-inch deep hole and collect soil samples from several spots in your planting area. Mix them together for an accurate reading.
If your test shows a pH above 6.0, you'll need to lower it significantly. A reading below 4.5 is rare but can happen in heavily organic soils—you'll need to raise it slightly. Note the exact pH number; you'll use it to calculate how much to amend.
🪴 Step 2: Remove Existing Topsoil and Prepare the Planting Area
Dig out the top 6-8 inches of existing soil from your planting area and set it aside. This layer often contains limestone or other alkaline amendments that will neutralize your acidifying efforts. Work the soil with a garden fork to loosen it, breaking up any compacted layers.
If you're planting in a container, empty it completely and wash out any old soil. Azaleas in pots need fresh acidic mix—never reuse old container soil unless you've tested and amended it properly. The key here is starting with a clean slate.
🌿 Step 3: Amend with Peat Moss for Acidic Base
Spread a 2-3 inch layer of sphagnum peat moss over the prepared area. Peat moss is the foundation of acidic soil because it naturally holds a pH between 3.0 and 4.5. Work it into the top 6 inches of soil using your garden fork, mixing thoroughly but not compacting.
For containers, mix 50% peat moss with 50% high-quality potting mix. This creates the ideal airy, moisture-retentive medium azaleas love. If your soil feels gritty after mixing, add a handful of perlite to improve drainage—azaleas hate soggy roots.
🍃 Step 4: Incorporate Pine Needles for Natural Acidification
Spread 2-3 inches of fresh pine needles over the amended soil. As they decompose, they'll slowly release organic acids that lower the pH. For best results, chop them roughly first—this speeds up decomposition and makes the acidification process faster. Work them into the top 4 inches of soil.
Here's the thing—pine needles work best when they're part of a mulch layer. After planting, spread a 3-inch thick layer of pine straw or needles over the soil surface. This creates a slow-release acidifying blanket that'll keep your azaleas happy for months. Refresh it every 6-12 months.
💧 Step 5: Water with Acidic Solution and Monitor
Fill a watering can with rainwater or distilled water—tap water often contains lime that can raise pH. Add 1 tablespoon of white vinegar per gallon of water (this is temporary—just to help establish the pH). Water your amended soil thoroughly until it's 6 inches deep.
Test the soil pH again after 2-3 weeks. If it's still not in the 5.0-5.5 range, repeat the peat moss and pine needle amendment process. Azaleas are sensitive, so aim for the slightly acidic end of the spectrum—5.0-5.2 is perfect. Once established, your mulch program will maintain this naturally.
⏰ Step 6: Maintain Acidic Conditions Long-Term
Every 3-4 months, top-dress with ½ inch of fresh pine needles or peat moss. This prevents the soil from gradually becoming less acidic over time. In containers, replace 25% of the soil mix annually with fresh acidic mix to prevent nutrient depletion.
Watch your azaleas—they'll tell you when it's working. Dark green, glossy leaves and abundant blooms mean you've got the pH right. Yellow leaves or poor flowering? Test again and adjust. I've found that azaleas in properly acidic soil need 10-20% less water than in neutral soil—another great reason to get this right.
Tips & tricks for perfect azalea soil acidification
Common mistakes can turn your azalea soil project into a frustrating guessing game—here's how to nail it every time.
Testing Accuracy: Don't just test one spot—collect samples from multiple areas of your planting zone and mix them thoroughly. I've seen pH readings vary by 1.5 points just a few feet apart in the same yard. Test after watering too, since dry soil can give false readings that are 0.5-1.0 points higher than reality.
Peat Moss Quality Check: Not all peat moss is created equal. Look for "sphagnum peat moss" labeled specifically for gardening—not the cheaper, lower-quality versions meant for cat litter. The good stuff has a spongy texture and holds moisture beautifully. If yours feels dusty or crumbly, it's been over-processed and won't hold its acidic properties.
Pine Needle Prep: The rough chopping step in Step 4 isn't optional—it's crucial. Whole pine needles decompose too slowly and may not acidify your soil in time for your azaleas' needs. Use pruning shears to chop them into 1-2 inch pieces before mixing. For containers, you can even pre-compost the chopped needles for 2-3 weeks before using to jumpstart the acidification process.
Long-Term Maintenance: That 3-4 month top-dressing schedule in Step 6 is your secret weapon against gradual pH creep. Set calendar reminders for this—many gardeners forget and end up with soil that's slowly becoming less acidic over time. I've seen azaleas go from vibrant to struggling within a year when this maintenance was neglected. A little effort now prevents major headaches later.
Pro Tips for Make Soil Acidic For Azaleas
- Common mistakes can turn your azalea soil project into a frustrating guessing game—here's how to nail it every time.
- Testing Accuracy: Don't just test one spot—collect samples from multiple areas of your planting zone and mix them tho...
- Peat Moss Quality Check: Not all peat moss is created equal. Look for "sphagnum peat moss" labeled specifically for g...
Frequently asked questions
Got questions about keeping your azaleas thriving in acidic soil? Here are some common ones—and their answers—to help you grow like a pro!
How often should I check my soil’s pH for azaleas?
Test your soil’s pH every 6–12 months, especially if your azaleas look stressed (yellow leaves, poor blooms). Azaleas prefer pH 4.5–5.5, so regular checks ensure you’re on track without over-acidifying. A simple DIY pH test kit (or soil lab test) works best!
Can I use vinegar to acidify soil for azaleas?
While vinegar can lower pH temporarily, it’s not ideal for azaleas. It disrupts soil microbes and can harm roots. Instead, opt for organic matter like pine needles or sulfur—they’re safer and more effective long-term.
How long does it take to acidify soil for azaleas?
Results vary, but you’ll see changes in 4–8 weeks with consistent amendments (like peat moss or pine fines). For faster results, mix in elemental sulfur (follow package rates) and water well. Patience is key—azaleas reward slow, steady soil prep!
What if my azaleas still look sad after acidifying?
Check for other issues first! Yellow leaves could mean overwatering, nutrient deficiencies (try an acidic fertilizer), or fungal issues (like root rot). If pH is correct but growth stalls, test for aluminum or manganese toxicity—common in overly acidic soil.
Are there budget-friendly ways to acidify soil?
Skip pricey amendments and use:
- Pine needles or straw (free from local forests or farms)
- Coffee grounds (brew used grounds into compost)
- Wood ash alternative: Use pine bark mulch (not hardwood ash—it raises pH!)
Wrapping up and next steps
Creating the perfect acidic soil for your azaleas is totally doable—just follow these simple steps! 🌱 With the right mix of peat moss, pine needles, and a little patience, you’ll give your azaleas the thriving environment they crave.
Remember, consistency is key, so keep testing your soil’s pH and adjusting as needed.
Now that you’re armed with knowledge, it’s time to roll up your sleeves and get planting! Start with one section of your garden and watch your azaleas bloom beautifully—you’ve got this! 🌸