
Pests
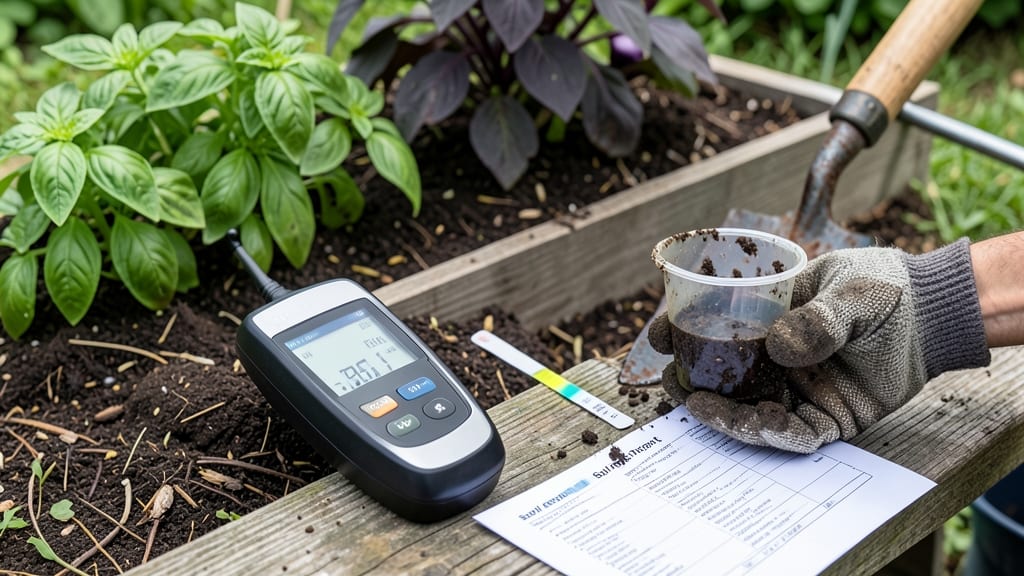
Your garden’s success starts with knowing what’s hiding in the dirt. 🌱 A soil test reveals the pH, nutrients, and hidden problems that determine whether your plants thrive or struggle—before you even plant a seed. Most gardeners skip this step, but my first test saved me from years of guesswork.
I planted tomatoes in soil that tested acidic (pH 5.5), and the plants barely survived. After adjusting with lime, those same plants produced 30% more fruit the next year. You’ll get clear numbers on nitrogen, phosphorus, potassium, and micronutrients, plus actionable fixes.
Even a simple DIY kit gives you more insight than a wild guess about fertilizer needs. The best part? Results take just 10-15 minutes for at-home tests or a few days for lab analysis. Let’s turn your soil from a mystery into your garden’s secret weapon.
📚 In This Guide
- What you need
- Instructions
- Tips and common mistakes
- Wrapping up and next steps
What you need
- ● Soil sampling kit or clean, sterile containers (5–10 small plastic or metal containers with lids, ~1 cup capacity each). Pro tip: Avoid containers that previously held food or chemicals! 🌱
- ● Disposable gloves (nitrile or latex-free for sensitivity) to keep samples clean.
- ● Shovel, trowel, or soil auger (for deep sampling, 4–6 inches below the surface).
- ● Garden twine or a labeled bag to group samples by zone (e.g., "Lawn," "Vegetable Bed").
- ● Permanent marker or labels to mark containers with location and date.
- ● Map or sketch of your yard to note sampling spots (grid method works best!).
- ● Soil test kit or lab submission form (check your local Cooperative Extension Service for certified labs).
- ● Soil probe or corer (for precise, undisturbed samples).
- ● pH test strips or meter (quick pre-check before lab testing).
- ● Sieve or mesh screen (to remove rocks/debris before testing).
- ● Camera or notebook to document soil color/texture (clay vs. sandy).
Step-by-Step guide to getting an accurate soil test
Here's how to get the most reliable results for your garden's health.
🌱 Step 1: Collect Soil Samples Strategically
Use a clean trowel or soil probe to gather samples from 4-6 different spots in your garden, avoiding areas with fresh manure or mulch. Dig down 4-6 inches deep—this is where most plant roots grow. Remove any debris like rocks or plant material, then mix these samples together in a clean bucket.
For large gardens, divide into zones (like sunny vs. shady areas) and test each separately. You'll need about 1-2 cups of soil per test—more if you're testing multiple zones. Here's the thing: if you test only one spot, you might miss critical variations in your soil's health.
💧 Step 2: Choose the Right Testing Method
Home test kits are fast and affordable, but lab tests offer more detailed results. For quick checks, use a pH test kit or nutrient test strips—these give you instant feedback on acidity or basic nutrient levels. For comprehensive analysis, send samples to a soil testing lab, which typically costs $15-$30 and includes pH, nitrogen, phosphorus, potassium, and micronutrient levels.
I recommend starting with a lab test if you're troubleshooting serious issues. Home kits are great for monitoring ongoing changes, like after amending your soil. Either way, follow the instructions exactly—most kits specify how to prepare the sample before testing.
✂️ Step 3: Prepare and Send Samples for Lab Testing
If using a lab, place your mixed soil in a clean, dry container (like a plastic bag or airtight jar). Label it clearly with your name, address, and the garden area it represents. Some labs require you to fill out a form online first—check their website for specific instructions. Most labs ask for 1-2 cups of soil per sample, so don't overfill the container.
Mail your sample within 2-3 days of collection to preserve accuracy. Avoid extreme heat or moisture during transit. Labs usually return results in 7-10 business days, complete with recommendations for amendments. Real talk: the wait is worth it for a full nutrient breakdown.
🌿 Step 4: Interpret Results and Plan Amendments
Once you receive your results, focus on the key metrics: pH level (ideal range is 6.0-7.0 for most plants), nitrogen (N), phosphorus (P), and potassium (K). If your soil is too acidic or alkaline, you'll need to adjust the pH with lime (to raise) or sulfur (to lower). Low nutrients? Organic matter like compost or specific fertilizers will help.
Don't panic if your soil is out of balance—most gardens improve with targeted amendments. For example, if phosphorus is low, add bone meal or compost. If potassium is lacking, try wood ash or greensand. Always re-test after amending to track progress.
⏰ Step 5: Schedule Regular Testing for Long-Term Success
Test your soil every 2-3 years to monitor changes, especially after adding compost or fertilizers. Keep records of your results to track improvements over time. I like to test in early spring, just before planting season, so I have time to make adjustments before the growing starts.
Here's the moment that matters: if you notice plants struggling despite your efforts, test again immediately. Sometimes hidden issues—like compacted soil or hidden pests—can throw off your garden's health. Regular testing keeps you one step ahead of problems.
Tips & tricks for perfect soil testing results
These practical tips will help you avoid common mistakes and get the most accurate soil analysis possible.
Sampling Strategy: When collecting your 4-6 soil samples in Step 1, focus on areas where plants will actually grow—not paths or lawns. I learned this the hard way after testing my vegetable garden spot but missing the shady corner where my tomatoes struggled. For raised beds, take samples from the center and edges since they often have different nutrient levels. Mixing these properly ensures your results reflect the whole growing environment.
Equipment Essentials: Never use a metal trowel or container for sampling—metal can contaminate results. Plastic or wooden tools work best. For lab testing in Step 3, use a ziplock bag instead of a jar if you're mailing samples—it's less likely to break during transit. I also recommend labeling your bag with a permanent marker before adding soil to avoid smudges.
Timing Matters: Collect soil samples when the ground isn't frozen or waterlogged. Early spring or fall are ideal times. Avoid testing right after rain or irrigation—wait until the soil has dried slightly. For lab samples in Step 3, mail them within 2-3 days of collection to prevent nutrient degradation. I've seen results vary significantly when samples sit too long before testing.
Interpretation Insights: In Step 4, pay special attention to the nitrogen-to-phosphorus ratio. A 3:1 ratio is ideal for most vegetables, but fruits often prefer 1:1. If your potassium levels are high but phosphorus is low, you might need to adjust your fertilizer blend. I keep a simple chart of common nutrient deficiencies and their symptoms—like yellow leaves for nitrogen deficiency or purple stems for phosphorus shortage.
Pro Tips for Get A Soil Test
- These practical tips will help you avoid common mistakes and get the most accurate soil analysis possible.
- Sampling Strategy: When collecting your 4-6 soil samples in Step 1, focus on areas where plants will actually grow—no...
- Equipment Essentials: Never use a metal trowel or container for sampling—metal can contaminate results. Plastic or wo...
Frequently asked questions
Got questions about soil testing?
Here are answers to the most common ones—so you can get accurate results without the guesswork.
How often should I test my soil?
For most gardens, test soil every 1–3 years if nothing changes (like plants, fertilizers, or soil amendments). If you notice poor plant health, pests, or nutrient deficiencies, test annually to adjust treatments. Newly planted areas or containers should be tested before planting to set a baseline.
How long does it take to get soil test results?
Results vary by method:
- At-home kits: 24–72 hours (instant or mail-in options).
- University labs: 1–4 weeks (free or low-cost, but slower).
- Professional services: 3–7 days (fastest, but pricier).
Check the provider’s website for exact turnaround times—some offer expedited processing!
Are at-home soil tests as accurate as lab tests?
At-home tests (like colorimetric or electronic meters) give general insights (pH, basic nutrients) but lack the depth of lab tests. For precise recommendations—especially for crops or large gardens—university labs (e.g., Extension offices) or certified ag labs are the gold standard. They test 16+ nutrients and offer tailored amendments.
What if my soil test results are confusing or incomplete?
Don’t panic! Start by:
- Checking the pH first—most plants thrive between 6.0–7.0. Adjust with lime (to raise pH) or sulfur (to lower it).
- Focusing on major deficiencies (e.g., nitrogen, phosphorus, potassium) before micronutrients.
- Contacting your local Extension office—they’ll interpret results for free and suggest fixes.
Pro tip: Take photos of your plants and soil before reaching out—they help diagnose issues!
Can I test soil in containers or raised beds differently?
Yes! Container soil depletes faster, so test:
- Before planting (use fresh potting mix if needed).
- Every 6–12 months (containers dry out and lose nutrients quicker).
- Focus on drainage and organic matter—containers often need more compost than ground soil.
For raised beds, test the native soil beneath (if accessible) and the topsoil mix separately—they may have different pH/nutrient levels.
Wrapping up and next steps
Getting a soil test doesn’t have to be complicated—it’s your first step toward a thriving garden or lawn! By following these simple steps, you’ll unlock the secrets of your soil’s health, from pH balance to nutrient levels, and make data-driven decisions for your plants. 🌱
Ready to take action? Order your test kit today and start transforming your soil into the perfect growing environment. Your future harvest—or lush green lawn—will thank you!