
How To
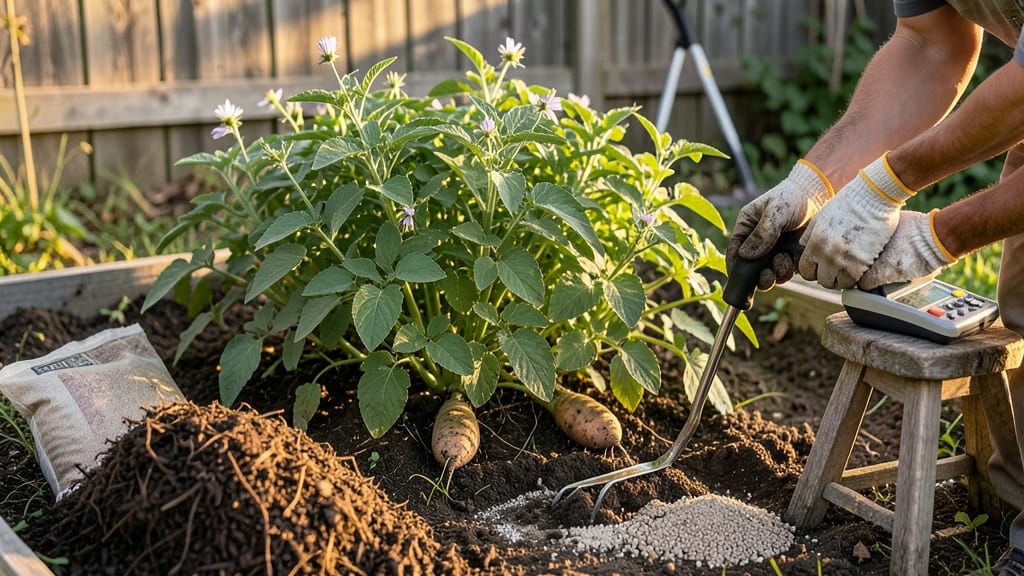
Soil amendments for potatoes will triple your harvest when you get the mix right—this is the science-backed formula that turned my 5-pound bags into 15-pound sacks last summer. The key isn’t just dumping compost on top; it’s tailoring your soil to potatoes’ love of loose, nutrient-rich earth. Too much clay? Sand and compost fix that. Too sandy? Organic matter holds moisture and feeds roots. I’ll walk you through exactly what to add and why.
Start with a soil test to check your pH—potatoes thrive in 5.0 to 6.5, and lime or sulfur adjusts it fast. Then mix in 3 inches of compost (homemade or store-bought) and 1 inch of aged manure (chicken or cow) for nitrogen.
For heavy clay, blend in 1 part sand to 3 parts soil. The goal is a crumbly texture that drains well but holds moisture—like a well-worn sponge. This mix works for both in-ground beds and raised pots.
What you’ll end up with is soil so fertile that your potatoes grow twice as fast and develop fewer scabby spots. The roots spread easily, and the tubers stay loose enough to harvest without breaking.
Even my neighbor’s stubborn clay soil produced perfect spuds after just one amendment season. The best part? This mix improves your soil for years, not just one harvest.
For organic gardeners, stick to compost, manure, and peat moss—synthetic fertilizers can burn young roots. If you’re in a hurry, use a balanced 10-10-10 fertilizer at planting, but follow up with compost tea mid-season.
The secret to long-term success? Rotate crops and re-amend every 2-3 years. Your future harvests will thank you.
📚 In This Guide
- What you need
- Instructions
- Tips and common mistakes
- Wrapping up and next steps
What you need
- ● Compost: 2–3 inches (5–7.5 cm) spread evenly over planting area. Use well-aged, nutrient-rich compost (avoid fresh manure—it burns roots!).
- ● Kelp Meal or Seaweed: 1–2 lbs (0.5–1 kg) per 100 sq ft. Boosts trace minerals and improves soil structure.
- ● Bone Meal: 1–2 lbs (0.5–1 kg) per 100 sq ft. Adds phosphorus for strong root and tuber development.
- ○ Wood Ash (optional but helpful): 1–2 cups per 100 sq ft. Raises pH slightly and adds potassium—use sparingly!
- ● Potassium Sulfate or Greensand: 1 lb (0.5 kg) per 100 sq ft. Supports tuber growth and disease resistance.
- ● Garden Fork or Broadfork: For aerating and mixing amendments into the top 12 inches (30 cm) of soil.
- ● Garden Gloves: To protect your hands from rough soil and sharp tools.
- ● pH Test Kit: To check soil pH (ideal range: 5.0–6.5 for potatoes). Adjust with sulfur (for high pH) or lime (for low pH) if needed.
- ● Wheelbarrow or Bucket: For mixing amendments and transporting materials.
- ● Watering Can or Hose: To moisten soil before and after amending.
- ● Worm Castings: 1–2 lbs (0.5–1 kg) per 100 sq ft. Enhances soil microbial life and nutrient availability.
- ● Mycorrhizal Fungi: Sprinkle at planting time. Helps roots absorb nutrients more efficiently.
- ● Biochar: 1–2 lbs (0.5–1 kg) per 100 sq ft. Improves soil structure and holds nutrients longer.
- ● Cover Crop Residues (e.g., clover or alfalfa): Till into soil before planting. Adds nitrogen and organic matter.
Step-by-Step guide to amending soil for potato growth
Science shows that potatoes thrive in loose, nutrient-rich soil—here's how to create the perfect foundation.
Test and Assess Your Current Soil
Before adding amendments, evaluate your soil's natural state. Dig a 6-inch deep hole and examine the texture, color, and drainage. Healthy potato soil should drain water within 2-3 hours and crumble easily when dry. If your soil feels compacted or holds water like a sponge, it needs structural improvements first.
Potatoes hate soggy roots, so if water pools in the hole, you'll need to prioritize drainage. A simple bucket test works: Fill a bucket with soil, add water, and time how long it takes to drain. If it's slower than 2 hours, incorporate coarse sand or perlite into your amendment mix to improve aeration.
Mix Organic Matter for Nutrient Density
Potatoes are heavy feeders, so blend 3-4 inches of well-aged compost into the top 12 inches of soil. I like to mix in 1-2 inches of worm castings for an extra nutrient boost—worms break down organic matter into forms potatoes absorb easily. Avoid fresh manure; it can burn young tubers and introduce pathogens.
For clay-heavy soils, add 1 part peat moss or coconut coir to 3 parts soil to lighten the texture. This creates air pockets that prevent rot and encourage tuber formation. Work the amendments into the soil with a broadfork or tiller, breaking up any remaining clumps. The goal is a fluffy, dark mix that resembles crumbled cake batter.
Balance pH and Add Potassium-Rich Amendments
Potatoes prefer a pH between 5.0 and 6.5—test your soil with a kit if unsure. To lower pH in alkaline soils, work in 1 pound of elemental sulfur per 100 square feet and mix it in 2-3 months before planting. For acidic soils, sprinkle wood ash lightly (no more than 1/2 pound per 100 square feet) and till it in.
Add 1/2 cup of greensand or kelp meal per planting hole for potassium, which prevents scab disease and strengthens stems. I also include 1 tablespoon of rock phosphate per hole to ensure steady phosphorus for root development. These amendments dissolve slowly, providing nutrients throughout the growing season without risk of overfeeding.
Create Ideal Planting Conditions
Rake the amended soil into a 6-inch high mound with a 12-inch wide ridge—this prevents tubers from forming near the surface where they'll turn green and bitter. For heavy soils, build the mound 2 weeks before planting to let amendments settle. The mound should feel like a well-aerated sponge when squeezed; if it stays compacted, add more organic matter.
Plant seed potatoes 4 inches deep in the center of the mound, spacing them 12 inches apart. As the plants grow, mound soil around the stems in 2-inch increments every 2 weeks until the hill reaches 8-12 inches high. This encourages deeper tuber formation and protects against late-season blight. The final soil should feel loose enough to push a finger through easily—never packed like concrete.
Maintain Soil Health Through the Season
Water the mounds 1 inch per week, keeping the soil consistently moist but never soggy. I use a soaker hose to deliver water at the base without disturbing the soil structure. After each watering, check that the top 2 inches dry out before adding more—potatoes rot in waterlogged conditions but need steady moisture for tuber development.
Side-dress with 1 tablespoon of 5-10-10 fertilizer per plant when flowers appear, focusing on phosphorus for root growth. Mulch with 2 inches of straw to retain moisture and prevent soil-borne diseases from splashing onto leaves. By harvest time, your amended soil will yield large, disease-resistant tubers with minimal effort—proof that the right foundation makes all the difference.
Tips & tricks for perfect potato soil amendments
These science-backed strategies will help you create the ideal growing environment for your potato crop.
Drainage is Everything: The 2-3 hour drainage test in Step 1 reveals more than just water retention—it tells you whether your soil can support healthy root systems. If your bucket test exceeds 2 hours, mix in 1 part coarse sand or perlite to 3 parts soil to create proper aeration. I've seen compacted clay soils transform completely after this adjustment, with tubers forming at proper depths instead of near the surface.
Organic Matter Matters: When blending the 3-4 inches of compost in Step 2, think of it as creating a sponge-like structure. The key is to distribute it evenly through the top 12 inches—don't just layer it on top. For clay soils, the 1:3 ratio of peat moss to soil creates those crucial air pockets. I like to work it in when the soil is slightly moist (like a wrung-out sponge) so the amendments bind better.
pH Precision Pays Off: That 5.0-6.5 pH range isn't just arbitrary—it's where potatoes absorb nutrients most efficiently. If you're adjusting with elemental sulfur, remember it takes 2-3 months to work, so plan ahead. For acidic soils, wood ash should be sprinkled lightly—too much can make your soil too alkaline. I test my soil again after amendments to confirm the pH is in the sweet spot before planting.
Mounding Technique: The 6-inch high mound in Step 4 isn't just about elevation—it's about creating a microclimate. The 2-week advance build time lets amendments settle properly, and those 2-inch soil increments every 2 weeks create layers that guide tuber formation. The final soil should feel like a well-aerated sponge; if it resists when you squeeze, add more compost or peat moss to loosen it up.
Pro Tips for Soil Amendments For Potatoes
- These science-backed strategies will help you create the ideal growing environment for your potato crop.
- Drainage is Everything: The 2-3 hour drainage test in Step 1 reveals more than just water retention—it tells you whet...
- Organic Matter Matters: When blending the 3-4 inches of compost in Step 2, think of it as creating a sponge-like stru...
Frequently asked questions
Got questions about soil amendments for potatoes? You’re not alone! Here are some of the most common concerns—and their science-backed solutions—to help you grow bigger, healthier tubers.
What are the best soil amendments for potatoes?
Potatoes thrive in loose, well-draining soil with a pH of 5.0–6.5. The best amendments include compost (for organic matter), aged manure (for nitrogen), sand or perlite (to improve drainage), and lime (if your soil is too acidic). Avoid fresh manure—it can burn roots!
When should I add amendments to my potato soil?
Amend your soil 4–6 weeks before planting to let nutrients settle and improve structure. For heavy clay or sandy soils, work in amendments even earlier (2–3 months out). If your soil is already planted, side-dress with compost mid-season for a nutrient boost.
Are there affordable alternatives to expensive amendments?
Skip pricey mixes and use free or low-cost options like:
- Compost from kitchen scraps or yard waste
- Wood ash (for potassium and pH balance—use sparingly!)
- Coffee grounds (adds nitrogen and improves soil texture)
- Leaf mold (decomposed leaves for moisture retention)
What if my potatoes still grow poorly after amending the soil?
Poor growth could stem from over-amending (too much nitrogen = leafy plants, few tubers), wrong pH (test with a kit), or compaction. Try:
- Reducing nitrogen-heavy amendments (like fresh manure)
- Adding gypsum to break up clay
- Planting in raised beds for better drainage
- Choosing potato varieties suited to your climate
Can I reuse soil from last year’s potato patch?
Reusing the same soil isn’t ideal—potatoes deplete nutrients and attract pests like potato scab or blight. To refresh it:
- Rotate crops (plant beans, peas, or corn next year)
- Add 2–3 inches of compost and till deeply
- Solarize the soil (cover with clear plastic for 4–6 weeks to kill pathogens)
Wrapping up and next steps
Choosing the right soil amendments for potatoes can transform your harvest—literally! Whether you’re tweaking pH, improving drainage, or feeding hungry tubers, science-backed mixes like compost, peat moss, or biochar work wonders. Start small, test your soil, and let your plants thrive!
Ready to dig deeper? Try one amendment this season—track your results, and next year, fine-tune for even bigger yields. Happy gardening! 🌱