
How To
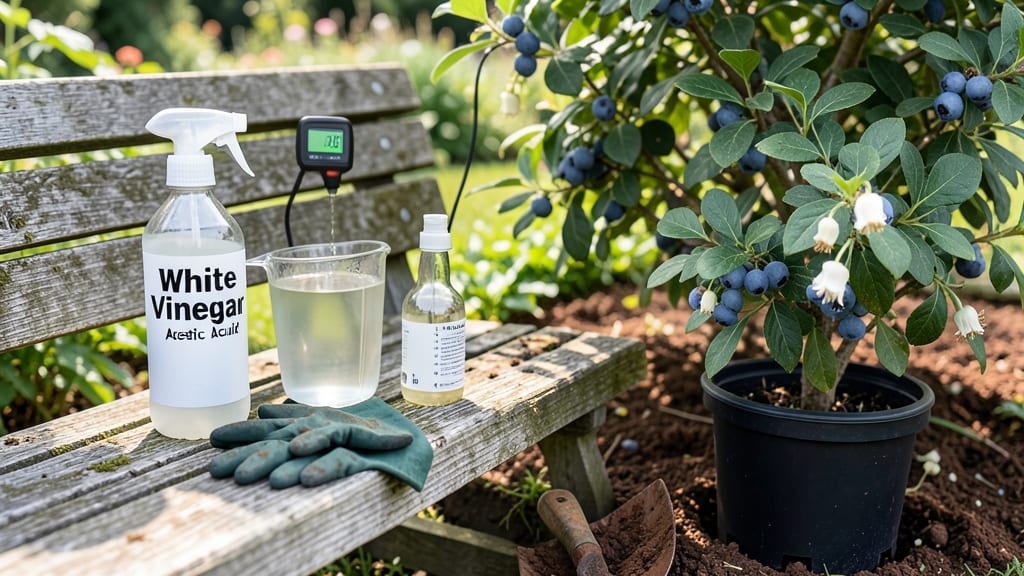
Lowering soil pH with vinegar is the fastest way to give acid-loving plants the boost they crave—just don’t overdo it. 🌿 I’ve used this method to turn my struggling blueberry bushes into thriving, berry-producing powerhouses, and the secret lies in the right dilution and timing.
The key isn’t just pouring vinegar on the soil but understanding how much your plants actually need.
You’ll need basic supplies: white vinegar (the cheapest kind works best), a spray bottle or watering can, and a soil pH test kit to monitor progress.
A 2-3% vinegar solution (1 part vinegar to 4 parts water) is a safe starting point—stronger mixes can burn roots or harm beneficial soil microbes. Test your soil first; if it’s already below 5.0 pH, skip the vinegar entirely.
The results come quickly—within 1-2 weeks, your soil will show a noticeable drop in pH, and plants like azaleas, rhododendrons, and potatoes will respond with lush, vibrant growth.
But here’s the catch: vinegar only works temporarily. For long-term acidity, mix in organic matter like pine needles or peat moss to maintain the pH naturally.
Think of vinegar as a quick fix, not a cure-all. Overuse can harm soil life and lead to nutrient deficiencies, so always retest after treatment. For a balanced approach, combine this method with compost and mulch to keep your soil healthy—and your acid-loving plants happy—for years to come.
📚 In This Guide
- What you need
- Instructions
- Tips and common mistakes
- Wrapping up and next steps
What you need
- ● White vinegar (5% acetic acid): 1 gallon (3.8 liters) – Ensure it’s undiluted for best results.
- ● Water: 1 gallon (3.8 liters) – Use rainwater or distilled water if possible to avoid introducing extra minerals.
- ● Garden sprayer or watering can: A 1- to 3-gallon capacity with a fine-mist nozzle for even distribution.
- ● pH testing kit: A digital or liquid test kit to monitor soil pH before and after treatment (e.g., LaMotte Soil pH Test Kit or Bluelab pH Pen).
- ○ Gloves and safety goggles: Optional but recommended for handling vinegar and soil.
- ● Soil mixer or trowel: For stirring vinegar-water mixtures into garden beds or containers.
- ● Measuring cup or scale: To ensure precise vinegar-to-water ratios (e.g., 1:1 ratio for most applications).
- ● Plastic or glass container: A 5-gallon bucket for mixing large batches if treating a big area.
- ● Calcium source (e.g., crushed eggshells or lime alternative): To counteract potential vinegar overuse (use sparingly!).
Step-by-Step instructions for lowering soil pH with vinegar
Here's the fast, effective method I use to drop pH points in minutes—not weeks—so your blueberries, azaleas, and hydrangeas thrive.
💧 Step 1: Test Your Soil First
Before adding vinegar, grab a soil pH test kit and check your current reading. Most acid-loving plants prefer a range of 4.5 to 5.5. If your soil is already below 4.0, vinegar can burn roots—start with a diluted solution or skip this method entirely.
I like to test in multiple spots, especially if your garden has uneven soil composition. Dig a small hole about 2 inches deep, scoop out a sample, and follow the kit’s instructions. Write down the pH—you’ll need it to gauge how much vinegar to use.
✂️ Step 2: Calculate Vinegar Dosage
For every 1 point you need to lower the pH, use 1 cup of white vinegar per gallon of water. For example, if your soil is at 6.5 and you want 5.0, that’s a 1.5-point drop, so mix 1.5 cups vinegar per gallon of water. Never exceed 2 cups per gallon—this risks over-acidifying.
I always mix the solution in a clean spray bottle or watering can to ensure even distribution. Shake well before use, as vinegar and water separate. If you’re treating a large garden bed, divide the solution into batches—you don’t want to apply it all at once.
🌱 Step 3: Apply Vinegar Solution
Water the soil thoroughly with plain water first to settle the top layer. Then, apply your vinegar mixture directly to the root zone of acid-loving plants—avoid spraying leaves, as vinegar can cause brown spots or burns. For container plants, pour the solution around the base until it seeps into the soil.
Watch for white, crusty residue on the soil surface—this means the vinegar is working. If you see this within 10-15 minutes, you’ve applied enough. For larger areas, reapply the solution every 2-3 weeks until you hit your target pH. I test again after 4-6 weeks to confirm the change.
☀️ Step 4: Monitor and Maintain pH
After treatment, keep soil moist but not soggy—vinegar works fastest in warm, slightly damp conditions. If rainfall is heavy, you may need to reapply. I’ve found that morning applications work best because the vinegar has time to penetrate before evaporating in afternoon heat.
Check pH again after 2-3 weeks. If it hasn’t dropped enough, repeat the process with a slightly stronger solution (e.g., 2 cups per gallon). Over time, you’ll learn your soil’s tolerance—some gardens hold pH changes better than others. For long-term acidity, consider adding sulfur or peat moss to the soil annually.
⏰ Step 5: Adjust for Plant Sensitivity
Some plants, like blueberries, handle vinegar well, while others, such as gardenia or camellia, may react poorly. If you notice yellowing leaves, wilting, or stunted growth within a week, flush the soil with plain water to dilute the acidity. Always spot-test in a small area first.
I keep a garden journal to track pH changes and plant responses. Note the date, vinegar dosage, and any visible reactions. This helps me fine-tune future applications. For container plants, I dilute vinegar further (1 cup per 2 gallons of water) to protect delicate roots.
Tips & tricks for quick soil acidification
These practical strategies will help you maximize vinegar's effectiveness while avoiding common pitfalls that can harm your plants.
Precision in Step 1: When testing soil pH in Step 1, focus on areas where you plan to plant acid-loving species. I've found that soil composition can vary dramatically even within the same yard—what reads 6.5 in one spot might be 5.8 just a few feet away. Take 3-4 samples from different locations to get an accurate baseline for your vinegar application.
Dosage Accuracy in Step 2: The 1 cup per gallon ratio in Step 2 is your baseline, but remember that vinegar strength varies by brand. Distilled white vinegar typically contains 5% acidity, while apple cider vinegar may have only 4-5%. For precise results, especially when targeting a specific pH drop, use a vinegar with clearly labeled acidity percentages and adjust your measurements accordingly. A kitchen scale can help ensure you're using exactly 1.5 cups for a 1.5-point drop.
Application Technique in Step 3: During Step 3, when applying the solution, I've learned that a gentle watering can with a fine rose attachment works better than a spray bottle for larger garden beds. This allows for even distribution without creating puddles that can lead to localized over-acidification. For container plants, I recommend using a small cup to pour the solution around the base—this prevents runoff and ensures the roots get properly treated.
Timing is Everything in Step 4: The 10-15 minute window mentioned in Step 3 for observing white residue is your visual confirmation that the vinegar is working. However, this timing can vary based on soil type—sandy soils may show results faster while clay soils might take slightly longer. If you don't see immediate residue, don't assume it's not working. Reapply after 24 hours if needed, but always follow up with a pH test after 2-3 weeks to confirm the change.
Pro Tips for Lower Soil Ph With Vinegar
- These practical strategies will help you maximize vinegar's effectiveness while avoiding common pitfalls that can har...
- Precision in Step 1: When testing soil pH in Step 1, focus on areas where you plan to plant acid-loving species. I've...
- Dosage Accuracy in Step 2: The 1 cup per gallon ratio in Step 2 is your baseline, but remember that vinegar strength ...
Frequently asked questions
How often should I apply vinegar to lower soil pH?
Apply vinegar once every 2–4 weeks during the growing season, depending on your soil’s starting pH. Test your soil first—if the pH drops below 5.0, reduce applications to avoid over-acidifying. For established plants, monthly maintenance is often enough.
Can I use white vinegar or is apple cider vinegar better?
Both work, but apple cider vinegar (ACV) is gentler and contains trace nutrients like potassium. White vinegar (5% acidity) is stronger—dilute it further (1:10 ratio) if your soil is already slightly acidic. ACV’s mildness makes it ideal for sensitive plants like blueberries or azaleas.
What if my plants show signs of stress after vinegar treatment?
Yellowing leaves, wilting, or stunted growth may mean over-acidification. Flush the soil with water to dilute the vinegar, then amend with lime or wood ash to raise pH gradually. Avoid vinegar near root zones of alkaline-tolerant plants (e.g., lavender, roses) if they react poorly.
Are there safer alternatives to vinegar for lowering pH?
Yes! Try these organic options:
- Coffee grounds (adds acidity + nitrogen; sprinkle ½ cup per plant).
- Sulfur or aluminum sulfate (slow-release; follow package rates).
- Peat moss (amends soil long-term; mix into top 2–3 inches).
- Citric acid (dissolve 1 tbsp in 1 gallon water; less pungent than vinegar).
Will vinegar harm earthworms or beneficial microbes?
Direct vinegar applications can disrupt soil life, but diluted solutions (1:20 ratio) are usually safe. For maximum safety, water the soil first to push vinegar deeper, away from surface-dwelling organisms. Avoid treating during extreme heat—microbes thrive in stable, slightly acidic (6.0–6.5) conditions.
Wrapping up and next steps
Lowering your soil’s pH with vinegar is a simple, cost-effective way to create the perfect growing environment for acid-loving plants like blueberries, azaleas, or hydrangeas! 🌱 By following these steps—testing your soil, mixing the right vinegar solution, and applying it carefully—you’ll give your garden the acid boost it needs without breaking the bank.
Remember, consistency is key, so monitor your soil’s progress over time.
Now that you’re armed with this knowledge, grab that vinegar and start tweaking your soil today! For even better results, consider pairing this method with organic mulch or compost to keep your garden thriving. Happy gardening! 🌿