
How To
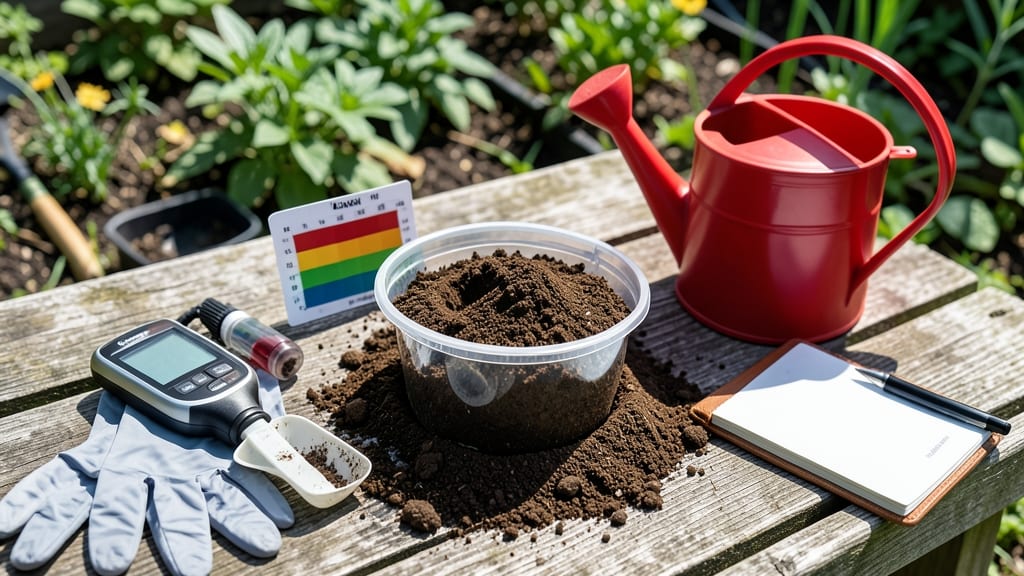
Testing soil acidity levels unlocks the secret to thriving plants—it’s the difference between lush gardens and struggling seedlings. 🌱 I’ve spent years watching plants wilt because their soil was either too sour or too alkaline, and the fix always starts with a simple pH check.
The good news? You don’t need fancy equipment to get accurate results right at home.
Most gardeners grab a basic pH test kit (around $10) or use household items like vinegar and baking soda for a quick DIY test. Even a digital meter from the hardware store works—just dig a sample from 6 inches deep, let it dry slightly, and follow the instructions.
The key is consistency: test multiple spots in your garden since pH can vary wildly even in small areas.
Once you know your soil’s pH, you’ll see why some plants thrive while others struggle—acid-loving blueberries need 4.5-5.5, while tomatoes prefer 6.0-6.8. A simple lime application raises pH, while sulfur lowers it, and you’ll know exactly what to add. Most importantly, you’ll stop guessing and start growing with confidence.
This method works for vegetable gardens, flower beds, and even houseplants—just adjust the sample size. The best part? You’ll spot problems before they start, saving time and frustration. Let’s get those plants the perfect soil conditions they deserve.
📚 In This Guide
- What you need
- Instructions
- Tips and common mistakes
- Wrapping up and next steps
What you need
- ● Soil sample: About 1 cup (8 oz) of fresh, undisturbed soil from your garden (avoid top layers with mulch or debris).
- ● Water: Distilled or boiled-and-cooled water (tap water can skew results due to mineral content).
- ● pH test kit: A digital pH meter (for precision) OR a pH test strip kit (affordable and easy to use).
- ● Small container: A clean, shallow dish or jar (like a mason jar) for mixing soil and water.
- ● Measuring spoon: A 1-tablespoon scoop for consistency.
- ● Stirring stick: A clean wooden spoon or popsicle stick to mix the soil and water.
- ● Gloves: A pair of disposable nitrile gloves to keep your hands clean (soil can be gritty!).
- ● Notebook: To record your pH results and track changes over time.
- ● Lime or sulfur: If you plan to adjust pH, have these on hand (but measure carefully—overdoing it can harm plants!).
- ● pH indicator liquid: A DIY solution like red cabbage juice (for a fun, natural alternative to test strips).
Step-by-Step instructions for testing soil acidity levels
Here's how to check your soil's pH in minutes—no fancy tools required.
🌱 Step 1: Collect Soil Samples From Multiple Spots
Grab a clean trowel or spoon and dig down 4-6 inches in 4-5 different spots across your garden bed. Mix these samples together in a clean bucket—this gives you a representative reading of your entire area. Avoid spots near fresh manure, compost piles, or where you've recently added amendments, as these can skew results.
If you're testing a large garden, take samples from sunny and shady areas separately since light exposure affects soil chemistry. Break up any clumps with your hands, but don't crush the soil completely—you want to preserve its natural structure for accurate testing. You'll need about 1 cup of this mixed soil for most at-home tests.
💧 Step 2: Choose Your Testing Method
For a quick, no-cost method, use vinegar and baking soda. Pour ½ cup white vinegar over 1 cup of dry soil in a clean container. If it fizzes vigorously, your soil is alkaline (pH 7.0+). Next, mix ½ cup baking soda with 1 cup of water, then add it to 1 cup of dry soil. If it fizzes, your soil is acidic (pH < 7.0). No fizz? Your soil is likely neutral (pH 7.0).
For a more precise reading, use a pH test kit (available at garden centers). Follow the kit's instructions to moisten your soil sample, then dip the test strips or use the provided liquid indicator. Match the color to the chart—most kits give you a pH range (e.g., 5.0-7.0) rather than an exact number. I like digital meters for their convenience, but they require calibration and can be less accurate in organic soils.
✂️ Step 3: Interpret Results and Plan Amendments
Most vegetables thrive in slightly acidic to neutral soil (pH 6.0-7.0). Blueberries and azaleas need acidic soil (pH 4.5-5.5), while asparagus and carrots prefer alkaline soil (pH 7.0-8.0). If your test shows your soil is too acidic (pH < 6.0), mix in wood ash or crushed oyster shell to raise the pH gradually. For alkaline soil (pH > 7.0), add sulfur or peat moss to lower it over time.
Don't panic if your soil is outside the ideal range—amending soil takes time. Re-test every 4-6 weeks after adding amendments to track progress. I like to keep a garden journal to record pH changes and note which plants thrive in my specific soil conditions. Over time, you'll learn what works best for your garden's unique chemistry.
🪴 Step 4: Test Again After Amending (Optional)
After adding amendments, wait 4-6 weeks before re-testing. Soil pH changes slowly, and rushing can lead to over-amending, which harms plants. For example, adding too much lime to lower acidity can create a highly alkaline environment that locks out essential nutrients like iron and manganese.
If you're growing multiple crops with different pH needs, consider creating separate beds for acid-loving plants (like blueberries) and neutral/alkaline plants (like tomatoes). This way, you don't have to compromise on soil conditions. Re-test your amended soil using the same method to confirm the pH shift before planting.
Tips & tricks for quick soil pH testing
These simple tricks will help you get accurate results without the guesswork—even if you're new to gardening.
Sampling Strategy: When collecting your 4-5 soil samples in Step 1, focus on areas where you plan to plant. Avoid spots with visible weeds or recent fertilizer applications, as these can skew your results. I like to take samples in a zigzag pattern across the garden bed to get a truly representative mix. For raised beds or containers, sample from multiple spots along the edges and center—pH can vary even in small spaces.
Precision with Vinegar/Baking Soda: For the quick vinegar and baking soda test in Step 2, use a clean, dry container and exactly ½ cup of each liquid. Tap the container gently after adding liquids to help release any trapped air bubbles that could mask fizzing. A slow, steady fizz with vinegar suggests mild alkalinity, while vigorous bubbling with baking soda indicates strong acidity. If you're on the fence, try both tests—they complement each other!
Kit Accuracy Tip: When using pH test kits in Step 2, always follow the instructions to the letter—especially the waiting time before reading results. I've found that digital meters can be less reliable in organic soils, so I cross-check with test strips for consistency. For the most accurate reading, test your kit against a known pH solution (like distilled water at pH 7.0) before starting—this helps calibrate your expectations.
Amendment Application: In Step 3, when adjusting pH, spread amendments evenly over the soil surface and gently work them into the top 2-3 inches. For large areas, use a broadcast spreader for even distribution. Remember that organic amendments like sulfur or peat moss take longer to change pH than inorganic ones like lime—be patient and re-test as recommended every 4-6 weeks. Overdoing it is worse than underdoing it!
Pro Tips for Test Soil Acidity Level
- These simple tricks will help you get accurate results without the guesswork—even if you're new to gardening.
- Sampling Strategy: When collecting your 4-5 soil samples in Step 1, focus on areas where you plan to plant. Avoid spo...
- Precision with Vinegar/Baking Soda: For the quick vinegar and baking soda test in Step 2, use a clean, dry container ...
Frequently asked questions
Got questions about testing soil acidity? You’re not alone!
Here are answers to the most common concerns—plus a few pro tips to make your pH checks a breeze.
How often should I test my soil’s pH level?
Check your soil’s pH at least once a year for general gardening. If you’re troubleshooting poor plant growth, test every 3–4 months. New gardens or amended soil should be tested before planting and again after 2–3 months to monitor changes.
Can I use vinegar or baking soda instead of a pH test kit?
Yes! For a quick acidity check, mix 1 part vinegar with 2 parts water and pour it into a small soil sample. If it fizzes, your soil is alkaline (pH > 7). For alkalinity, use baking soda (1 tsp in 1 cup water)—fizzing means acidic soil (pH < 7). Note: This is a rough estimate; kits are more precise.
How long does it take for soil pH test results to be accurate?
Most home test kits (like litmus paper or liquid drops) give results in 5–15 minutes. For lab tests, allow 1–2 weeks for shipping and processing. If using the vinegar/baking soda method, observe fizzing within 30 seconds. Patience pays off—rush jobs can lead to errors!
What if my soil test shows extreme pH (very acidic or alkaline)?
Extreme pH (below 5.0 or above 8.0) can harm plants. To lower acidity, add lime (calcium carbonate) or wood ash. For raising pH, use sulfur, peat moss, or pine needles. Always amend soil in small batches and retest after 4–6 weeks. Overcorrecting is worse than doing nothing!
Does weather affect soil pH test accuracy?
Yes! Wet or frozen soil can skew results. Test when soil is moist but not soggy (like a damp sponge). Avoid testing right after rain or heavy watering. If your soil is frozen, wait until it thaws—cold temps slow chemical reactions. Keep your kit in a stable environment (not the trunk of your car!).
Are expensive soil test kits worth it for home gardeners?
Not always! For most home gardens, a $10–$20 kit (like MySoil or Luster Leaf) is plenty accurate. Save the lab tests ($20–$50) for commercial farms or large-scale projects. Compare results with your plants’ needs—happy plants are the best feedback!
Wrapping up and next steps
Testing your soil’s acidity level doesn’t have to be complicated—with simple household tools and a little patience, you’ve got the power to give your plants the perfect growing conditions! 🌱 Whether you’re using a DIY vinegar-baking soda test or a pH test kit, understanding your soil’s pH is the first step toward a thriving garden.
Now that you’re equipped with the know-how, take action! Grab your tools, head outside, and start nurturing healthier plants today.
🌟 Next Steps:
- Adjust soil pH if needed (lime for acidic, sulfur for alkaline).
- Monitor changes over time for optimal plant growth.
- Share your success with fellow gardeners—happy growing! 🌻