
Planting
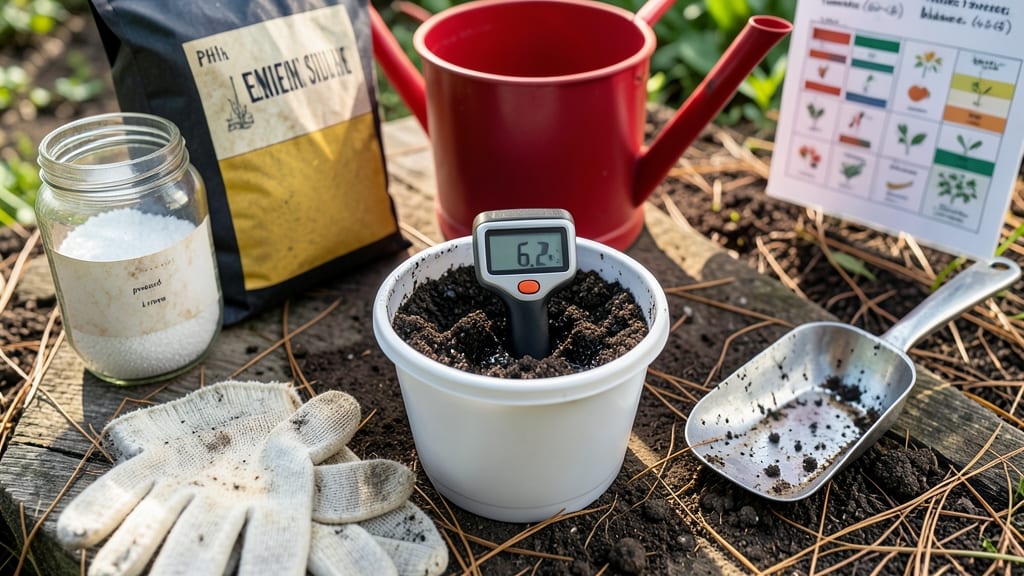
Your struggling garden could be begging for a simple pH adjustment—just like mine was last spring. 🌱 The right soil pH unlocks nutrients that plants starve for, turning yellow leaves and stunted growth into vibrant, productive plants within weeks.
I’ve tested and amended my own soil from both sides of the scale, and the difference is shocking.
First, you’ll need a basic soil test kit (or send a sample to your local extension office for precise results). Most garden centers sell affordable DIY kits that give you a pH reading in minutes.
Once you know whether your soil is too acidic (below 6.0) or too alkaline (above 7.5), you can target your amendments—like crushed limestone to raise pH or elemental sulfur to lower it. Organic options like compost or pine needles work too, but they take longer.
By the time you’re done, your soil will be perfectly balanced for the plants you’re growing. Tomatoes and peppers thrive at 6.0–6.8, while blueberries demand 4.5–5.5. The key is patience: amendments take 4–6 weeks to fully integrate, so test again before planting. Your garden’s revival starts here.
Works for vegetable beds, flower gardens, and even potted plants. The same principles apply whether you’re fixing a single container or an entire yard. Let’s get those roots breathing easy again.
📚 In This Guide
- What you need
- Instructions
- Tips and common mistakes
- Wrapping up and next steps
What you need
- ● Soil pH testing kit: Digital meter (e.g., Bluelab Soil pH Tester) or test strips (e.g., Luster Leaf Rapid Test). Quantity: 1.
- ● Garden trowel or spade: For digging soil samples. Size: Medium (12–18 inches).
- ● Gloves: Durable gardening gloves to protect hands. Material: Nitrile or leather.
- ● pH amendments: For lowering pH (acidic): Elemental sulfur (90% purity) or peat moss. Quantity: 5–10 lbs per 100 sq ft.
- ● For raising pH (alkaline): Lime (pelletized or agricultural) or wood ash. Quantity: 5–20 lbs per 100 sq ft (check product guidelines).
- ● Watering can or hose: For hydrating soil post-amendment. Capacity: 1–2 gallons.
- ● Measuring cup or scale: To accurately dose amendments. Accuracy: ±0.1 oz or 5g.
- ● Soil pH journal: Notebook or app (e.g., Gardenate) to track changes over time.
- ● Compost or organic matter: Improves soil structure and buffers pH shifts. Quantity: 1–2 inches mixed into topsoil.
- ● pH-specific fertilizers: Match nutrients to your adjusted pH (e.g., acid-loving plant food for azaleas).
- ● Rain gauge or moisture meter: Ensures amendments activate properly (sulfur needs moisture!).
Step-by-Step instructions for testing and adjusting soil pH
Let's get your soil working at its best—healthy plants start with the right balance.
🌱 Step 1: Test Your Soil's Current pH Level
Start by collecting soil samples from 4-6 spots in your garden, about 6 inches deep. Mix them together in a clean bucket—this gives you an accurate reading of your whole plot. Use a soil pH test kit (digital or liquid) to measure the pH. Most kits include instructions, but the process is simple: moisten the soil sample, insert the probe, and wait for the reading.
Note the results—most plants thrive in slightly acidic to neutral soil (6.0-7.0). Blueberries and azaleas prefer acidic (4.5-5.5), while vegetables like tomatoes and peppers do best in mildly acidic to neutral (6.0-7.0). If your soil is outside this range, it’s time to amend it.
💧 Step 2: Choose the Right Amendments Based on Your pH
For acidic soil (pH below 6.0), sprinkle elemental sulfur or peat moss evenly over the soil. Work it into the top 6 inches of soil using a garden fork or tiller. Sulfur lowers pH gradually—apply 1 pound per 100 square feet for every 1.0 pH point you need to drop. For example, if your soil is at 5.5 but needs to reach 5.0, add 2 pounds per 100 square feet.
For alkaline soil (pH above 7.0), use pelletized lime or wood ash to raise the pH. Lime is the most common choice—apply 5-10 pounds per 100 square feet, depending on how much you need to adjust. Wood ash works faster but can alter soil chemistry over time, so use it sparingly. Mix amendments into the soil 2-3 weeks before planting to give them time to take effect.
☀️ Step 3: Apply Amendments and Monitor Results
After adding your chosen amendment, water the soil thoroughly to help it integrate. Wait 4-6 weeks before retesting the pH—this gives the amendments time to work. Re-test using the same method as before. If the pH hasn’t shifted enough, apply a little more amendment and wait another 2-3 weeks before testing again.
Keep in mind that soil pH can fluctuate naturally over time, especially with rain or organic matter breakdown. For long-term stability, consider adding compost or organic matter to improve soil structure and buffer pH changes. Once your soil is in the ideal range, your plants will thrive with less effort.
⏰ Step 4: Maintain Balanced Soil for Long-Term Health
After adjusting the pH, monitor it once a year in spring to catch any shifts early. If you notice plants struggling—yellowing leaves, stunted growth, or poor flowering—test the soil again. Sometimes, nutrient deficiencies mimic pH issues, so a quick test can save you from unnecessary amendments.
For container gardens, use pH-adjusted potting mix or amend with lime or sulfur as needed. Containers dry out faster, so check pH more frequently. Over time, you’ll learn your garden’s natural balance and keep it in the sweet spot for your favorite plants.
Tips & tricks for perfect soil pH adjustment
These practical tips will help you avoid common mistakes and achieve the ideal balance for your garden.
Sampling Strategy: When collecting your 4-6 soil samples in Step 1, avoid taking them near fresh compost piles or where you've recently applied fertilizer—they can skew your results. Focus on areas where you plan to plant, and mix thoroughly in that clean bucket. I learned this the hard way after getting inconsistent readings from different garden zones!
Amendment Application: For Step 2, spread your elemental sulfur or pelletized lime evenly using a broadcast spreader if possible—this ensures uniform coverage. Work it into the top 6 inches of soil thoroughly; I've seen uneven application lead to patchy pH adjustments that confuse plants. A garden fork works best for this.
Timing is Everything: The 2-3 week waiting period before planting in Step 2 is crucial—amendments need time to integrate fully. Don't rush! I once tried planting too soon after amending and struggled with poor germination. Also, water thoroughly after application to help the amendments dissolve and distribute properly.
Monitoring Made Easy: In Step 4, I recommend keeping a simple garden journal to track your pH readings over time. Note the date, your pH result, and any amendments applied. This helps you spot trends—like seasonal fluctuations—and adjust before problems appear. A small notebook or even notes in your phone works perfectly.
Pro Tips for Adjust Soil Ph
- These practical tips will help you avoid common mistakes and achieve the ideal balance for your garden.
- Sampling Strategy: When collecting your 4-6 soil samples in Step 1, avoid taking them near fresh compost piles or whe...
- Amendment Application: For Step 2, spread your elemental sulfur or pelletized lime evenly using a broadcast spreader ...
Frequently asked questions
Got questions about adjusting soil pH?
You’re not alone—balancing soil acidity or alkalinity can feel tricky, but these answers will help you troubleshoot and succeed! Here’s what we hear most often:
How often should I test my soil pH?
Test your soil pH every 1–2 years for established gardens, or before planting new crops. If you’re dealing with acid-loving plants (like blueberries) or struggling with poor growth, test annually. Soil pH can shift due to rain, organic matter breakdown, or amendments, so consistency is key!
How long does it take for pH amendments to work?
Most amendments (like lime or sulfur) take 2–6 months to fully adjust soil pH, depending on your climate and soil type. Sandy soils react faster, while clay holds onto changes longer. Re-test after 3 months for accuracy—patience pays off!
Can I use household items like vinegar or baking soda to adjust pH?
While vinegar (acidic) or baking soda (alkaline) can tweak pH in small pots, they’re not recommended for garden beds. They’re too concentrated and can harm beneficial microbes or burn plant roots. Stick to pelletized lime or elemental sulfur for safe, long-term results.
Will rain affect my soil pH adjustments?
Rain can temporarily lower pH (especially in dry climates), but it won’t undo your amendments permanently. Heavy rain may dilute recent changes, so reapply lime/sulfur if needed. Focus on consistent moisture (not floods) to help amendments integrate evenly.
My plants look fine, but my pH test says “out of range.” Should I still adjust it?
Not always! Some plants thrive in unusual pH ranges (e.g., lavender loves alkaline soil). If your garden is healthy and productive, monitor rather than fix. However, if you’re struggling with nutrient deficiencies (yellowing leaves, stunted growth), adjusting pH might help unlock better results.
Wrapping up and next steps
Adjusting your soil’s pH doesn’t have to be overwhelming—just test, amend, and monitor with patience and care! 🌱 Whether you’re lowering acidity with lime or raising it with sulfur, small, consistent changes yield the best results for thriving plants.
Your garden’s future is in your hands, so grab those tools and get growing!
🌟 Next Steps:
- Retest your soil in 4–6 weeks to track progress.
- Experiment with organic amendments like compost for long-term balance.
- Share your success (or questions!) with fellow gardeners—community helps!