
Planting
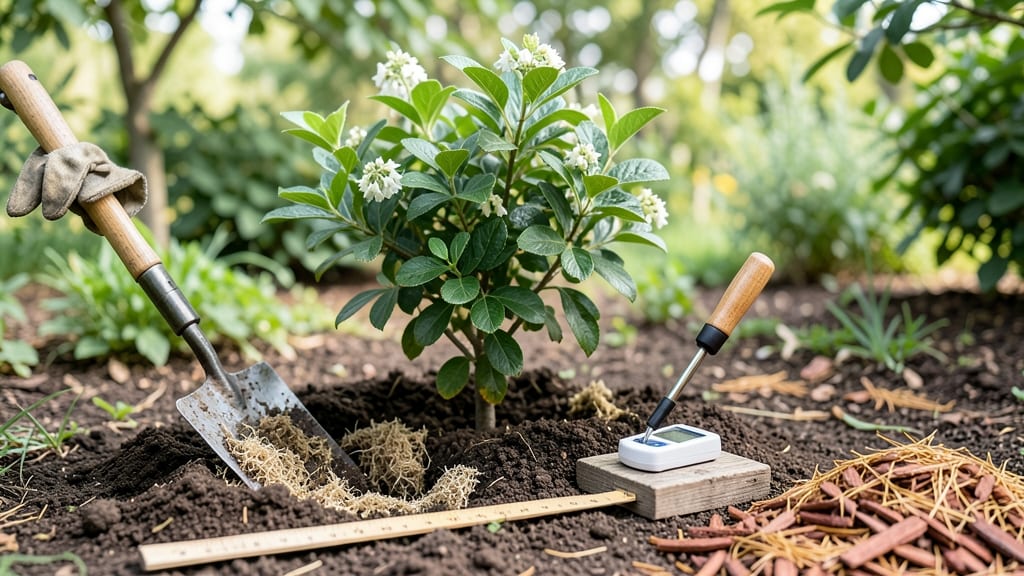
Blueberry plant soil preparation isn’t just about dirt—it’s about creating the perfect acidic loam blend that unlocks their full potential. 🌱 I learned the hard way that skipping this step means stunted growth, pale leaves, and disappointing harvests, even with healthy-looking plants. The secret lies in mimicking their natural bog habitat, where the soil stays moist, well-drained, and perpetually acidic. You'll need 3 parts peat moss or pine bark fines, 2 parts sandy loam, and 1 part composted leaves—this creates the ideal airy, moisture-retentive mix. Test your soil pH first (aim for 4.5-5.5), because blueberries refuse to thrive above 6.0. Amend with sulfur or aluminum sulfate if needed, but do this 3-6 months before planting to avoid root burn. Once mixed, your soil should feel like a damp sponge—not compact, not gritty. The roots will spread eagerly through this medium, accessing nutrients and moisture exactly as they need. In just 6-8 weeks, you'll see new shoots signaling success, and by year two, your bushes will reward you with bold, juicy berries that taste nothing like store-bought. Regional adjustments matter: Northern gardeners add extra peat, while Southern climates benefit from more organic matter to retain moisture. Avoid common pitfalls like over-amending (which can raise pH) or using fresh wood chips (which steal nitrogen). The payoff? Blueberries that produce year after year with minimal effort.
📚 In This Guide
- What you need
- Instructions
- Tips and common mistakes
- Wrapping up and next steps
What you need
- ● Peat moss or coconut coir: 50% of the blend (1 part per 2 parts total soil). Why? It lowers pH and retains moisture.
- ● Pine bark fines or finely shredded pine bark: 25% of the blend (½ part per 2 parts total soil). Why? Adds organic matter and improves aeration.
- ● Compost or well-rotted leaf mold: 25% of the blend (½ part per 2 parts total soil). Why? Boosts nutrients without altering pH too much.
- ● Elemental sulfur or aluminum sulfate: 1–2 tablespoons per 5-gallon bucket of mix. Why? Adjusts soil acidity to pH 4.5–5.5 (critical for blueberries!).
- ● Slow-release organic fertilizer (e.g., 10-10-10 or 8-3-9): 1 cup per 5-gallon bucket. Why? Provides balanced nutrition for young plants.
- ○ Garden lime (optional, but useful if your soil is too acidic):** Only if your soil test shows pH < 4.0. Use sparingly!
- ● Garden gloves – Protect your hands from sharp bark and sulfur dust.
- ● Garden trowel or spade – For mixing and amending soil in pots or beds.
- ● pH testing kit – Non-negotiable! Test soil before and after mixing to hit the 4.5–5.5 pH sweet spot.
- ● Wheelbarrow or large bucket – For mixing ingredients (5+ gallons per plant is ideal).
- ● Mulch (pine needles or wood chips): 2–3 inches to top the soil. Why? Retains acidity and moisture.
- ● Watering can or hose with a gentle spray nozzle – For hydrating the soil blend evenly.
- ● Worm castings – ½ cup per 5-gallon bucket for extra microbial activity.
- ● Biochar – 1 cup per 5-gallon bucket to improve drainage and nutrient retention.
- ● Mycorrhizal fungi – Helps roots absorb nutrients more efficiently (mix into soil before planting).
- ● Soil solarizer (for sterilization) – If repurposing old soil, use clear plastic to kill pathogens in the sun.
Step-by-Step guide to preparing acidic loam soil for blueberries
Blueberries demand precise soil conditions—here's how to create the perfect acidic loam blend for strong roots and bountiful harvests.
🌱 Step 1: Test and Adjust Your Existing Soil pH
Blueberries thrive in soil with a pH between 4.5 and 5.5. Grab a soil test kit and take samples from 6 inches deep—this is where roots will establish. If your soil tests higher than 5.5, you'll need to acidify it. I like to test in multiple spots since pH can vary even within a small garden area.
For each 100 square feet of planting space, mix in 2-3 pounds of sulfur if your soil is too alkaline. Work it into the top 12 inches of soil and water thoroughly. It takes 2-3 months for sulfur to fully acidify the soil, so plan ahead. You'll know it's working when the soil feels lighter and has a slightly tangy smell.
🌿 Step 2: Remove All Existing Vegetation and Loosen the Soil
Blueberries hate competition, so clear the area of grass, weeds, and other plants within a 5-foot radius of where they'll grow. Use a garden fork to loosen the soil to a depth of 12-18 inches. This breaks up compacted layers and allows roots to penetrate deeply. I like to work in sections, loosening one area at a time to avoid disturbing the entire bed.
Once the soil is loose, rake it smooth to create a level surface. Remove any large rocks or debris—blueberry roots are shallow and won't grow well around obstacles. If your soil feels gritty or sandy, you'll need to amend it further to create the ideal loam texture. Here's where it gets fun—watch the soil transform as you work.
💧 Step 3: Blend Organic Matter for Acidic Loam Texture
In a wheelbarrow or directly in the planting hole, mix 50% peat moss or pine bark fines with 50% garden loam or composted leaf mold. This creates the perfect airy, moisture-retentive blend blueberries love. For every 4 cubic feet of soil, add 1 cup of cottonseed meal or aluminum sulfate to maintain acidity long-term.
Work the amended soil into the loosened bed, ensuring it's evenly distributed down to 12 inches deep. Avoid overworking the soil—just enough to blend the materials without compacting it. You'll see the soil darken and feel slightly springy, which means it's holding moisture and air perfectly for blueberry roots.
⏰ Step 4: Create a Raised Planting Mound for Optimal Drainage
Blueberries despise soggy roots, so mound the prepared soil into a 12-inch tall, 2-foot wide hill for each plant. This elevates the root zone and improves drainage. Space mounds 6 feet apart to allow for proper airflow and future growth. The mound should be wide enough to support the plant's mature size while keeping roots in the amended soil.
Water the mound thoroughly after shaping it to settle the soil. You'll notice the water drains quickly through the amended mix—this is a good sign. Mulch the mound with 3 inches of pine needles or wood chips to maintain acidity and retain moisture. Avoid using regular mulch, as it can raise the pH over time.
☀️ Step 5: Monitor and Maintain Soil Conditions Year-Round
Test the soil pH again in 3 months and adjust if needed. Blueberries are heavy feeders, so every spring, spread ½ pound of ammonium sulfate around the drip line of each plant. Water it in immediately to prevent burning the roots. You'll see new growth within 2-3 weeks if the soil conditions are right.
Every 2-3 years, refresh the soil by adding another layer of peat moss or pine bark fines and re-testing the pH. This keeps the soil light, acidic, and full of nutrients. Watch for signs of stress like yellowing leaves or stunted growth—these often indicate pH or nutrient issues. With consistent care, your blueberries will reward you with years of delicious harvests.
Tips & tricks for perfect blueberry soil preparation
Creating the ideal acidic loam blend for blueberries takes a few key tricks to avoid common pitfalls and maximize root health.
Soil Testing Precision: When testing your soil's pH in Step 1, take samples from multiple spots—especially if your yard has different microclimates. I've seen pH readings vary by 0.5 points just a few feet apart! Use a digital pH meter for accuracy rather than color-changing strips, which can be less precise. The goal is that 4.5-5.5 range—anything outside this window will stress your blueberries.
Organic Matter Mixing: In Step 3, the 50/50 blend of peat moss or pine bark fines with garden loam is critical, but don't just eyeball it. Use a measuring bucket or wheelbarrow with marked divisions to ensure equal parts. I like to mix in the cottonseed meal or aluminum sulfate first, then blend everything together—this helps distribute the acidifying agents evenly. The soil should feel like a damp sponge when you squeeze it, not like wet sand.
Mound Construction: For Step 4, shaping that 12-inch tall, 2-foot wide mound might seem simple, but the slope matters. Create gentle, rounded sides rather than steep angles—this prevents erosion and makes watering more effective. After shaping, press down lightly with your hands to firm up the surface before adding mulch. This helps maintain the mound's structure during watering.
Long-Term Maintenance: The 3-month pH retest in Step 5 is non-negotiable, but here's a pro move: keep a soil journal. Record your initial pH, amendments added, and any adjustments. I've found that some soils need more frequent acidification—especially in rainy climates where pH can drift upward naturally. This record becomes your blueprint for future adjustments.
Pro Tips for Blueberry Plant Soil Preparation
- Creating the ideal acidic loam blend for blueberries takes a few key tricks to avoid common pitfalls and maximize roo...
- Soil Testing Precision: When testing your soil's pH in Step 1, take samples from multiple spots—especially if your ya...
- Organic Matter Mixing: In Step 3, the 50/50 blend of peat moss or pine bark fines with garden loam is critical, but d...
Frequently asked questions
Got questions about prepping the perfect soil for your blueberry plants? We’ve got answers! Here are some of the most common queries gardeners have when preparing acidic loam blends for thriving blueberry roots.
What’s the ideal pH range for blueberry soil?
Blueberries love acidic soil—aim for a pH between 4.5 and 5.5. Test your soil with a kit (available at garden centers) before planting. If it’s too alkaline, amend it with sulfur or peat moss to lower the pH gradually. Pro tip: Test again in 2–3 months to monitor changes!
How far in advance should I prepare the soil?
Start soil prep 4–6 weeks before planting to let amendments (like compost or pine bark fines) break down and integrate. If you’re planting in fall, begin in early summer—blueberries need time to establish roots before winter. For spring planting, prep in late winter.
Can I use regular garden soil for blueberries?
Nope! Regular soil is usually too alkaline and lacks the organic matter blueberries crave. Mix in 50% acidic loam (like pine bark fines or leaf mold) with 50% well-draining soil. Avoid clay-heavy soils—blueberries hate soggy roots! Bonus: Add a handful of cottonseed meal for extra nitrogen.
What if my soil is already acidic but still not producing berries?
Check for nutrient deficiencies or poor drainage. Blueberries need micronutrients like iron and magnesium—add Epsom salt (magnesium sulfate) or a chelated iron supplement. Also, ensure the planting area has good drainage; raised beds or mounds work well. Watch out: Yellow leaves? Could be chlorosis from iron issues!
Are there any soil amendments I should avoid?
Steer clear of lime, wood ash, or composted manure—these raise pH and harm blueberries. Also, avoid fresh sawdust (it robs nitrogen) and sand-heavy mixes (they compact and reduce acidity). Stick to peat moss, pine needles, or sulfur-based amendments for safety.
How often should I amend the soil after planting?
Amend the soil annually in early spring with a light layer of pine bark fines or composted leaf mold. Re-test pH every 2–3 years—blueberries are picky! If you notice stunted growth or pale leaves, it’s time to tweak the mix. Remember: A little maintenance goes a long way for happy bushes!
Wrapping up and next steps
Preparing the perfect soil for your blueberry plants is the foundation of their success—just like giving them the right home! 🌱 By blending acidic loam with organic matter and ensuring proper drainage, you’re setting the stage for juicy, healthy berries and strong roots.
Don’t let soil stress hold you back; with the right prep, your blueberries will thrive year after year.
Now that you’re armed with the knowledge, it’s time to roll up your sleeves! Grab your tools, test your soil, and start mixing that ideal blend. Your future harvest is just a shovel’s throw away—happy planting! 🌿