
Trees
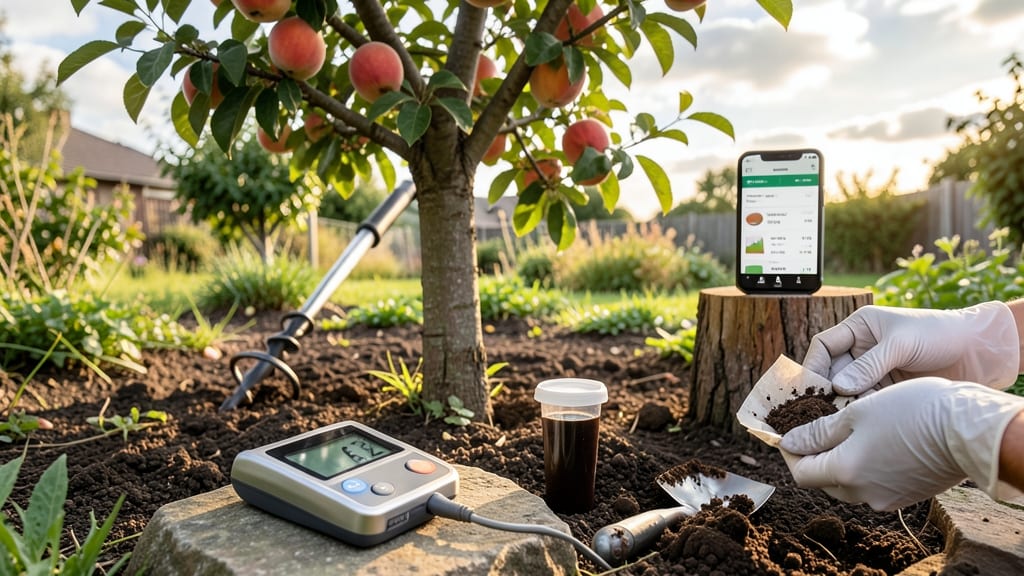
Your fruit trees won’t thrive without knowing what’s hiding in the soil. 🌱 Testing before planting reveals pH levels, nutrient deficiencies, and drainage issues that determine whether your apples, peaches, or citrus will bear fruit—or just struggle.
I’ve seen healthy-looking trees fail because their soil was secretly too alkaline for their needs, and the fix was simple once we knew the problem.
The process is simpler than you’d think: grab a basic soil test kit (or send a sample to a lab), dig in the right spots, and follow the instructions.
Most kits take about 10 minutes and cost less than $20, while lab tests run around $25-$50 but give more detailed results. The key is testing in early spring or fall, before you plant or amend, so you have time to adjust.
What you’ll discover could be a game-changer—like finding your soil is too acidic for peaches (pH 6.0-7.0) or lacks phosphorus for root growth. Amending with lime, sulfur, or compost based on the test turns guesswork into a foolproof plan.
Suddenly, your trees aren’t just surviving—they’re flourishing with vibrant foliage and heavy fruit loads.
Works for any fruit tree, from backyard orchards to container-grown citrus. Once you’ve got the results, we’ll walk through how to fix them—no more wasted seasons or mystery plant struggles. Let’s get that soil talking to you.
📚 In This Guide
- What you need
- Instructions
- Tips and common mistakes
- Wrapping up and next steps
What you need
- ● Soil testing kit – Choose a home testing kit (for quick pH checks) or a lab submission kit (for detailed nutrient analysis). Brands like blank">Luster Leaf or blank">MySoil are great options.
- ● Sterile sampling tools: Trowel or soil probe (6-inch depth for most fruit trees)
- ● Clean, disposable gloves (to avoid contamination)
- ● Sample bags or containers – Use airtight, labeled plastic bags or sterile sample jars (for lab testing). Aim for 1–2 cups of soil per sample.
- ○ pH test strips or meter (optional but handy for quick checks before lab testing).
- ● Notebook and pen – To log location, depth, and observations.
- ● Map or GPS coordinates (if testing multiple spots in a large orchard).
- ● Moisture meter – Helps determine soil moisture levels before testing.
- ● Hand lens or magnifying glass – For inspecting soil texture and organic matter.
- ● Calibration kit (if using a pH meter for precision).
- ● Reference guide – Like the University of California Soil Testing Guide for interpreting results.
- ● Shovel or spade (for larger sampling areas).
Step-by-Step instructions for testing soil for fruit trees
Accurate soil analysis is the foundation for healthy fruit trees—here’s how to do it right.
🌱 Step 1: Collect Representative Soil Samples
Grab a clean trowel and dig 6-8 small holes around your planting area, spaced 12-18 inches apart in a grid pattern. Dig 4-6 inches deep—this is where roots will thrive. Avoid surface soil, which can be misleading due to mulch or organic matter buildup.
Use the trowel to break up soil clumps, then transfer 1-2 tablespoons from each hole into a clean bucket. Mix thoroughly until the sample looks uniform. This ensures you’re testing the actual growing conditions, not just one spot. If testing multiple areas (like near existing trees), repeat the process separately for each zone.
💧 Step 2: Prepare the Sample for Testing
Let your mixed soil sample air-dry for 24-48 hours in a clean container. Once dry, break it into small pieces and remove any debris like rocks, roots, or mulch. You want pure mineral soil for accurate results. If the sample feels clumpy, crush it gently with your hands or a mortar and pestle.
Weigh out 1-2 cups of the prepared soil (about 8-16 ounces) into a labeled plastic bag or container. Label it with the location and date—this helps track changes over time. Moisture affects test accuracy, so keep the sample in a dry place until you’re ready to send it off.
☀️ Step 3: Send the Sample to a Certified Lab
Purchase a soil test kit from a reputable agricultural extension service or private lab. Most kits include instructions and a prepaid return envelope. Fill out the form carefully, noting whether you’re testing for pH, nutrients (like nitrogen, phosphorus, potassium), or organic matter—fruit trees need all three for optimal growth.
Drop the sample off or mail it according to the lab’s guidelines. Turnaround time varies (7-14 days is typical), so plan ahead, especially if you’re preparing for spring planting. Avoid DIY test kits for fruit trees—they often lack the precision needed for long-term tree health.
📊 Step 4: Interpret the Results for Fruit Tree Success
Once you receive your report, focus on pH (ideal: 6.0-7.0 for most fruit trees) and nutrient levels. If pH is too low (acidic), amend with lime; if too high (alkaline), use sulfur or peat moss. For nutrients, adjust based on deficiencies—phosphorus and potassium are critical for fruit development, while nitrogen supports leafy growth.
Compare your results to the lab’s recommendations for fruit trees. For example, peach trees thrive in slightly acidic soil (pH 6.0-6.5), while apples prefer pH 6.0-7.0. Note any organic matter percentages—3-5% is ideal for most fruit tree soils. Use these insights to create a custom soil amendment plan before planting or fertilizing.
Tips & tricks for perfect soil testing for fruit trees
Precision soil testing isn't just about digging a hole—it's about getting accurate results that actually help your fruit trees thrive. Here's what I've learned from years of testing my own orchard soil.
Sampling Strategy: When you're digging those 6-8 holes in Step 1, focus on areas where you plan to plant or where existing trees show stress. I've found that spots with visible mulch layers can give skewed results—always dig through any organic matter to reach the true mineral soil. For established trees, take separate samples from north and south sides since sun exposure affects soil composition differently.
Drying Time Matters: The 24-48 hour drying period in Step 2 is non-negotiable for accuracy. I learned this the hard way—wet samples can give false readings, especially for organic matter content. Place your sample in a well-ventilated area away from direct sunlight to prevent overheating, which can alter test results. If you're in a humid climate, you might need the full 48 hours to ensure complete dryness.
Lab Selection Wisdom: Not all soil test kits are created equal. In Step 3, I recommend contacting your local agricultural extension office—they often have discounted kits specifically calibrated for fruit tree growing conditions. Some private labs offer "home garden" tests that aren't sensitive enough to detect the subtle nutrient differences that matter for fruit production. Always ask if they provide recommendations for fruit trees specifically, not just general gardening advice.
Result Interpretation: When you get your report in Step 4, pay special attention to the "available" nutrient levels rather than just total amounts. For example, phosphorus might be abundant but "locked up" in forms your trees can't access. I keep a reference chart of ideal ranges for common fruit trees—peaches, apples, and citrus all have slightly different needs. The lab's general recommendations are a good starting point, but I always cross-reference with tree-specific data.
Pro Tips for Soil Testing For Fruit Trees
- Precision soil testing isn't just about digging a hole—it's about getting accurate results that actually help your fr...
- Sampling Strategy: When you're digging those 6-8 holes in Step 1, focus on areas where you plan to plant or where exi...
- Drying Time Matters: The 24-48 hour drying period in Step 2 is non-negotiable for accuracy. I learned this the hard w...
Frequently asked questions
Got questions about soil testing for your fruit trees? You’re not alone!
Here are answers to the most common queries—helping you grow healthier trees with confidence.
How often should I test my fruit tree soil?
Test your soil every 2–3 years for established trees or annually if you’ve made major changes (like adding compost or fertilizers). Young trees or those in poor soil may need testing yearly to monitor progress. Always test before planting new trees to avoid costly mistakes!
What’s the best time of year to test soil?
The ideal window is early spring (before planting) or late fall (after harvest). Avoid testing after heavy rain or when soil is frozen—moisture levels skew results. Spring tests help prep for the growing season, while fall tests let you plan winter amendments.
Can I use a home soil test kit instead of a lab?
Yes! Home kits (like MySoil or Luster Leaf) are budget-friendly for quick pH and basic nutrient checks. However, for fruit trees, lab tests (like those from University Extension Services) provide detailed micronutrient analysis—critical for diagnosing issues like zinc or boron deficiencies. Labs cost ~$20–$40 but offer precision.
My fruit tree leaves are yellow—could it be soil-related?
Yellow leaves often signal nutrient deficiencies or pH imbalances. Test for:
- Chlorosis (yellowing between veins): Likely iron or manganese deficiency (common in alkaline soil).
- Uniform yellowing: Could be nitrogen deficiency or overwatering.
- Brown edges: Possible potassium or calcium deficiency.
Is soil testing worth it if my trees look healthy?
Absolutely!
Healthy-looking trees might still lack micronutrients (like copper or molybdenum) or have hidden pH issues that’ll hurt future yields. Testing is a preventative power move—it reveals hidden problems, optimizes growth, and saves money by avoiding over-fertilization. Think of it as a checkup for your orchard!
Wrapping up and next steps
Soil testing for fruit trees isn’t just science—it’s the secret ingredient to a thriving orchard! 🌱 By understanding your soil’s pH, nutrients, and texture, you’re giving your trees the perfect foundation to grow strong, resist pests, and produce bountiful harvests year after year.
Whether you’re a backyard gardener or a seasoned homesteader, knowledge is your best tool—so grab that soil sample, follow the steps, and watch your fruit trees flourish!
Your next step? Schedule your test, amend the soil if needed, and plant with confidence! 🌟