
How To
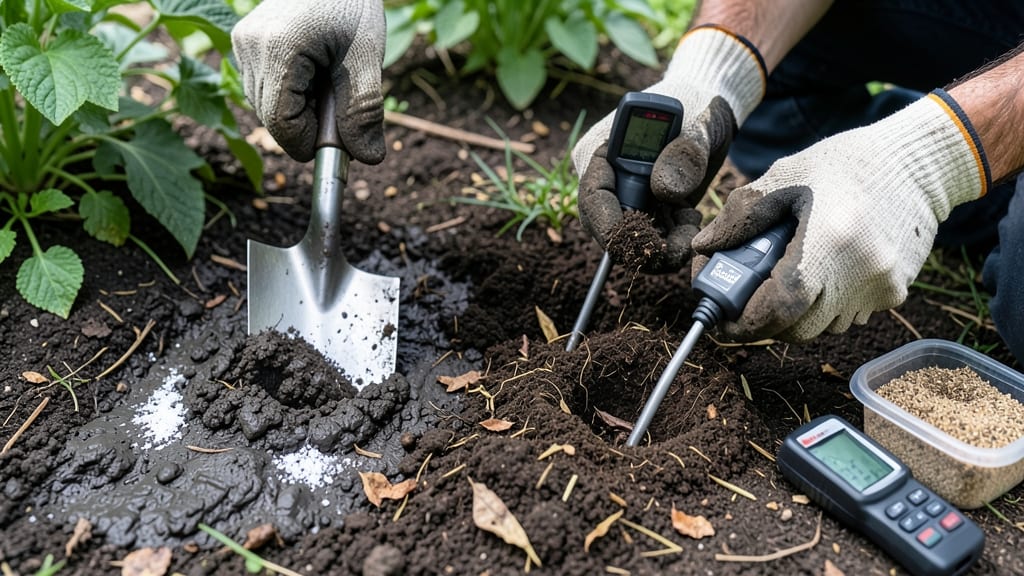
Clay soil treatment isn’t about fighting nature—it’s about working with it. 🌱 I’ve turned my backyard’s heavy, waterlogged clay into a thriving garden by focusing on three simple goals: breaking up compaction, improving drainage, and feeding the soil life that makes plants happy.
The key? Organic matter, patience, and the right techniques.
Most people grab bags of sand or gravel, thinking that’ll fix drainage—but that just creates a worse problem. Instead, we’re adding compost, aged manure, and leaf mold to loosen the soil naturally while feeding microbes.
This method works for vegetable beds, flower gardens, and even lawns, and you’ll see roots spreading freely within 3-4 weeks of consistent work.
By the end of this process, your plants will grow stronger, handle drought better, and even bloom more abundantly. The soil will crumble in your hands instead of sticking like glue, and you’ll wonder why you didn’t do this sooner. No more soggy patches or struggling seedlings—just healthy, productive ground.
This approach works for any clay-heavy area, from small raised beds to large in-ground plots. The secret is consistency: a little effort now means years of easier gardening. Let’s get your soil working for you instead of against you.
📚 In This Guide
- What you need
- Instructions
- Tips and common mistakes
- Wrapping up and next steps
What you need
- ● Organic matter: Compost (2–4 inches per square foot of soil)
- ● Peat moss or coconut coir (1–2 bags, 4–6 cubic feet)
- ● Well-rotted manure (e.g., cow, horse, or chicken; 1–2 cubic yards for large areas)
- ● Soil conditioners: Gypsum (calcium sulfate; 20–50 lbs per 100 sq ft, depending on clay density)
- ● Lime (if soil pH is acidic; test first! 10–20 lbs per 100 sq ft)
- ● Tools: Garden fork or broadfork (for aeration; 18–24 inches long)
- ● Shovel or spade (for digging and mixing)
- ● Wheelbarrow or large container (for hauling amendments)
- ● Garden hose (with spray nozzle for wetting soil)
- ● Gloves and knee pads (because comfort matters!)
- ● Sand (coarse, not fine; 1–2 bags for very dense clay—use sparingly!)
- ● Perlite or vermiculite (1–2 bags for extra fluffiness)
- ● Soil test kit (to check pH and nutrient levels before amending)
- ● Mulch (straw, wood chips, or leaves; 2–3 inches to retain moisture)
- ● Soil aerator or rototiller (for large areas; rent if needed)
Step-by-Step soil treatment for heavy clay ground
Clay soil can feel like working with concrete, but with the right approach, you’ll transform it into loose, crumbly earth in just a few seasons.
🌱 Step 1: Test and Assess Your Current Soil
Before digging in, grab a handful of damp soil and squeeze it. If it forms a tight ball that cracks when dropped, you’re dealing with heavy clay. Clay holds water like a sponge and repels roots with its dense structure. I like to dig a small trench about 6 inches deep—this gives me a clear view of how compacted the layers are.
Look for signs of poor drainage: water pooling on the surface after rain or a shiny, slick appearance when dry. Clay soil often has a grayish or bluish tint when wet. If your plants struggle with yellowing leaves or stunted growth, that’s your clue to take action. The goal here is to break up those tight layers without turning your yard into a dust bowl.
✂️ Step 2: Loosen the Soil Mechanically
Rent a tiller or use a broadfork to break up the clay in sections. I start by marking a grid pattern 12-18 inches apart to ensure even coverage. Work the tiller to a depth of 8-12 inches, but don’t go deeper than necessary—clay compacts easily under heavy equipment. If you’re doing this by hand, a broadfork is your best friend. Push it in, rock it back and forth, and lift to break up the soil without turning it into a muddy mess.
Here’s the thing—clay soil resists breaking down, so you’ll feel resistance at first. That’s normal. The key is persistence. Once you’ve loosened the top layer, rake it into a rough, clumpy texture. You’re not aiming for perfect tilth yet—just creating space for organic matter to mix in later. Avoid walking on the freshly tilled area to prevent recompaction.
🌿 Step 3: Amend with Organic Matter
Spread a 2-3 inch layer of compost or well-rotted manure over the tilled soil. Clay craves organic material to improve its structure, and compost acts like a glue, binding particles together without suffocating roots. I like to mix in a handful of gypsum if my soil tests high in sodium—it helps break up the clay’s tight bonds over time. Work the compost into the top 6 inches of soil using a garden fork or your hands.
Don’t skimp on the organic matter—clay soil needs it more than sandy soil. You’ll know you’ve done enough when the soil feels lighter and less sticky. If it still feels dense, add another layer of compost and repeat. This step is where the real transformation happens, but it takes time. Think of it as rebuilding soil health from the ground up.
💧 Step 4: Improve Drainage with Mulch and Water Management
Top the amended soil with a 3-4 inch layer of mulch, like straw or wood chips. Mulch prevents water from pooling on the surface and keeps the soil from recompacting when it rains. Water deeply but infrequently—clay soil holds moisture, so you don’t want to drown it. Aim for 1 inch of water per week, either from rain or irrigation, and let the soil dry out slightly between waterings. This encourages roots to grow deeper instead of staying shallow.
Watch for puddling after watering. If water sits for more than a few hours, you’ll need to repeat the tilling and amending process. Over time, the organic matter will create channels for water to drain, but it’s a gradual process. Patience is key—don’t rush it. In a year or two, you’ll notice the soil crumbles easily when you dig, and your plants will thrive like never before.
☀️ Step 5: Monitor and Maintain Long-Term
Every spring, add a fresh layer of compost and lightly till it into the top 2-3 inches of soil. This keeps the organic matter working its magic and prevents the clay from tightening up again. Plant deep-rooted crops like tomatoes, peppers, or fruit trees—they’ll reward you by breaking up the soil naturally as they grow. Avoid heavy foot traffic in the garden beds to keep the soil loose.
You’ll know your efforts are paying off when you can dig a hole and see roots growing freely instead of circling in compacted layers. It might take a season or two, but the payoff is worth it. Clay soil can go from a gardener’s nightmare to a dream with the right treatment. Keep at it, and soon you’ll have the kind of soil that holds moisture without drowning roots and supports strong, healthy plants.
Tips & tricks for transforming heavy clay soil
Working with clay soil takes patience and strategy—but these insights will help you avoid common pitfalls while maximizing your efforts.
Depth Matters: When tilling to that 8-12 inch depth in Step 2, focus on breaking up the clay in horizontal layers rather than forcing the tiller straight down. Clay resists vertical penetration, so work the tiller at a slight angle, lifting and repeating in the same spot until you feel resistance give way. This layered approach prevents compaction from equipment weight while creating the necessary aeration channels. Think of it like flaking a cake—gentle, repetitive motion works best.
Organic Matter Selection: For Step 3, don't just grab any compost—look for well-aged, dark, crumbly material with visible worm activity. Peat moss works wonders for clay but avoid pure peat if you're in a drought-prone area (it holds water like clay itself). I've found that mixing in 10-15% coarse sand (like builder's sand) with the compost creates immediate drainage channels while the organic matter rebuilds structure over time. This combo prevents the "muddy mess" scenario mentioned in Step 2.
Mulch Strategy: The 3-4 inch mulch layer in Step 4 serves double duty beyond water management. For heavy clay, use straw over wood chips—straw breaks down faster, adding organic matter directly to the soil surface. Apply mulch immediately after amending to create a protective barrier that prevents rain from sealing the newly loosened soil. I've seen dramatic improvements in just one season when maintaining consistent mulch coverage, especially in areas with frequent heavy rains.
Long-Term Visual Cues: In Step 5, watch for these signs of progress: earthworms appearing in your soil (they thrive in improved clay), and plant roots growing vertically rather than spreading horizontally. When digging a small hole becomes effortless and the soil crumbles like cake mix, you've achieved the perfect texture. This transformation typically takes 12-18 months of consistent maintenance—patience pays off in soil that holds moisture without suffocating roots.
Pro Tips for Soil Treatment For Clay
- Working with clay soil takes patience and strategy—but these insights will help you avoid common pitfalls while maxim...
- Depth Matters: When tilling to that 8-12 inch depth in Step 2, focus on breaking up the clay in horizontal layers rat...
- Organic Matter Selection: For Step 3, don't just grab any compost—look for well-aged, dark, crumbly material with vis...
Frequently asked questions
Got questions about treating clay soil? You’re not alone!
Here are answers to the most common concerns—from quick fixes to long-term solutions—so you can tackle compaction like a pro.
How long does it take for soil treatments to improve clay soil?
Results vary, but you’ll often see noticeable drainage improvements within 2–4 weeks after adding organic matter (like compost or gypsum). For deep compaction, seasonal changes—rain, freezing/thawing—help break up clay faster. Patience pays off! Test soil moisture monthly to track progress.
Can I use just sand to fix clay soil? Why not?
While sand might seem like a quick fix, it worsens compaction in clay by creating a cement-like texture. Instead, blend coarse sand with compost (3:1 ratio) or use organic amendments (peat moss, leaf mold) to improve structure without locking out moisture.
What’s the best time of year to treat clay soil?
Ideal timing is early spring or fall—when soil is workable but not frozen. Avoid treating during peak drought or heavy rain, as these conditions hinder amendment integration. Pro tip: Loosen soil slightly before adding treatments for deeper penetration.
My plants still struggle after treating clay soil. What’s going wrong?
Common pitfalls:
- Insufficient depth: Treat at least 6–12 inches deep for roots to benefit.
- Wrong amendments: Avoid heavy clay (e.g., pure bentonite) or chemical fertilizers that compact further.
- No follow-up: Reapply compost annually and mulch to maintain structure.
Are there natural alternatives to commercial soil conditioners?
Try these DIY-friendly options:
- Compost tea: Brew compost in water (1:5 ratio) and pour over soil to introduce microbes.
- Wood ash: Sprinkle lightly (1 lb per 100 sq ft) to raise pH and add potassium.
- Cover crops: Plant clover or ryegrass in fall/winter to break up clay naturally.
Wrapping up and next steps
Transforming your clay soil into a thriving garden bed is totally doable with the right techniques!
By adding organic matter, improving drainage, and breaking up compaction, you’ll create the perfect environment for plants to root deeply and flourish. 🌱 Start small—test a patch, observe changes, and gradually expand your efforts for long-term success.
Ready to take the next step? Pick one method from this guide and give it a try this weekend. Your future garden (and plants!) will thank you!