
How To
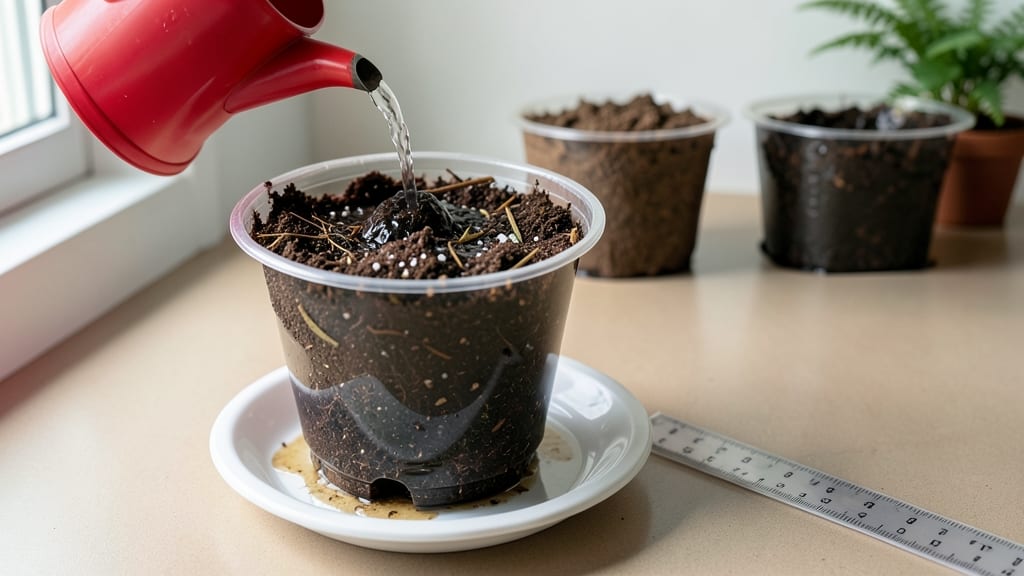
Your potted plants' roots are drowning in compacted potting soil drainage—literally. 🌱 The right air pockets prevent root rot and keep plants thriving, and I’ve cracked the code after killing three ferns this way. Most store-bought potting mixes are too dense, trapping water like a sponge that never dries.
The fix isn’t complicated: 50% potting soil, 30% perlite, and 20% coarse sand creates the perfect balance. For containers without drainage holes, add a 2-inch gravel layer at the bottom to catch excess water. You’ll see the difference in 2-3 waterings—plants drink up moisture without sitting in soggy conditions.
Signs of poor drainage? Yellowing leaves, moldy soil, or roots growing out of drainage holes. These are SOS signals your plants can’t ignore. The good news? Once you adjust the mix, most plants bounce back within 2-4 weeks of proper care.
Works for everything from succulents to ferns, indoors or out. Here’s how to do it right the first time—no more guesswork.
📚 In This Guide
- What you need
- Instructions
- Tips and common mistakes
- Wrapping up and next steps
What you need
- ● Potting soil: 1 bag (1–2 cubic feet, depending on pot size) – Use a high-quality, well-draining mix (e.g., 60% inorganic + 40% organic).
- ● Perlite or pumice: 1–2 cups – Adds air pockets and prevents compaction.
- ● Coarse sand or horticultural grit: ½–1 cup – Improves drainage without clogging soil.
- ● Organic matter: 1 cup (e.g., coconut coir, peat moss, or compost) – Balances moisture retention.
- ● Container with drainage holes: 1 (size matches plant roots) – Critical for excess water escape!
- ● Trowel or small shovel: 1 – For mixing and layering materials.
- ● Watering can or spray bottle: 1 – For gentle hydration tests.
- ● Soil moisture meter: 1 – Monitors drainage efficiency post-mix.
- ● Fine mesh screen: 1 – Sifts out clumps for smoother texture.
- ● Calcium carbonate (lime): Small amount – Adjusts pH if soil is too acidic.
- ● Slow-release fertilizer: 1 tsp – Boosts root health without overloading.
- ● Clean workspace (e.g., tarp or tray) to avoid soil spills.
- ● Time to mix thoroughly (10–15 minutes for ideal aeration).
- ● Knowledge of your plant’s water needs (e.g., succulents vs. ferns).
Step-by-Step guide to improving potting soil drainage
Here’s how I transform dense potting mix into a root-friendly environment—no fancy tools needed.
🪴 Step 1: Choose the Right Base Soil
Start with a high-quality potting mix (never garden soil—it compacts and suffocates roots). I like mixes labeled "well-draining" or "for containers," but even those can use a boost. If your mix feels heavy or holds water like a sponge, it’s time to lighten it up. Look for a blend with perlite, vermiculite, or coconut coir—these create natural air pockets.
Fill your container about 2/3 full with the base mix. Press it down gently with your fingers—just enough to remove air gaps, but don’t compact it like tamping down garden soil. The goal is to keep the mix loose enough for roots to explore while still providing structure. Tap the pot lightly on the table to settle it evenly.
💧 Step 2: Add Amendments for Air Flow
Now’s where the magic happens. For every 1 gallon of potting mix, stir in ¼ cup perlite or pumice—these create permanent air pockets. I also add 2 tablespoons of coarse sand (like horticultural-grade sand, not playground sand) to further improve drainage. Mix everything thoroughly with your hands or a small trowel until it looks uniformly crumbly.
If you’re working with a very dense mix, you can also fold in 10-20% compost (by volume) to improve structure without adding too much moisture retention. The key is balance: too much sand can make the mix drain too fast, while too much perlite can make it too loose. Aim for a texture that feels like a damp sponge—light but not powdery.
✂️ Step 3: Layer for Optimal Drainage
Instead of mixing everything together, try layering for even better results. Start with a 1-inch layer of coarse gravel or expanded clay pebbles at the bottom of your pot. This creates a drainage reservoir and prevents roots from sitting in water. Next, add a 2-inch layer of your amended potting mix, then top with another 2 inches of plain mix to create a buffer zone.
This layered approach mimics natural soil profiles and gives roots a gradual transition from dry to moist conditions. Water will drain through the gravel layer first, then slowly percolate into the amended mix below. You’ll notice roots grow more vigorously because they’re not struggling to breathe—especially in heavy mixes.
🌱 Step 4: Test and Adjust Before Planting
Before adding your plant, do a quick drainage test. Fill the pot with water until it’s ½ inch from the rim, then let it drain completely. Time how long it takes for water to stop dripping from the bottom. If it drains in under 5 minutes, add a little more perlite or compost to slow it down. If water pools at the top after 30 minutes, you need more sand or gravel.
Stick your finger into the mix—it should feel moist but not soggy. If it clumps together when squeezed, it’s too dense. The ideal mix should hold moisture without becoming waterlogged. This test ensures your amendments worked and your plant won’t drown in its own pot.
☀️ Step 5: Maintain Air Pockets Long-Term
Over time, potting mix compacts as roots grow and you water. To keep air pockets open, gently fluff the top 1-2 inches of soil every 4-6 weeks with a chopstick or small fork. Avoid disturbing roots deeper than 1 inch. I also top-dress with fresh perlite or compost every few months to refresh the mix.
Watch your plant’s leaves for clues: yellowing lower leaves often signal poor drainage, while crispy edges mean it’s drying out too fast. Adjust by adding a little more perlite if the mix stays too wet, or a touch of compost if it dries out too quickly. With these tweaks, your potting mix will stay root-friendly for seasons.
Tips & tricks for perfect potting soil drainage
Transforming your potting mix into a root-friendly environment takes just a few smart adjustments—here's how to get it right every time.
Layering Secret: The 1-inch gravel layer at the bottom isn't just for drainage—it creates a natural reservoir that prevents roots from sitting in stagnant water. I've found that using expanded clay pebbles works better than regular gravel because they're lighter and won't compact over time. This simple layering mimics how water moves through natural soil profiles, giving roots a gradual transition from dry to moist conditions.
Texture Test: When testing your mix's drainage in Step 4, pay attention to how it feels when squeezed—not just how fast it drains. The ideal mix should hold its shape when lightly pressed but still crumble easily when squeezed firmly. If it feels like wet sandpaper, you need more perlite or compost to improve structure. Remember, the 5-30 minute drainage window is just a guideline—your mix should feel right in your hands too.
Maintenance Hack: Don't wait until you see yellowing leaves to refresh your mix! I make it a habit to fluff the top 1-2 inches of soil every 4-6 weeks using a chopstick or small fork. This keeps air pockets open without disturbing deeper roots. For containers with multiple plants, I use a long-handled tool to avoid overworking the soil. Think of it like giving your mix a quick spa treatment to keep it performing at its best.
Pro Tips for Potting Soil Drainage
- Transforming your potting mix into a root-friendly environment takes just a few smart adjustments—here's how to get i...
- Layering Secret: The 1-inch gravel layer at the bottom isn't just for drainage—it creates a natural reservoir that pr...
- Texture Test: When testing your mix's drainage in Step 4, pay attention to how it feels when squeezed—not just how fa...
Frequently asked questions
Got questions about keeping your potting soil just right? Here are some of the most common concerns—and how to tackle them!
Why does my potting soil still feel soggy even after adding perlite or sand?
If your mix stays damp, it might be too dense or lack enough air pockets. Try increasing coarse materials (like vermiculite or horticultural grit) to 20-30% of the mix. Also, check your pot’s drainage holes—if they’re clogged, water pools at the bottom. A quick fix? Repot and refresh the soil with a chunkier blend.
How often should I check my potting soil’s drainage after planting?
For the first 2-4 weeks, monitor drainage closely—especially with moisture-loving plants. Stick your finger 1-2 inches deep; if water drips out within 15-30 minutes, your soil’s draining well. After that, adjust watering based on plant type (e.g., succulents need drier mixes than ferns). Pro tip: Weigh your pot—if it’s light, it’s time to water!
Can I use regular garden soil instead of potting mix for drainage?
Not ideal! Garden soil compacts over time, suffocating roots and blocking airflow. However, you can improve it by mixing in 50% potting soil + 30% perlite + 20% compost. For containers, stick to commercial potting mixes—they’re designed for airflow and root health. Need a budget hack? Try DIY blends with coconut coir and orchid bark.
What if my plant’s leaves turn yellow or wilt despite good drainage?
Yellowing or wilting could signal root rot (from overwatering) or nutrient burnout. First, check the roots—if they’re mushy or black, repot in fresh, well-draining soil. If roots are healthy but leaves droop, your plant might need more water (despite drainage) or fertilizer. Adjust your routine: water only when the top inch is dry, and flush the soil monthly to prevent salt buildup.
How long does potting soil drainage last before I need to refresh it?
Drainage degrades in 1-2 years as organic matter breaks down, compacting the mix. Signs it’s time to refresh: water pools on top, roots circle the pot, or mold appears. Revive old soil by fluffing it with a fork and adding 10-15% fresh perlite or compost. For heavy use (like veggie gardens), replace soil annually to keep roots happy.
Wrapping up and next steps
Mastering potting soil drainage isn’t just about saving your plants—it’s about giving them the thriving foundation they deserve! 🌱 By creating those tiny air pockets (whether through perlite, vermiculite, or DIY tricks), you’re ensuring roots breathe, water flows freely, and your green friends stay happy and healthy.
Now that you’re armed with the know-how, it’s time to roll up your sleeves and put it into action!
Start small: pick one plant and experiment with the techniques you’ve learned. Track its progress—you’ll be amazed at how a little drainage tweak can transform its growth. And if you’re feeling inspired? Share your success (or bloopers!) with fellow plant lovers. Happy gardening!