
How To
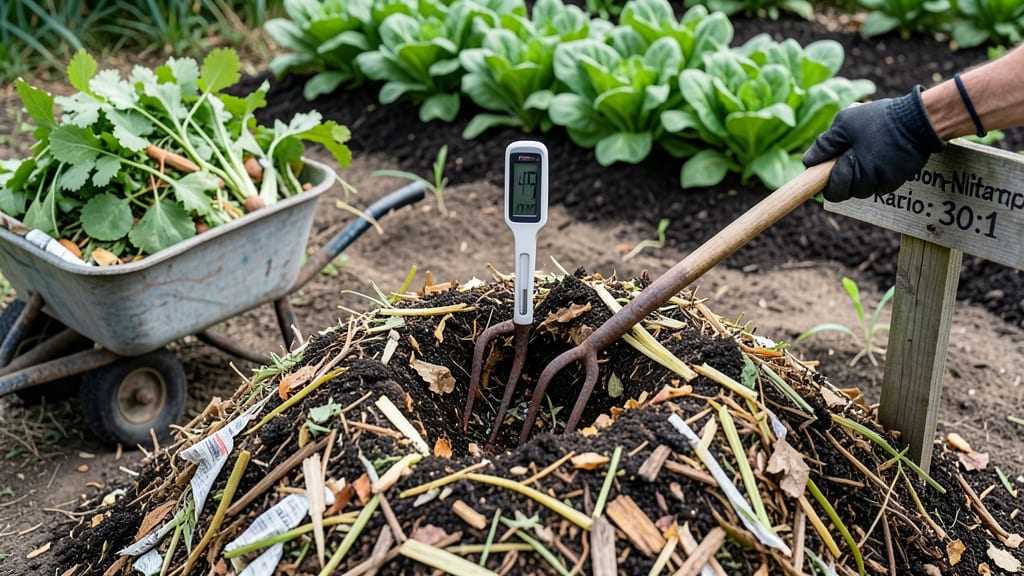
Your soil's secret weapon is organic matter for soil improvement—the dark, crumbly stuff that transforms hard ground into a thriving garden. 🌱 I used to think good soil was just dirt, but adding compost, leaf mold, or well-rotted manure changed everything—my tomatoes doubled in size, and my perennials came back stronger every spring.
The magic happens in layers: organic matter feeds hungry microbes, holds moisture like a sponge, and creates air pockets for roots. Too much sand or clay? Mix in 2-3 inches of finished compost before planting.
For heavy clay, blend in equal parts organic matter and existing soil to break up compaction. You'll notice the difference immediately—plants wilt less in heat, weeds struggle to take hold, and your garden looks rich and alive instead of exhausted. The best part?
You can use kitchen scraps, yard waste, or store-bought compost—no fancy equipment needed. Spring and fall are ideal times to amend, but a light top-dressing in summer keeps plants happy. Start small: even a 5-gallon bucket of compost spread over a square yard makes a noticeable difference.
Your roots will thank you.
📚 In This Guide
- What you need
- Instructions
- Tips and common mistakes
- Wrapping up and next steps
What you need
- ● Compost: 5–10 gallons (well-aged, dark, crumbly texture—avoid fresh manure or food scraps with meat/dairy).
- ● Leaf Mold or Shredded Leaves: 3–5 gallons (decomposed or partially broken down for moisture retention).
- ○ Peat Moss or Coco Coir: 2–3 gallons (optional but improves aeration; skip if using worm castings).
- ● Worm Castings: 1–2 gallons (boosts microbial activity—pro tip: 💡 blend with compost for extra nutrients!).
- ● Wood Chips or Straw: 1–2 gallons (coarse texture for drainage; avoid cedar or treated wood).
- ● Garden Soil (Topsoil): 5–8 gallons (high-quality, weed-free—pro tip: 🔥 mix in a handful of kelp meal for trace minerals!).
- ● Tools: Garden fork or trowel (for aerating soil).
- ● Wheelbarrow or large bucket (for mixing).
- ● Gloves (to protect your hands—trust us, compost isn’t always gentle!).
- ● Watering can or hose (for hydration).
- ● Biochar: ½–1 cup (enhances water retention and microbial life).
- ● Bone Meal or Fish Emulsion: 1 tbsp (for phosphorus-rich blooms—✨ perfect for veggies and flowers!).
- ● Mycorrhizal Fungi: 1 packet (symbiotic fungi that supercharge root growth).
- ● Sand (Coarse): 1–2 gallons (if your soil is clay-heavy—🎯 improves drainage without compacting).
- ● Test your soil’s pH (ideal range: 6.0–7.0 for most plants). Adjust with lime or sulfur if needed.
- ● Clear the area of weeds, rocks, or debris (aim for a 12" deep work zone).
- ● Choose a sunny or partially shaded spot (organic matter thrives with moisture but hates waterlogging!).
How to build a layered loam for richer soil and healthier plants
This is the method I use to transform tired soil into a nutrient powerhouse—no fancy tools, just smart layering.
🌱 Step 1: Test and Clear the Existing Soil
Start by removing any weeds, rocks, or debris from your 4-square-foot area (about the size of a small garden bed). I like to use a garden fork to loosen the top 6 inches of soil without turning it completely—this preserves the existing soil structure while making room for improvements. If your soil is extremely compacted, add a thin layer of coarse sand to help with drainage before proceeding.
Here's the thing—don’t overthink testing. Just dig a small hole, fill it with water, and watch how quickly it drains. If water pools for more than 15 minutes, your soil needs more organic matter to improve drainage. If it disappears instantly, add a bit more compost to retain moisture for your plants.
🪴 Step 2: Layer Organic Materials for Balance
Begin with a 2-inch base layer of coarse organic matter like chopped leaves or straw. This creates air pockets at the bottom, preventing compaction. Next, add a 3-inch layer of well-aged compost—this is the nutrient powerhouse. I sift mine to remove any large chunks, but don’t stress if yours isn’t perfectly refined.
Top this with a 1-inch layer of fine organic matter, such as worm castings or peat moss, to blend nutrients into the soil. This isn’t just about adding food for plants—it’s about creating a living ecosystem where beneficial microbes can thrive. Water each layer lightly as you go to help everything settle.
💧 Step 3: Mix Gently to Integrate Without Disturbing Structure
Use a broadfork or your hands to gently combine the layers, working them into the top 4-6 inches of soil. The goal is to create a loose, crumbly texture—think of it like fluffing a pillow, not stirring a pot. Over-mixing can destroy the soil’s natural structure and release too many nutrients at once, which plants can’t use efficiently.
Stop when the soil looks dark and rich with visible organic bits. You’ll know it’s right when a handful crumbles easily between your fingers. If it feels gritty or falls apart like sand, you need more fine organic matter. If it sticks together like clay, add a bit more coarse material to improve aeration.
☀️ Step 4: Mulch to Protect and Feed
Spread a 2-inch layer of straw or wood chips over the amended soil. This keeps moisture in, temperatures stable, and prevents erosion from rain or wind. I avoid fresh wood chips because they can rob nitrogen as they break down—stick with well-aged or cedar mulch for the best results.
Water the bed deeply after mulching to help everything settle. You’ll see the first signs of improvement in 2-4 weeks—soil that holds moisture better, fewer weeds, and plants that grow with vigor. This isn’t a one-time fix; think of it as laying the foundation for years of healthy soil.
⏰ Step 5: Monitor and Maintain Over Time
Check your soil every 3-4 months by digging a small hole to see how the layers are integrating. Add a 1-inch top dressing of compost annually to keep nutrients replenished. I also rotate crops to prevent nutrient depletion—heavy feeders like tomatoes go where last year’s leaf mold was added, while lighter plants get the areas with more mulch.
Watch for signs your soil is thriving: earthworms, healthy microbial activity (a slightly musty smell when it’s damp), and plants that seem to grow with minimal effort. If you see mushrooms popping up, that’s actually a good sign—it means decomposition is active. Just remove them before they spread too much.
Tips & tricks for perfect layered soil improvement
Here's what nobody tells you about building soil that actually works—these are the tricks I've learned after years of trial and error in my own garden.
Soil Test Shortcut: Instead of waiting for lab results, use the water test from Step 1 as your guide. If water disappears instantly, your soil drains too fast—add more compost to retain moisture. If it pools beyond 15 minutes, focus on drainage first with that coarse sand layer before adding organic matter. This simple test tells you exactly what your soil needs without any fancy equipment.
Layering Precision: When building your 2-inch base layer in Step 2, fluff it up before adding compost. I like to spread it out and gently press down—this creates better air pockets at the bottom. For the 3-inch compost layer, sift it if you can, but don't stress if you can't. The key is to keep it loose so roots can penetrate easily. Think of it like building a cake: each layer needs space to breathe.
Mulch Selection: For the 2-inch mulch layer in Step 4, I avoid fresh wood chips because they rob nitrogen as they break down. Instead, I use well-aged straw or cedar mulch—both release nutrients slowly and create a perfect environment for earthworms. Pro tip: If you're using straw, give it a quick shake first to remove any weed seeds that might have hitched a ride.
Maintenance Hack: That 1-inch annual compost top dressing in Step 5 doesn't have to be perfect. I often use finished compost from my bin, even if it's not perfectly sifted. The important part is to spread it evenly—this keeps nutrients right where the roots need them. Think of it like fertilizing: consistency matters more than perfection.
Pro Tips for Organic Matter For Soil Improvement
- Here's what nobody tells you about building soil that actually works—these are the tricks I've learned after years of...
- Soil Test Shortcut: Instead of waiting for lab results, use the water test from Step 1 as your guide. If water disapp...
- Layering Precision: When building your 2-inch base layer in Step 2, fluff it up before adding compost. I like to spre...
Frequently asked questions
Got questions about boosting your soil with organic matter? You’re not alone! Here are some of the most common queries—plus straightforward answers to get you growing like a pro.
What’s the fastest way to improve my soil with organic matter?
For quick results, mix in compost or well-rotted manure (like cow or horse) into the top 6–12 inches of soil. Add worm castings for an instant nutrient boost. Spread a 1–2 inch layer of compost on the surface and lightly till it in for gradual enrichment. Pro tip: Use cover crops (like clover or vetch) to build soil between plantings!
How long does it take to see improvements in soil health?
Visible changes (like darker soil and better drainage) may appear in 3–6 months, but full benefits take 1–2 years. Microbial activity and root growth improve within weeks, while long-term benefits—like water retention and nutrient cycling—develop over time. Patience pays off!
Are there affordable alternatives to expensive compost?
Try these budget-friendly options:
- Leaf mold: Collect fallen leaves, dampen them, and let them decompose in a bin for 6–12 months.
- Green manure: Plant fast-growing crops (like buckwheat or rye) and chop them down to till into the soil.
- Wood ash: Sprinkle sparingly (1/4 cup per 10 sq ft) for potassium—but avoid acidic soils.
- Food scraps: Start a backyard compost pile with kitchen waste (no meat/dairy).
What organic materials should I avoid in my soil?
Skip these to prevent pests, diseases, or imbalances:
- Meat, dairy, or oily foods: Attract rodents and create foul odors.
- Diseased plants: Can spread pathogens like fungi or bacteria.
- Weeds with seeds: Risk introducing invasive species (e.g., nutgrass or bindweed).
- Fresh wood chips: Tie up nitrogen as they decompose; opt for aged chips instead.
Can I add organic matter in winter or only in spring?
You can (and should!) add organic matter year-round, but timing matters:
- Fall: Ideal for breaking down over winter. Top-dress with compost or leaf mold.
- Winter (mild climates): Apply cover crops or mulch to protect soil from erosion.
- Avoid freezing temps: Don’t till in fresh manure or green waste when soil is frozen—it can burn plants.
Wrapping up and next steps
Incorporating organic matter for soil improvement isn’t just about gardening—it’s about nurturing life itself!
Whether you’re reviving a tired garden bed or boosting a new planting area, layered loam packed with compost, leaf mold, and well-rotted manure works wonders for root health and vibrant blooms. 🌱 The key? Consistency—feed your soil regularly, and it will reward you with thriving plants and lush growth.
Ready to take the next step? Start small—amend a single bed or pot this season and watch the difference! For even better results, test your soil’s health and adjust your organic mix accordingly. Happy growing! 🌿