
Tools
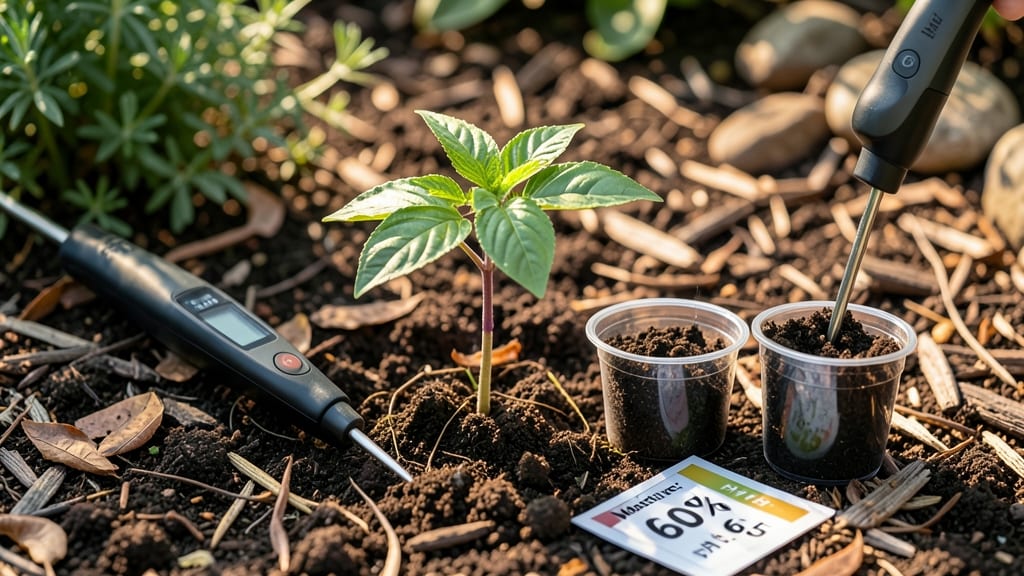
A moisture and pH garden soil tester is the secret weapon that stops plant stress before it even starts. 🌱 I’ve watched my own struggling tomato plants go from wilted to thriving just by fixing what this simple tool revealed—overwatered roots, locked-out nutrients, or soil too acidic to support growth.
It’s not just about guessing anymore. The best testers combine digital precision with ease of use, giving you instant readings that tell you exactly what your plants need.
My go-to model takes seconds to check moisture levels and pH, so I can adjust watering or amend the soil before problems appear. No more waiting for lab results or relying on guesswork.
With this tool, you’ll know when to hold back water, when to add lime, or when your compost needs balancing. The difference between a struggling garden and a lush one often comes down to these two simple measurements—and now you can fix it fast.
Whether you’re troubleshooting a sickly tomato plant or prepping a new flower bed, this tester gives you the confidence to act. Here’s how to use it right the first time.
📚 In This Guide
- What you need
- Instructions
- Tips and common mistakes
- Wrapping up and next steps
What you need
- ● Moisture & pH Soil Tester: A digital or analog tester (ensure it measures both moisture % and pH levels, ideally with a 0-14 pH range).
- ● Garden Soil: Fresh, undisturbed soil from the root zone of your plants (avoid surface debris).
- ● Small Trowel or Scoop: For collecting soil samples without contamination.
- ● Clean Container: A small plastic or glass cup to hold soil samples (4–6 oz capacity).
- ○ Water (Optional for Calibration): Distilled water for rinsing the tester between uses (if recommended by the manufacturer).
- ● Notebook or App: To log readings (e.g., Gardenize or a simple spreadsheet).
- ● Soil pH Adjustment Kit: Lime (to raise pH) or sulfur (to lower pH) if you plan to make corrections.
- ● Moisture Meter Calibration Kit: For recalibrating your tester over time (check product specs).
- ● Handheld Magnifying Glass: To inspect soil texture or hidden pests.
- ● Gloves: For hygiene when handling soil or chemicals.
Step-by-Step instructions for using a moisture and pH soil tester
This handy tool reveals what your plants really need—no guesswork involved.
🌱 Step 1: Prepare the Soil for Accurate Testing
Choose a spot where you suspect problems—wilting plants, yellowing leaves, or stunted growth. Clear away any mulch or debris from the top 2 inches of soil. You want bare earth so the tester’s probes can read true moisture and pH levels without interference.
Gently loosen the soil with your fingers or a small trowel to break up compacted areas. This ensures the probes penetrate smoothly and give consistent readings. Avoid testing right after watering—wait until the soil surface feels dry to the touch (about 12-24 hours after irrigation). Wet soil skews moisture readings, and pH tests can be thrown off by excess water.
💧 Step 2: Test Moisture Levels First
Insert the moisture probe 2-3 inches deep into the soil at a slight angle. Hold it firmly but don’t force it—resistance means the soil is too compacted. Most testers show a digital readout or color-coded indicator for moisture levels: dry, slightly moist, or saturated.
Compare your reading to your plants’ needs. For example, succulents thrive in dry to slightly moist soil, while leafy greens prefer consistently moist conditions. If the tester shows saturated soil but your plants look thirsty, you’ve got drainage issues. If it’s bone dry but you watered recently, roots may be struggling to access moisture.
☀️ Step 3: Measure pH in the Same Spot
Clean the pH probe with a damp cloth to remove any soil residue from the moisture test. Insert it into the same hole 2-3 inches deep, ensuring it touches the same soil layer. Wait 10-15 seconds for the reading to stabilize—rushing this step gives inaccurate results.
Note the pH level: acidic (below 7.0), neutral (7.0), or alkaline (above 7.0). Most vegetables and herbs prefer 6.0-7.0, while blueberries and azaleas thrive in acidic (4.5-5.5) soil. If your reading is off by more than 0.5 points, your plants may be struggling to absorb nutrients, even if you’re fertilizing regularly.
✂️ Step 4: Adjust Based on Your Findings
For moisture issues, water deeply if the soil is dry, but check drainage if it’s consistently soggy. For pH problems, amend the soil gradually: add sulfur or peat moss to lower pH, or lime to raise it. Always test again in 2-4 weeks to monitor changes—soil chemistry shifts slowly.
Here’s the thing—don’t overcorrect. A sudden pH swing can shock plants. If your soil is slightly off (e.g., 6.8 instead of 6.5), focus on improving organic matter first. Healthy soil buffers pH naturally over time. Re-test after adjustments to confirm progress.
Tips & tricks for perfect soil diagnostics
These simple tricks will help you get the most accurate readings from your soil tester every time.
Soil Prep Matters: In Step 1, when you're clearing the top 2 inches of soil, don't just scrape the surface—dig down gently to break up any compacted layers. I've found that using a small trowel helps prevent disturbing the soil structure too much. The goal is to mimic natural soil conditions as closely as possible for accurate readings.
Timing is Everything: The instructions mention waiting 12-24 hours after watering to test, but here's what nobody tells you—if you're dealing with sandy soil, you might need to wait up to 48 hours. Sandy soil drains much faster, so the moisture levels can change quickly. Always check the surface feels dry to the touch before testing.
Probe Technique: When inserting the probes in Steps 2 and 3, I've learned to hold them at a slight angle rather than straight down. This helps prevent creating a false moisture channel that could give you inaccurate readings. Also, make sure to clean the probes thoroughly between tests—soil residue can throw off your pH readings significantly.
Interpreting Results: The tester shows dry, slightly moist, or saturated—but what does that really mean for your plants? For most vegetables, you want the soil to feel like a wrung-out sponge when you squeeze it. If it crumbles apart, it's too dry; if water drips out, it's too wet. This visual check helps confirm your tester's readings.
Pro Tips for Moisture Ph Garden Soil Tester
- These simple tricks will help you get the most accurate readings from your soil tester every time.
- Soil Prep Matters: In Step 1, when you're clearing the top 2 inches of soil, don't just scrape the surface—dig down g...
- Timing is Everything: The instructions mention waiting 12-24 hours after watering to test, but here's what nobody tel...
Frequently asked questions
Got questions about using a moisture and pH garden soil tester?
You’re not alone! Here are answers to the most common concerns to help you get the most out of your tool and keep your plants thriving.
How often should I test my soil’s moisture and pH levels?
For most gardens, testing once every 3–6 months is ideal—especially before planting seasons. If your plants show stress (yellowing leaves, stunted growth), test sooner. Moisture should be checked after watering or during dry spells, while pH can stay stable unless you amend soil frequently.
What does it mean if my soil tester shows “too wet” or “too dry”?
A “too wet” reading (often >40% moisture) means poor drainage—roots suffocate, leading to rot. “Too dry” (<20%) signals thirsty plants. Fix it: Amend clay soil with compost or perlite for drainage; water deeply but less often for sandy soil. Adjust based on your plants’ needs!
Can I use a DIY pH strip instead of a digital tester?
DIY strips are cheaper but less accurate—digital testers give precise readings (e.g., 6.5 vs. “slightly acidic”). For critical crops (veggies, citrus), invest in a dual moisture/pH meter ($20–$40). Strips work for casual checks, but digital is the gold standard.
Why does my tester give inconsistent pH readings?
Inconsistencies often stem from dirty probes, old calibration, or testing in wet clumps (not loose soil). Clean probes with vinegar, calibrate annually, and test dry soil (moisten slightly if needed). Avoid testing right after fertilizing—wait 24 hours for accurate pH.
How do I adjust pH naturally without chemicals?
Lower pH (more acidic)? Add peat moss, pine needles, or coffee grounds. Raise pH (more alkaline)? Mix in lime, wood ash, or crushed eggshells. Re-test after 2–4 weeks. Pro tip: Test in multiple spots—soil pH varies!
Wrapping up and next steps
Mastering your garden’s health starts with understanding its moisture and pH levels—and a moisture and pH soil tester makes it effortless! 🌱 With the right tools and knowledge, you can prevent plant stress before it even begins, ensuring lush growth and vibrant blooms.
Now that you’re equipped with insights, take action—test your soil regularly and adjust as needed to create the perfect environment for your plants!
Ready to transform your garden? Grab your tester, roll up your sleeves, and watch your green space thrive! 🌿