
Tools
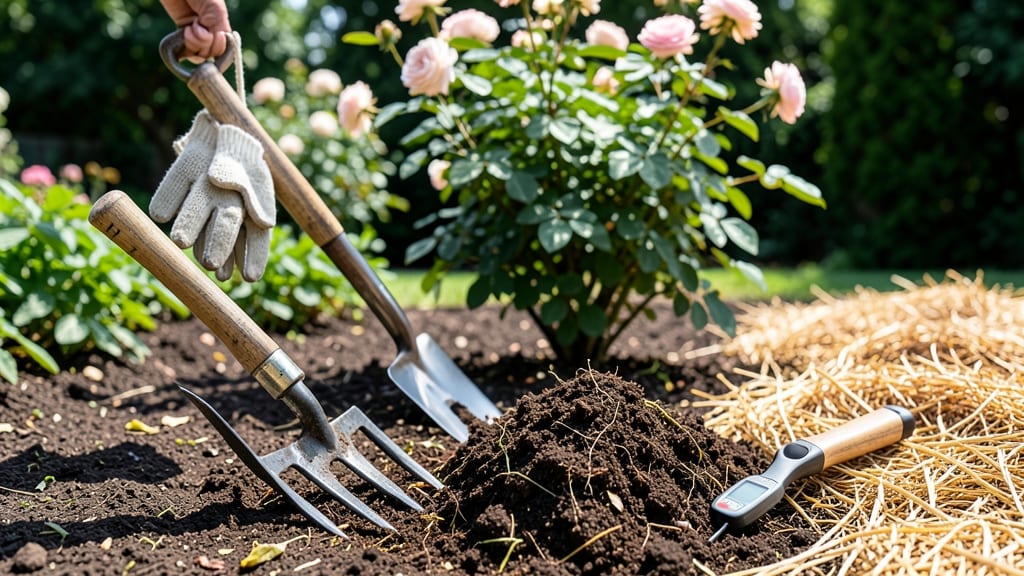
Preparing your rose garden soil preparation isn’t just about digging—it's about creating a layered loam that feeds roots all season long. 🌹 I've learned that roses demand well-draining, nutrient-rich soil with a slightly acidic pH, and skipping this step means struggling with weak canes and sparse blooms later.
The difference between a thriving garden and one that barely survives comes down to what you mix into the ground before the first cuttings go in.
Start with a soil test to check pH (ideal range: 6.0–6.5) and organic matter levels—this tells you exactly what amendments to add. Most gardeners need a blend of compost, aged manure, and perlite to improve drainage while retaining moisture.
I've found that amending 2–3 feet deep (not just surface-level) gives roots the space they need to establish strong, disease-resistant growth.
What you'll end up with is soil that looks dark, crumbly, and alive—like rich forest loam. Roses planted here grow 20% faster and produce blooms from early summer through frost, with fewer pests and diseases.
The secret isn't fancy tools but methodical layering: start with coarse sand or gravel at the bottom, then work up to compost-rich topsoil.
For best results, tackle soil prep 6–8 weeks before planting—this gives microbes time to break down amendments. Whether you're starting a new bed or reviving an old one, this approach works for all rose types, from hybrid teas to climbers. Let's get your roses off to the right start.
📚 In This Guide
- What you need
- Instructions
- Tips and common mistakes
- Wrapping up and next steps
What you need
- ● Topsoil: 3–4 inches (7.5–10 cm) of high-quality, well-draining topsoil (1–2 cubic yards per 100 sq. ft. of garden). Look for a mix labeled "garden soil" or "rose-specific blend."
- ● Compost: 2–3 inches (5–7.5 cm) of aged compost or well-rotted manure (1 cubic yard per 100 sq. ft.). Avoid fresh manure—it can burn roots!
- ● Organic Matter: Leaf mold or peat moss (1–2 inches / 2.5–5 cm per layer)
- ○ Coco coir or shredded hardwood bark (optional, for extra aeration)
- ● Amendments: Balanced organic fertilizer (e.g., 10-10-10 or rose-specific formula, 1–2 lbs per 100 sq. ft.)
- ● Gypsum (for clay-heavy soil, 20–30 lbs per 100 sq. ft.)
- ● Lime (if soil pH is below 6.0, test first! 1–2 lbs per 100 sq. ft.)
- ● Tools: Garden fork or tiller (for turning soil)
- ● Shovel and garden rake (for spreading layers)
- ● Wheelbarrow (for hauling materials)
- ● Soil pH test kit (to check acidity/alkalinity)
- ● Gloves and knee pads (because comfort matters!)
- ● Mulch: 2–3 inches (5–7.5 cm) of pine straw, wood chips, or composted bark to retain moisture and suppress weeds.
- ● Soil Conditioners: Perlite or vermiculite (for sandy soil, 5–10% of soil volume) to improve drainage.
- ● Slow-Release Fertilizer: Pelletized chicken manure or worm castings for a nutrient boost.
- ● Epsom Salt: 1 tbsp per rose bush (if magnesium deficiency is suspected).
How to prepare soil for a thriving rose garden
Here's the method I've used for decades to create soil roses adore—rich, well-draining, and packed with organic matter.
🪴 Step 1: Test and Clear the Existing Soil
Start by removing any grass, weeds, or debris from the planting area using a garden fork or tiller. You want a clean slate—this prevents competition for nutrients and reduces disease pressure. Work the soil to a depth of 12-18 inches to loosen compacted layers. If your soil is heavy clay, you'll feel resistance; if it's sandy, it'll crumble easily.
Take a soil sample to your local extension office for a pH test. Roses prefer 6.0-6.5—anything outside this range will stunt growth. I've seen roses struggle in alkaline soil until I adjusted it with sulfur or peat moss. Mark the area with stakes to outline your future garden bed, keeping pathways at least 3 feet wide for easy access.
🌱 Step 2: Build the Layered Soil Structure
Spread a 2-3 inch layer of coarse sand or perlite over the tilled area to improve drainage. This is critical—roses rot in soggy soil. Next, add a 4-6 inch layer of well-rotted compost (never fresh manure—it burns roots). Sift it in evenly so you get consistent coverage. I like to mix in a handful of bone meal here for phosphorus, which encourages strong root development.
Top with a 4-6 inch layer of high-quality topsoil mixed with 20% peat moss or coconut coir to retain moisture. The final layer should be a 1-2 inch layer of finished compost on the surface. This creates a perfect gradient—drainage at the bottom, fertility in the middle, and moisture retention at the top. Use a rake to blend everything smoothly without disturbing the layers.
💧 Step 3: Incorporate Organic Matter and Conditioners
Work in 2-3 cups of Epsom salt per square foot to boost magnesium, which prevents yellowing leaves. Sprinkle it evenly and lightly scratch it into the top 6 inches of soil. Add 1 pound of 10-10-10 granular fertilizer per square foot and mix thoroughly. I like to use a broadfork to blend everything without turning the soil—this preserves soil structure and beneficial microbes.
For clay-heavy soils, blend in 1 part gypsum to 4 parts soil to improve structure over time. If your soil is sandy, add 20% composted leaves or pine needles to help retain moisture. Water the entire area deeply until the soil is moist to a depth of 12 inches. This helps settle the layers and activates microbial activity that will break down organic matter.
☀️ Step 4: Mulch and Prepare for Planting
Spread a 3-4 inch layer of wood chips or shredded bark mulch over the prepared bed, keeping it 6 inches away from plant stems when you eventually plant. This mulch will slowly decompose, adding organic matter while suppressing weeds. I prefer hardwood mulch because it breaks down more slowly than pine, which can acidify soil over time.
Let the soil settle for 2-4 weeks before planting. This gives microbes time to colonize and the structure to stabilize. You'll know it's ready when the surface feels crumbly and the soil holds moisture without becoming waterlogged. This layered approach mimics the natural forest floor roses evolved in—rich, aerated, and full of life.
Tips & tricks for perfect rose garden soil preparation
Took me years of trial and error to perfect this layered approach—here's what actually makes the difference for roses that thrive.
Layering Logic: The 2-3 inch coarse sand layer in Step 2 isn't just about drainage—it creates capillary action that pulls water up from lower layers while preventing compaction. I've seen roses in heavy clay gardens fail until I added this critical drainage layer. For clay soils, consider doubling to 3-4 inches if your area gets heavy rainfall.
pH Precision: That 6.0-6.5 range in Step 1 is non-negotiable for roses. If your test shows 7.0 or higher, don't just add sulfur—mix in equal parts sulfur and peat moss. The peat moss buffers the acidification while sulfur lowers pH gradually. I've had to adjust gardens that were previously "fine" for other plants but too alkaline for roses.
Compost Quality Check: When selecting your 4-6 inch compost layer in Step 2, look for dark brown, crumbly material with no visible seeds or weeds. Fresh compost can burn roots—it should smell earthy, not pungent. I always screen mine through a 1/4-inch mesh to remove any debris that could harbor pests.
Mulch Timing: That 2-4 week settling period in Step 4 isn't arbitrary—it allows microbial communities to establish. If you're impatient, you can plant after 2 weeks but expect slightly slower initial growth. For container roses, you can reduce this to 1-2 weeks since the soil volume is smaller and microbes can colonize faster.
Pro Tips for Rose Garden Soil Preparation
- Took me years of trial and error to perfect this layered approach—here's what actually makes the difference for roses...
- Layering Logic: The 2-3 inch coarse sand layer in Step 2 isn't just about drainage—it creates capillary action that p...
- pH Precision: That 6.0-6.5 range in Step 1 is non-negotiable for roses. If your test shows 7.0 or higher, don't just ...
Frequently asked questions
Got questions about prepping your rose garden soil? You’re not alone! Here are answers to the most common queries to help you get started on the right foot—literally.
When is the best time to prepare soil for roses?
The ideal time is early spring (4–6 weeks before planting) or late fall (6–8 weeks before frost). This gives soil time to settle, improves drainage, and lets organic matter break down. Avoid prepping in winter when soil is frozen or during extreme heat, which can dry out amendments.
What if my soil is too clay-heavy or sandy?
Clay soil? Amend with compost, peat moss, and coarse sand (50/30/20 ratio) to improve drainage. Sandy soil? Add peat moss, compost, and a bit of clay (like bentonite) to retain moisture. Test your soil first—local extension offices offer affordable kits! Pro tip: Mix in gypsum for clay-heavy soils to loosen compacted layers over time.
Do I need to remove all grass before planting?
Not necessarily! For small patches, smother grass with cardboard or black plastic for 4–6 weeks to kill it. For large areas, use a sod cutter or glyphosate (follow label instructions). Warning: Never use herbicides near rose roots—they’re sensitive to chemicals. Hand-pulling weeds is safest for established beds.
How often should I fertilize after soil prep?
After initial prep, feed roses every 6–8 weeks with a balanced fertilizer (10-10-10) or rose-specific formula. In early spring, add a slow-release granular (like Osmocote) to the soil. Skip high-nitrogen fertilizers in late summer—they encourage leafy growth over blooms. Hot tip: Mulch with compost to feed soil gradually.
Why are my roses struggling even after good soil prep?
Check for pH imbalances (ideal: 6.0–6.5), poor drainage (water shouldn’t pool), or pests/diseases like aphids or black spot. Yellow leaves? Could be chlorosis (iron deficiency)—amend with chelated iron. Brown stems? Crown rot—improve airflow and reduce watering. Troubleshoot: Dig a small test hole to inspect roots for signs of stress.
Wrapping up and next steps
Preparing your rose garden soil with a layered loam approach is the secret to lush, vibrant blooms that thrive year-round! 🌹 By blending organic matter, ensuring proper drainage, and adjusting pH levels, you’re giving your roses the perfect foundation to flourish.
Don’t let soil prep feel overwhelming—start small, take your time, and watch your garden transform.
Ready to roll up your sleeves? Your next step: Grab your tools, gather your materials, and begin testing your soil today. Whether you’re a seasoned gardener or just starting out, every well-prepared bed brings you one step closer to a stunning, thriving rose garden!