
Fertilization
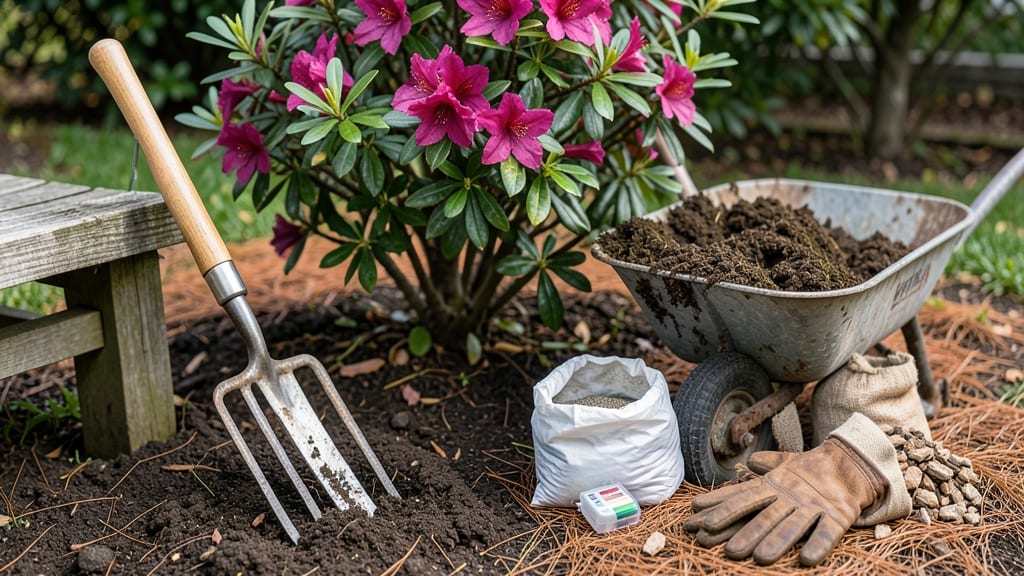
How to prepare soil for azaleas is all about creating the perfect acidic environment—think of it as crafting a cozy, moisture-loving home where their roots can thrive. Azaleas demand soil as acidic as a fresh cup of black coffee: pH 4.5–6.0 is non-negotiable. 🌿 I learned the hard way that even a slightly alkaline soil turns those vibrant blooms into sad, sparse clusters. The secret lies in blending organic matter, adjusting acidity, and ensuring drainage that keeps roots happy year-round. Start with a mix of peat moss or pine bark fines (3 parts) and compost or leaf mold (1 part)—this gives azaleas the airy, moisture-retentive home they crave. Test your soil’s pH first (kits cost $10 and save you heartache), then amend with elemental sulfur (1 pound per 100 sq ft) if your soil tests above 6.0. For a natural boost, work in pine needles or oak leaves—they slowly acidify the soil over time. After planting, mulch with pine straw or wood chips to protect the roots and maintain that critical acidity. Azaleas reward this care with bold, glossy foliage and trumpet-shaped blooms that last for weeks. The key? Consistency—check pH every spring and top-dress with sulfur if needed. This method works for container-grown azaleas too—just use a pre-mixed acidic potting soil and repot every 2–3 years to refresh nutrients. Once you master the soil, these shrubs become the showstoppers of your landscape. Let’s get those roots settled in the right home!
📚 In This Guide
- What you need
- Instructions
- Tips and common mistakes
- Wrapping up and next steps
What you need
- ● Soil Test Kit – To check pH (aim for 4.5–6.0).
- ● Peat Moss or Sphagnum Peat – 5–10 gallons (for acidity and moisture retention).
- ● Pine Bark Fines or Pine Needles – 3–5 gallons (boosts acidity and aeration).
- ● Compost or Well-Rotted Leaf Mold – 2–3 gallons (adds organic matter).
- ● Garden Fork or Tiller – For loosening soil to a 12-inch depth.
- ● Garden Gloves & Knee Pads – Because comfort (and safety) matters!
- ● Lime Alternative (Elemental Sulfur or Aluminum Sulfate) – 1–2 lbs (if pH is too high).
- ● Watering Can or Hose – For thorough hydration post-amendment.
- ● Azalea-Specific Fertilizer – Look for high-iron, low-phosphorus blends (e.g., Osmocote Azalea Food).
- ● Mulch (Pine Straw or Wood Chips) – 2–3 inches thick (retains moisture and acidity).
- ● Soil pH Adjusters (e.g., Liquid Acidifier) – For fine-tuning pH over time.
- ● Organic Matter Boosters – Coffee grounds (1 cup per plant) or worm castings (1–2 lbs).
Step-by-Step guide to preparing soil for azaleas
Azaleas thrive only in one kind of soil—acidic, well-draining, and rich in organic matter. Here’s how to create the perfect foundation for vibrant blooms and healthy growth.
🌱 Step 1: Test and Amend Existing Soil
First, determine your soil’s current pH using a home test kit or send a sample to your local extension office. Azaleas demand an acidic range of 4.5–6.0, and most garden soils run too alkaline. If your test shows anything above 6.0, you’ll need to lower the pH significantly. Start by removing any existing topsoil in your planting area down to 12–18 inches—this ensures you’re working with fresh, unamended soil.
Next, mix in 2–3 inches of peat moss or pine bark fines into the top 6–8 inches of soil. These materials naturally acidify the soil as they break down. If your soil is particularly dense or clay-heavy, add sand or perlite to improve drainage—azaleas drown in soggy roots. Work the amendments in thoroughly with a garden fork until the soil looks dark, crumbly, and free of clumps.
🌿 Step 2: Build a Raised Acidic Bed
For best results, create a raised bed or mound at least 12 inches wide and deep—this prevents roots from encountering alkaline subsoil. Use a 50/50 blend of peat moss and pine bark fines as your base, then layer in 2–3 inches of composted pine needles for extra acidity. Avoid leaf mold or oak leaves, which can raise pH over time.
Azaleas also need excellent drainage, so avoid low spots where water pools. If your yard has heavy clay, consider planting in large containers instead—fill them with a specialized azalea mix (available at nurseries) and top with 1–2 inches of fresh pine fines annually. This mimics their natural woodland habitat where roots stay moist but never waterlogged.
⏰ Step 3: Apply Slow-Release Acidifiers
After planting, apply a slow-release sulfur-based fertilizer like aluminum sulfate or iron sulfate to maintain the 4.5–6.0 pH range. Follow package instructions for dosage—too much can harm roots. For a natural option, spread 1–2 inches of finely shredded pine bark around the base of the plant and lightly rake into the soil. This not only feeds the roots but also gradually lowers pH as it decomposes.
Re-test the soil 6 months after planting and again in early spring before blooming season. Azaleas show stress quickly—yellowing leaves or poor flowering often mean the pH has drifted. If needed, reapply sulfur or pine fines and water deeply to help the amendments integrate. Mulch with 2–3 inches of wood chips or pine straw to lock in moisture and prevent pH fluctuations from temperature swings.
☀️ Step 4: Maintain Soil Conditions Year-Round
Azaleas hate sudden changes, so avoid fresh manure or composted leaves—these raise pH and attract pests. Instead, top-dress with 1–2 inches of fresh pine fines every fall and spring to replenish acidity. Water deeply 2–3 times per week during dry spells, but never let the soil stay soggy—roots need oxygen to thrive.
Watch for iron chlorosis (yellow leaves with green veins), a classic sign of alkaline stress. If this happens, apply chelated iron or a liquid acidifier like citric acid (follow label rates). Over time, your soil will stabilize, and with proper care, your azaleas will reward you with vibrant blooms for decades—just like the ones in old-world gardens where they’ve flourished for centuries.
Tips & tricks for perfect azalea soil preparation
Creating the ideal environment for azaleas isn't just about following steps—it's about understanding the subtle details that make all the difference. Here's what I've learned from years of helping these acid-loving plants thrive.
Soil Testing Accuracy: When testing your soil's pH, don't rely on quick home tests alone. For the most accurate results, send a sample to your local extension office—they use professional lab equipment that can detect subtle pH shifts you might miss. This is especially important if your azaleas show signs of stress like yellowing leaves or stunted growth. I once had a client whose home test showed pH 6.2, but the lab confirmed it was actually 6.8—just enough to cause problems for azaleas. The difference between 6.2 and 6.8 might seem small, but for azaleas, it's the difference between thriving and struggling.
Layering Technique: In Step 2, when building your raised bed, focus on creating distinct layers rather than just mixing everything together. Start with a 6-inch base of your 50/50 peat moss and pine bark blend, then add the 2-3 inches of composted pine needles on top. This layering mimics natural forest floor conditions where azaleas evolved. The top layer will break down more quickly, providing a steady supply of acidity to the roots. Pro tip: Use a garden rake to create gentle ridges in the top layer—this increases surface area for microbial activity, which helps maintain that crucial acidic environment.
Container Gardening: If you're working with containers, don't just fill them with any azalea mix. The key is to create a "soil profile" that mimics the natural woodland conditions azaleas prefer. Start with 2 inches of coarse perlite or pumice at the bottom for drainage, then add 4 inches of your specialized azalea mix, and top with 2 inches of fresh pine fines. This stratification prevents compaction and allows roots to breathe while maintaining proper moisture levels. I've seen azaleas in containers thrive for years using this method, even in urban environments where regular garden soil would be too alkaline.
Seasonal Maintenance: The fall and spring top-dressing mentioned in Step 4 is non-negotiable, but here's the secret: time it right. Apply your 1-2 inches of fresh pine fines right after your first heavy rain in fall and again after the last frost in spring. The rain helps distribute the amendments evenly, and the timing ensures they're in place before your azaleas need them most. This simple adjustment has dramatically improved bloom quality in my own garden—azaleas seem to recognize when they're getting the right care at the right time.
Pro Tips for Prepare Soil For Azaleas
- Creating the ideal environment for azaleas isn't just about following steps—it's about understanding the subtle detai...
- Soil Testing Accuracy: When testing your soil's pH, don't rely on quick home tests alone. For the most accurate resul...
- Layering Technique: In Step 2, when building your raised bed, focus on creating distinct layers rather than just mixi...
Frequently asked questions
Got questions about prepping soil for azaleas?
You’re not alone! Here are answers to the most common concerns—so you can give your plants the perfect acidic home for stunning blooms.
When is the best time to prepare soil for azaleas?
Spring or early fall are ideal! These seasons give roots time to establish before summer heat or winter frost. Avoid preparing soil in extreme temperatures—roots are sensitive, and cold or scorching conditions can stress them. If you’re planting bare-root azaleas, do it in late fall or early spring when dormancy is natural.
What if my soil isn’t naturally acidic? Can I still grow azaleas?
Azaleas thrive in acidic soil (pH 4.5–6.0), but you can amend alkaline or neutral soil with organic matter like peat moss, pine bark, or sulfur. Test your soil first (DIY kits are cheap!) and adjust gradually—adding too much sulfur at once can harm roots. Patience pays off!
My azaleas look unhealthy—could the soil be the problem?
Yellow leaves, stunted growth, or poor blooms often signal soil issues. Check for:
- pH imbalance (test with a kit)
- Compacted soil (roots need airflow!)
- Poor drainage (waterlogged roots rot)
Do I need to fertilize right after preparing the soil?
Not immediately! Let the soil settle for 4–6 weeks after amending. Then, apply a slow-release, acid-loving fertilizer (like one labeled for rhododendrons or azaleas) in early spring. Avoid high-nitrogen fertilizers—they can burn roots and reduce blooms. Think "feed light, feed often."
How often should I retest soil pH for azaleas?
Test soil pH every 1–2 years or if you notice decline in plant health. Azaleas are heavy feeders, and organic matter breaks down over time. If pH drifts above 6.0, reapply sulfur or peat moss. Pro tip: Mulch with pine needles or oak leaves annually to maintain acidity naturally!
Wrapping up and next steps
Preparing the perfect soil for your azaleas is all about patience, the right mix, and a little TLC—and trust us, your blooms will thank you!
By ensuring proper drainage, the right acidity (pH 4.5–6.0), and a nutrient-rich blend, you’re setting the stage for stunning, long-lasting flowers. 🌸 Now that you’re armed with the know-how, grab your gloves and get ready to transform your garden into a vibrant azalea paradise!
Your next step? Test your soil and start digging—literally! Whether you’re amending an existing bed or planting fresh, your azaleas will reward you with colorful, healthy growth all season long. Happy gardening! 🌱