
How To
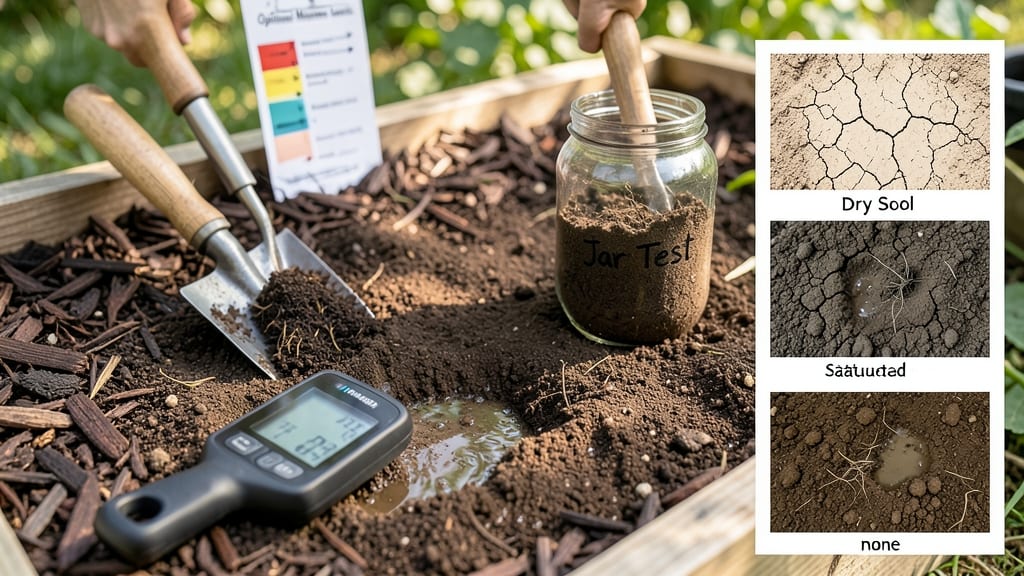
Measuring soil moisture is the secret to keeping your plants thriving without over- or under-watering them. 🌱 I’ve learned the hard way that guessing leads to wasted water, wilted leaves, and even root rot—so I now rely on a mix of simple tests and a moisture meter for precision.
The right approach depends on what you’re growing and your soil type, but these methods work for everything from container herbs to vegetable gardens.
Start with the finger test for a quick check: push your index finger 1–2 inches into the soil. If it feels dry, it’s time to water; if damp, hold off.
For digital meters, insert the probes 2–3 inches deep and wait 30 seconds for a reading—most meters show moisture as a percentage or with low/mid/high indicators. Analog tools like tensiometers measure suction pressure, which tells you when roots will start struggling to absorb water.
You’ll notice plants respond immediately when moisture is just right: leaves stay crisp, growth speeds up, and you avoid the stress of soggy soil or wilting. Over time, you’ll recognize the ideal feel and texture for your specific plants—like the slightly damp but not soggy mix my tomatoes love.
This consistency prevents common issues like fungal diseases from overwatering or stunted growth from drought.
For troubleshooting, recalibrate your meter every few months or check readings in multiple spots—soil compaction can skew results. And remember: clay holds moisture longer than sandy soil, so adjust your watering schedule accordingly. Mastering this skill saves time, water, and your sanity during dry spells.
📚 In This Guide
- What you need
- Instructions
- Tips and common mistakes
- Wrapping up and next steps
What you need
- ● Soil Moisture Meter: Digital probe-style (e.g., Blumaxx or AcuRite) – 1 unit (ensure it has a 0-100% scale or volts for accuracy).
- ○ Optional: Analog tensiometer (for advanced users; 1 unit with 0-100 centibar range).
- ● Hand Trowel: 1 medium-sized (for digging small test holes, 6-8 inches deep).
- ● Notebook & Pen: 1 (to log readings and observations).
- ● Measuring Tape or Ruler: 1 (for depth consistency, 12-inch minimum).
- ● Small Containers: 2-3 (for collecting soil samples if testing manually).
- ● Soil pH Test Kit: 1 (to check if moisture levels are affected by acidity/alkalinity).
- ● Garden Gloves: 1 pair (for hygiene and grip).
- ● Smartphone App: e.g., "Moisture Meter Pro" (to track trends over time).
- ● Calibration Solution: 1 bottle (if your meter requires periodic recalibration).
Step-by-Step guide to measuring soil moisture like a pro
Here's how I check soil moisture with confidence—no guesswork, just healthy roots.
💧 Step 1: Use the Finger Test for General Moisture
Stick your index finger 1-2 inches deep into the soil. If it feels damp but not wet, your plants are happy. I press gently—if moisture sticks to my skin, it's too wet. If it feels dry and crumbles easily, it's time to water. This method works for most container plants and garden beds.
For heavier soils, push deeper—3 inches—since they hold moisture longer. I always check the same spot each time to track patterns. If the soil feels cool and clings slightly, that's the sweet spot for most plants. Too sandy? You'll feel dryness immediately—water more frequently.
☀️ Step 2: Try the Scoop-and-Squeeze Method for Precision
Dig a small hole with a trowel or your fingers, then scoop out a handful of soil. Squeeze it firmly in your palm—if it holds shape but crumbles when you poke it, moisture is perfect. If it stays clumped, it's too wet. For sandy soils, squeeze harder—they drain fast and need more frequent checks.
This works best for container plants where you can easily access the soil. I do this weekly during summer heat to avoid overwatering. Pro tip: Do this in the morning when evaporation hasn't confused the reading yet. If the soil feels like a damp sponge, your plants are thirsty.
🌱 Step 3: Invest in a Soil Moisture Meter for Consistency
For serious gardeners, a digital moisture meter takes the guesswork out. Insert the probes 2-3 inches deep and read the display. Most meters show three zones: dry, moist, and wet. I keep mine near my potting bench for quick checks before watering. Analog meters with color-coded sticks are cheaper but less precise.
Calibrate your meter first by testing it in known conditions—like a freshly watered pot (should read "wet") and a bone-dry one (should read "dry"). Digital meters are especially helpful for sensitive plants like ferns or orchids that can't handle soggy roots. I use mine daily during my morning watering routine.
⏰ Step 4: Observe Plant Behavior to Calibrate Your Method
Watch for wilting leaves (sign of underwatering) or yellowing foliage (sign of overwatering). These visual cues help fine-tune your moisture measurements. Droopy leaves that perk up after watering mean you need to check soil moisture more often. Stunted growth or moldy soil means you're overdoing it.
I keep a small notebook by my garden tools to track when I water and how the soil feels. After a few weeks, I notice patterns—like my basil needs water every 2 days in summer but only every 5 days in spring. This helps me adjust without relying solely on tools or my fingers.
✂️ Step 5: Adjust for Season and Soil Type
Summer heat dries soil faster, so I check moisture daily in containers. Winter slows evaporation, so I water less often. Clay soil stays moist longer than sandy soil—adjust your testing depth and frequency accordingly. For potted plants, I check the top ½ inch of soil daily, then deeper as needed.
If you're using mulch, remember it slows moisture loss, so your finger test might read "moist" when it's actually dry deeper down. I always check below the mulch layer for accurate readings. For outdoor beds, dig deeper—3-4 inches—since roots spread wider and deeper than container plants.
Tips & tricks for perfect soil moisture measurement
These simple tricks will help you get consistent, reliable readings every time—no more guessing games.
Depth Matters: When using the finger test in Step 1, remember that 1-2 inches is ideal for most container plants, but 3 inches is better for heavier soils. I've learned this the hard way—shallow checks in clay pots often give false "dry" readings when roots are actually fine deeper down. For outdoor beds, go even deeper to 3-4 inches where roots spread wider.
Timing is Everything: The scoop-and-squeeze method in Step 2 works best in the morning when evaporation hasn't confused the reading. I check mine between 8-10 AM consistently. Afternoon checks can show soil drier than it actually is, leading to unnecessary watering. For container plants, I do this weekly during summer heat to prevent overwatering.
Meter Calibration: If you invest in a digital moisture meter as suggested in Step 3, calibrate it first by testing in known conditions—a freshly watered pot should read "wet" and a bone-dry one should read "dry." I keep mine near my potting bench for quick checks before watering. For sensitive plants like ferns, this tool is a game-changer—it prevents those dreaded soggy roots that cause yellowing leaves.
Seasonal Adjustments: Summer heat dries soil faster, so I check moisture daily in containers during peak season. Winter slows evaporation, so I reduce checks to every 3-4 days unless I notice wilting. The key is consistency—always check at the same time of day and same depth for accurate comparisons over time.
Pro Tips for Measure Soil Moisture
- These simple tricks will help you get consistent, reliable readings every time—no more guessing games.
- Depth Matters: When using the finger test in Step 1, remember that 1-2 inches is ideal for most container plants, but...
- Timing is Everything: The scoop-and-squeeze method in Step 2 works best in the morning when evaporation hasn't confus...
Frequently asked questions
Got questions about measuring soil moisture? You’re not alone! Here are some of the most common inquiries—and straightforward answers—to help you get it right every time.
How often should I check soil moisture?
For most plants, check soil moisture every 2–3 days during dry spells or when watering irregularly. Newly planted seedlings or drought-sensitive plants may need daily checks. Adjust based on weather—hot, windy days dry soil faster!
What if my soil moisture meter gives inconsistent readings?
Inconsistent readings often mean uneven probe insertion or calibration issues. Press probes firmly into the soil (2–3 inches deep) and avoid touching rocks or roots. If readings still vary, try recalibrating or testing in multiple spots. Pro tip: Clean probes with vinegar if mineral buildup is suspected!
Can I use a DIY method instead of a digital meter?
The finger test works great: Stick your finger 1–2 inches into the soil. If it feels damp, watering isn’t needed yet. For a visual cue, grab a handful—if it crumbles, it’s dry; if it sticks together, it’s moist. Bonus: Use a clear jar to see water levels in sandy soil!
Does temperature affect soil moisture readings?
Yes! Cold soil can slow moisture movement, making readings seem lower than they are. For accuracy, wait until soil warms up (especially in mornings). If testing in extreme heat, check early morning or evening to avoid false “dry” alerts.
How deep should I measure moisture for large plants like trees?
For trees or deep-rooted plants, measure moisture at 6–12 inches deep—that’s where roots often seek water. Use a long probe or a soil auger to reach deeper layers. Rule of thumb: If topsoil is dry but deeper layers hold moisture, water lightly to encourage roots to grow downward!
Wrapping up and next steps
Measuring soil moisture doesn’t have to be complicated—with the right tools and techniques, you’ll keep your plants thriving like a pro! 🌱 From simple DIY methods to advanced sensors, each approach offers unique benefits tailored to your gardening style.
Whether you’re a beginner or a seasoned grower, consistency is key—monitoring moisture levels regularly ensures your plants get the perfect balance of hydration.
Ready to take your gardening to the next level? Start small: pick one method that fits your needs, track your soil’s moisture patterns, and adjust as you go. Soon, you’ll be growing lush, healthy plants with confidence! 🌿