
How To
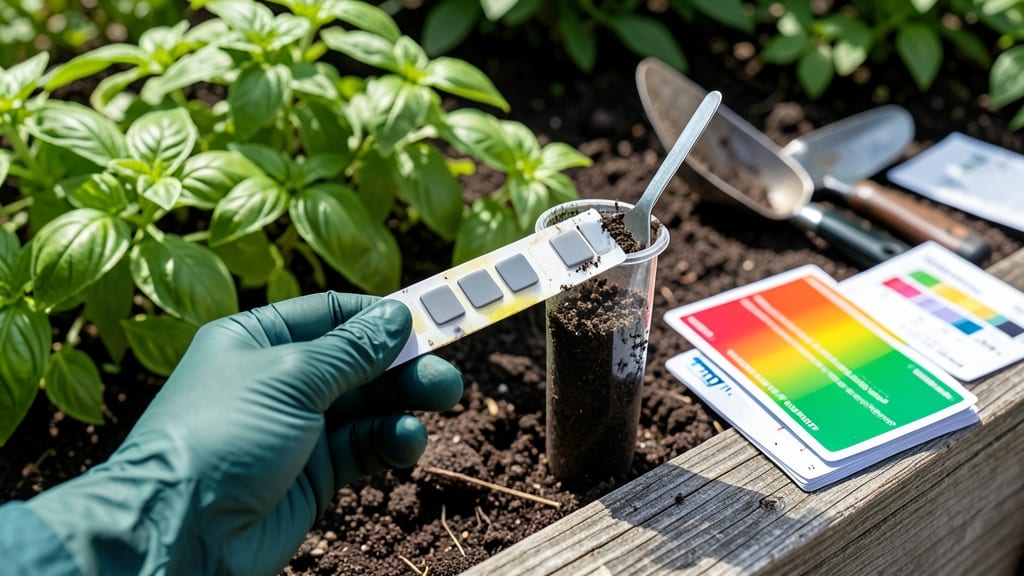
Your garden’s health starts with knowing what’s in the soil—and soil test strips give you that intel in under 5 minutes. 🌱 I’ve used them to diagnose why my tomatoes kept yellowing (turns out, it wasn’t pests—it was a pH of 5.2, way too acidic).
These strips reveal nutrient levels and pH faster than waiting for lab results, so you can fix problems before they ruin your harvest.
They’re not as precise as lab tests, but for most gardeners, strips are the foolproof first step. Grab a fresh soil sample, dip the strip, wait 30 seconds, and compare the color to the chart.
The results tell you if your soil is too acidic, alkaline, or lacking key nutrients like nitrogen or phosphorus—no guesswork. I’ve saved entire seasons by acting on these quick checks.
Once you know what’s missing, amending soil becomes straightforward. Add lime to raise pH, compost to boost nutrients, or sulfur to lower acidity. My tomato patch doubled its yield after one adjustment based on strip results.
The best part? You can test multiple spots in your garden to spot hidden trouble zones before planting.
For extra accuracy, pair strips with a simple pH meter or send samples to a lab if you’re growing high-value crops. But for 90% of gardeners, these strips are your secret weapon—affordable, fast, and packed with actionable insights. Let’s get testing!
📚 In This Guide
- What you need
- Instructions
- Tips and common mistakes
- Wrapping up and next steps
What you need
- ● Soil test strips – Choose a kit that tests for pH and key nutrients like nitrogen (N), phosphorus (P), potassium (K), and sometimes micronutrients. Brands like Luster Leaf or MySoil are popular choices. Quantity: 1-2 strips per test (check package instructions).
- ● Fresh soil sample – Collect from 4-6 inches deep in multiple spots (5-10 samples per garden bed) and mix thoroughly. Quantity: ~1 cup of composite soil.
- ● Distilled water – Tap water may contain contaminants that skew results. Quantity: ~½ cup per test.
- ● Small container or cup – For mixing soil and water. Specs: At least 8 oz capacity, non-reactive (plastic or glass).
- ● Spoon or trowel – For scooping soil. Specs: Clean, metal or plastic.
- ● Timer or clock – Most test strips require a 30-60 second wait for accurate readings.
- ● pH color chart – Some kits include one, but printing a backup ensures clarity.
- ● Notebook or app – To log results over time (e.g., Gardenate or PlantNet).
- ● Gloves – Protects hands from soil-borne bacteria or sharp rocks.
- ● Additional test strips – If testing multiple garden beds or retesting after amendments.
How to use soil test strips for fast, accurate results
Here's the quick method I rely on to check soil health in minutes—no lab waits or guesswork.
🧪 Step 1: Collect a Fresh Soil Sample
Grab a clean 1-inch deep sample from 4-6 inches below the surface—this is where roots actively grow. Avoid surface soil or areas with mulch, as they can skew results. I like to take samples from 3-4 spots around the garden and mix them together for an average reading.
Use a small trowel or spoon to collect about 1 tablespoon of soil from each spot. Place the samples in a clean, dry container. If your soil is very dry, add a few drops of distilled water to create a paste-like consistency—this ensures even contact with the test strip. Avoid tap water, as minerals in it can interfere with results.
💧 Step 2: Prepare the Soil Sample for Testing
If your soil is dry, mix it with distilled water until it forms a thick paste—about the consistency of wet sand. You want enough moisture to saturate the strip but not so much that it drips. I usually add water drop by drop while stirring until it holds together when squeezed gently.
For moist soil, simply press the test strip directly into the soil in your garden. The strip should stay in place for 30 seconds to absorb enough moisture for accurate readings. If you're testing potted plants, remove a small amount of soil from the pot and use that instead.
⏱ Step 3: Test for pH and Nutrients
Remove the test strip from its packaging and immediately press it into the prepared soil or paste. Hold it in place for 30-60 seconds, depending on the brand’s instructions. You’ll see color changes on the strip within 1-2 minutes—this is how you read the results.
Compare the colors on the strip to the color chart provided with your test kit. Most kits measure pH, nitrogen (N), phosphorus (P), and potassium (K). For example, a yellow-green strip might indicate a pH of 6.5, while a blue strip could signal high nitrogen. Write down your results so you can track changes over time.
📝 Step 4: Interpret Results and Adjust Soil
Check your pH reading first—most vegetables thrive in a range of 6.0-7.0, while blueberries need 4.5-5.5. If your soil is too acidic (low pH), add lime to raise it. For alkaline soil (high pH), mix in sulfur or peat moss to lower it gradually.
For nutrients, aim for balanced readings. If nitrogen is low, add compost or organic fertilizer. If phosphorus or potassium is lacking, use a balanced fertilizer or bone meal for phosphorus. Re-test after 2-4 weeks to see how your soil has responded—this helps avoid overcorrecting.
✂️ Step 5: Retest and Monitor Over Time
Soil conditions change with seasons, so I recommend testing at least once every 6 months. Keep a garden journal to track pH and nutrient levels—this helps you spot trends, like a gradual drop in potassium or rising acidity. After major amendments (like adding compost or lime), wait 4-6 weeks before retesting for accurate results.
If your soil tests consistently poor, consider amending it with organic matter like compost or aged manure to improve structure and nutrient retention. Healthy soil is the foundation of a thriving garden, and these quick tests let you act fast before problems start.
Tips & tricks for perfect soil testing with strips
These little tricks will help you get the most accurate, reliable results every time—no guesswork involved.
Sampling Spot Accuracy: Those 4-6 inches below the surface are crucial because that’s where most plant roots actually live. I’ve seen gardeners grab surface soil by mistake, and those results can be wildly different—often showing higher organic matter but lower nutrient availability. If you’re testing near a mulch pile or compost heap, move at least 12 inches away to avoid skewed readings.
Moisture Matters: The paste consistency in Step 2 is your secret weapon for accuracy. Too little water and the strip won’t absorb properly; too much and you’ll dilute the soil’s natural chemistry. I test the consistency by squeezing a small amount—it should hold together but still feel slightly damp when you open your hand. This ensures even contact without creating a runoff situation.
Timing is Everything: Those 30-60 seconds in Step 3 might seem like a short window, but they’re critical. Set a timer! Some brands need exactly 30 seconds, others 60—check your kit’s instructions. The color changes happen fast, and if you remove the strip too early, you might miss the full nutrient picture. I always double-check at the upper end of the range to ensure I’ve captured all possible readings.
Record Keeping: I keep a simple garden journal with dates, test results, and any amendments I’ve added. This helps me spot patterns—like that potassium level dropping every fall or nitrogen spiking after I add compost. Without tracking, it’s easy to forget what worked last year and repeat the same mistakes. A small notebook or even a phone note app works perfectly.
Pro Tips for Soil Test Strips
- These little tricks will help you get the most accurate, reliable results every time—no guesswork involved.
- Sampling Spot Accuracy: Those 4-6 inches below the surface are crucial because that’s where most plant roots actually...
- Moisture Matters: The paste consistency in Step 2 is your secret weapon for accuracy. Too little water and the strip ...
Frequently asked questions
Got questions about soil test strips? You’re not alone! Here are some of the most common queries—plus straightforward answers to help you get the most out of your gardening toolkit.
How accurate are soil test strips compared to lab tests?
Soil test strips offer a quick, affordable snapshot of pH and basic nutrients (like nitrogen, phosphorus, and potassium), but they’re less precise than lab tests. For general gardening, they’re great—just know they may miss subtle nutrient imbalances. For critical crops or large-scale farming, a lab test is the gold standard.
How long do results take to appear?
Most strips show results in 30 seconds to 2 minutes, depending on the brand. Follow the package instructions closely—some require rinsing or waiting for color changes. Pro tip: Test in a well-lit area to avoid missing faint color shifts!
Are soil test strips reusable?
Nope! Each strip is designed for single-use only. Reusing them can lead to inaccurate readings or contamination. Buy a pack with enough strips for your testing needs—typically 10–50 strips per box—to avoid running out mid-project.
What should I do if my strip results are unclear or faded?
Faded or unclear results often mean moisture issues (too dry or too wet soil) or improper timing. Double-check:
- You used fresh, uncontaminated soil (no rocks, debris, or old fertilizer).
- The strip was fully submerged (if required) for the recommended time.
- You compared colors to the chart under natural light.
Can I use test strips for hydroponics or soilless mixes?
Yes! Soil test strips work for hydroponic solutions, coco coir, and other soilless mixes, but you’ll need to adjust for water-based testing. Some brands even offer liquid-specific strips. Just dilute the sample as directed to match the strip’s guidelines—no need to dig!
Wrapping up and next steps
Soil test strips are your fast, easy, and budget-friendly ally for keeping your garden thriving! 🌱 With just a few minutes of your time, you can unlock the secrets of your soil’s health—whether you’re a seasoned gardener or just starting out. Now’s the perfect moment to act: grab a pack of test strips, test your soil, and give your plants the care they deserve!
Next step: Use your results to adjust your gardening plan—amend soil, tweak fertilizers, or celebrate a job well done! 🎉 Ready to dive in? Your green thumb is waiting!