
How To
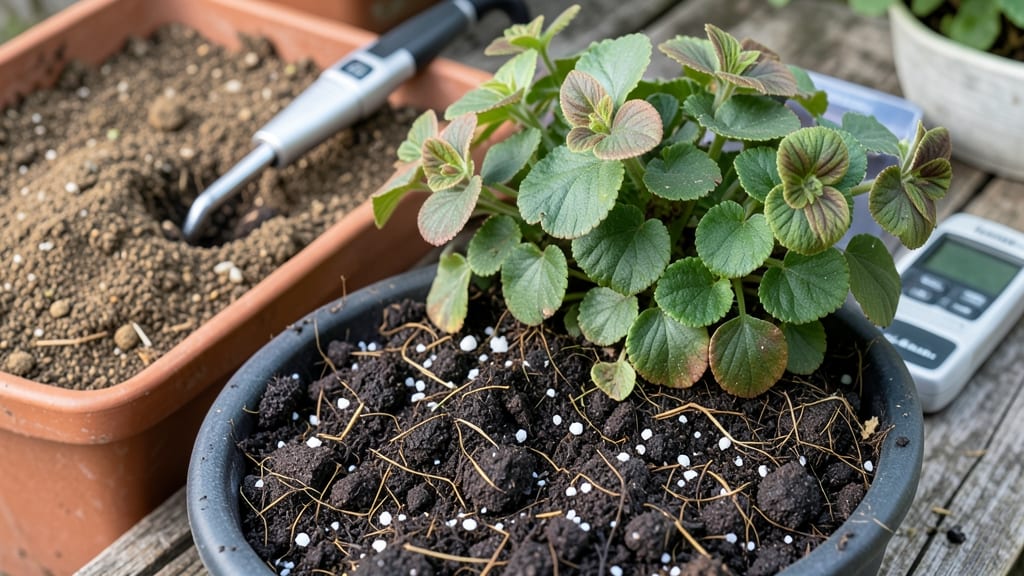
The right soil for pelargoniums is the secret to those bold, long-lasting blooms that make them garden standouts. 🌸 I’ve learned the hard way—pelargoniums wilt or refuse to flower when soil stays too wet or lacks the right acidity.
The ideal mix is light, fast-draining, and slightly acidic, with just enough nutrients to keep roots happy without drowning them.
Start with a base of 50% potting soil (not garden soil—it compacts too much) and mix in 30% perlite or coarse sand for that critical drainage. Add 20% compost or worm castings for nutrients, but keep it chunky—pelargoniums hate soggy roots.
For containers, a 5-gallon pot with drainage holes works best, while in-ground plantings need raised beds or mounded soil to prevent water pooling.
You’ll know you’ve nailed it when your plants stay upright and perky, not leaning or yellowing at the base. Pinch off spent blooms regularly, and your pelargoniums will reward you with nonstop color from spring through fall. The key? Never let them sit in water—even for a day.
This mix works for both sunny patios and bright indoor windowsills, though outdoor plants may need a touch more compost to handle seasonal wear. If your soil feels heavy or stays wet too long, it’s time to rebuild—your pelargoniums will thank you with bigger, brighter blooms.
📚 In This Guide
- What you need
- Instructions
- Tips and common mistakes
- Wrapping up and next steps
What you need
- ● Garden soil (base): 50% high-quality, well-aged garden soil (avoid heavy clay)
- ● Perlite or pumice: 20% for aeration and drainage (ensure it’s coarse and sterile)
- ● Peat moss or coconut coir: 20% to retain moisture and add acidity (opt for sphagnum peat for best results)
- ● Compost or worm castings: 10% for nutrients and microbial activity (well-rotted, not fresh)
- ○ Lime (optional but helpful): A pinch of dolomitic lime (if your soil is too acidic, test first!)
- ● Gloves and dust mask: To protect against soil particles and potential irritants
- ● Large mixing container or wheelbarrow: For blending ingredients evenly
- ● Garden trowel or shovel: For amending in-ground soil or repotting
- ● pH testing kit: To ensure your mix stays in the 6.0–7.0 range (pelargoniums prefer slightly acidic to neutral)
- ● Watering can or hose: For moistening the mix before planting
- ● Sand (coarse): 5–10% extra drainage boost (if your garden soil is dense)
- ● Slow-release fertilizer: Mix in 1–2 tbsp per gallon of soil for a nutrient kick
- ● Biochar: 5% to improve water retention and microbial life
- ● Mulch (e.g., pine bark): Top dressing to preserve moisture and acidity
How to create the perfect soil mix for pelargoniums
Here's the foolproof blend I use to keep my pelargoniums blooming like crazy—well-draining, acidic, and packed with nutrients.
🌱 Step 1: Start with a Base of Quality Potting Mix
Pelargoniums hate soggy roots, so begin with 50% premium potting mix—look for one labeled "well-draining" or "for containers." This base provides the structure your plants need while preventing compaction. I always sift it first to break up any clumps, ensuring even moisture distribution and better root penetration.
For 4 pelargonium plants, you'll need about 4 gallons total of finished mix. If your potting mix contains peat moss, you're already halfway to an acidic medium. If not, you'll need to adjust the pH later. Test your mix's moisture retention by squeezing a handful—it should hold together but not drip water.
🌿 Step 2: Add Perlite or Pumice for Aeration
Pelargoniums thrive in soil that mimics their natural rocky habitats. Mix in 25% perlite or pumice by volume—this creates air pockets that prevent root rot and encourage vigorous growth. I measure this by eye, adding roughly 1 part perlite to 2 parts potting mix.
Spread the perlite evenly and use your fingers to gently fold it into the potting mix. You'll see a noticeable fluffiness in the texture. This step is critical: without proper aeration, roots suffocate and the plant becomes susceptible to fungal diseases. If your mix feels too dense after adding perlite, increase the ratio slightly to 30% perlite.
💧 Step 3: Incorporate Organic Matter for Nutrients
Add 25% coarse sand or orchid bark to improve drainage while providing a slow-release nutrient source. I prefer coarse horticultural sand because it drains faster than fine sand but still holds moisture better than perlite alone. For a more organic approach, use 1 part chopped orchid bark—this breaks down slowly and maintains soil structure.
Mix thoroughly until the blend looks uniformly textured. You'll notice the soil becomes slightly gritty but still holds its shape. This combination ensures your pelargoniums get both the drainage they crave and the nutrients they need to produce abundant blooms. For extra insurance, add 1 tablespoon of balanced slow-release fertilizer per gallon of mix.
✂️ Step 4: Adjust pH for Acid-Loving Pelargoniums
Pelargoniums prefer slightly acidic soil with a pH between 6.0 and 6.5. Test your current mix with a soil pH meter—if it's above 7.0, you'll need to lower it. I add 1 tablespoon of elemental sulfur per gallon of mix and remix thoroughly. Wait 2-3 days before planting, as sulfur needs time to react.
For a visual check, add a pinch of cottonseed meal (which also lowers pH) to the mix. You'll see the soil darken slightly, indicating improved organic content. Water the mix lightly after adjusting pH to help activate the amendments. This step is especially important if you're growing Pelargonium peltatum varieties, which are more sensitive to alkaline conditions.
☀️ Step 5: Test and Plant Your Pelargoniums
Fill your containers with the finished mix, leaving 1 inch of space at the top for watering. Gently press the soil down to remove air pockets but don't compact it—pelargonium roots need room to breathe. Plant your pelargoniums at the same depth they were growing previously, as burying the stem too deeply encourages rot.
Water thoroughly until moisture runs out the drainage holes, then let the soil dry slightly before watering again. You'll know your mix is working when the top inch feels dry to the touch after 2-3 days. This well-draining blend keeps roots happy while delivering the vibrant blooms pelargoniums are famous for—no more wilted, struggling plants!
Tips & tricks for perfect pelargonium soil mixes
Here's what I learned after years of trial and error with these finicky beauties—your pelargoniums will thank you.
Soil Texture Test: After mixing your 50% potting mix with 25% perlite and 25% coarse sand, perform this quick check: Scoop a handful and gently squeeze. The mix should crumble easily when released but still hold its shape—like damp sandcastle material. If it feels too dense, add another 5% perlite. If it falls apart completely, reduce perlite by 5% and add 5% more potting mix. This balance is everything for root health.
pH Adjustment Shortcut: When lowering pH with elemental sulfur, I've found a simple trick: Sprinkle the sulfur directly onto the mix while stirring, then cover with plastic wrap for 24 hours. This speeds up the reaction time from the usual 2-3 days to just one day—perfect when you're ready to plant sooner rather than later. Just remember to water lightly after the 24-hour period to activate the amendments.
Organic Matter Alternatives: While coarse horticultural sand is my go-to for that perfect gritty texture, I've successfully substituted 1 part chopped fir bark for the 25% organic matter. It breaks down even slower than orchid bark, giving you longer-lasting structure. For a more nutrient-rich option, try 1 part worm castings—they add beneficial microbes while maintaining excellent drainage. Just reduce the perlite slightly to 20% if using worm castings, as they hold more moisture.
Container Considerations: If you're using terracotta pots, you'll need about 10% more mix than calculated for plastic containers—they dry out faster. For hanging baskets, increase perlite to 30% to prevent compaction at the bottom where roots cluster. And here's a pro move: Line the bottom of containers with 1/4-inch gravel before adding your mix to create an extra drainage layer, especially important for Pelargonium peltatum varieties that are prone to root rot.
Pro Tips for Soil For Pelargoniums
- Here's what I learned after years of trial and error with these finicky beauties—your pelargoniums will thank you.
- Soil Texture Test: After mixing your 50% potting mix with 25% perlite and 25% coarse sand, perform this quick check: ...
- pH Adjustment Shortcut: When lowering pH with elemental sulfur, I've found a simple trick: Sprinkle the sulfur direct...
Frequently asked questions
Got questions about the perfect soil for your pelargoniums? You’re not alone! Here are answers to the most common queries—so you can keep those vibrant blooms thriving without the guesswork.
What’s the ideal pH level for pelargonium soil?
Pelargoniums prefer a slightly acidic to neutral soil with a pH range of 6.0 to 7.0. Test your soil with a kit—if it’s too alkaline (above 7.5), amend it with peat moss or pine bark to lower the pH. Overly acidic soil (below 5.5) can stunt growth, so balance it with lime or compost.
Can I use regular garden soil for pelargoniums?
No—regular garden soil is too dense and retains too much moisture
, which risks root rot. Pelargoniums need a lightweight, well-draining mix (like 50% potting soil + 30% perlite + 20% sand). If you’re short on time, a pre-mixed cactus/succulent blend works in a pinch!
How often should I repot pelargoniums to refresh the soil?
Repot every 1–2 years or when roots crowd the container. Spring is the best time—spring = new growth! Use a slightly larger pot (just 1–2 inches bigger) with fresh, well-draining soil. Pro tip: Add a handful of slow-release fertilizer to the new mix for a nutrient boost.
Why are my pelargonium leaves turning yellow? Is the soil the issue?
Yellow leaves often signal overwatering or poor drainage. Check the soil: if it’s soggy, your mix may be too heavy. Amend with coarse sand or vermiculite to improve airflow. Also watch for:
- Brown, crispy edges = underwatering or low humidity.
- Mushy stems = root rot (cut back dead roots and repot in fresh mix).
Are there organic alternatives to peat moss for pelargonium soil?
Replace peat moss with:
- Coconut coir (sustainable, retains moisture well).
- Composted bark (adds structure and acidity).
- Leaf mold (improves drainage and nutrients).
Wrapping up and next steps
Choosing the right soil for pelargoniums is the secret to vibrant blooms and thriving plants! 🌸 A well-draining, slightly acidic mix—rich in organic matter and perlite—sets the stage for healthy growth. With the perfect blend, your pelargoniums will reward you with stunning flowers all season long.
Now that you’re equipped with the knowledge, it’s time to roll up your sleeves and get planting! Grab your supplies, mix that soil, and give your pelargoniums the ideal home they deserve. Happy gardening—your blooms will thank you! 🌱