
How To
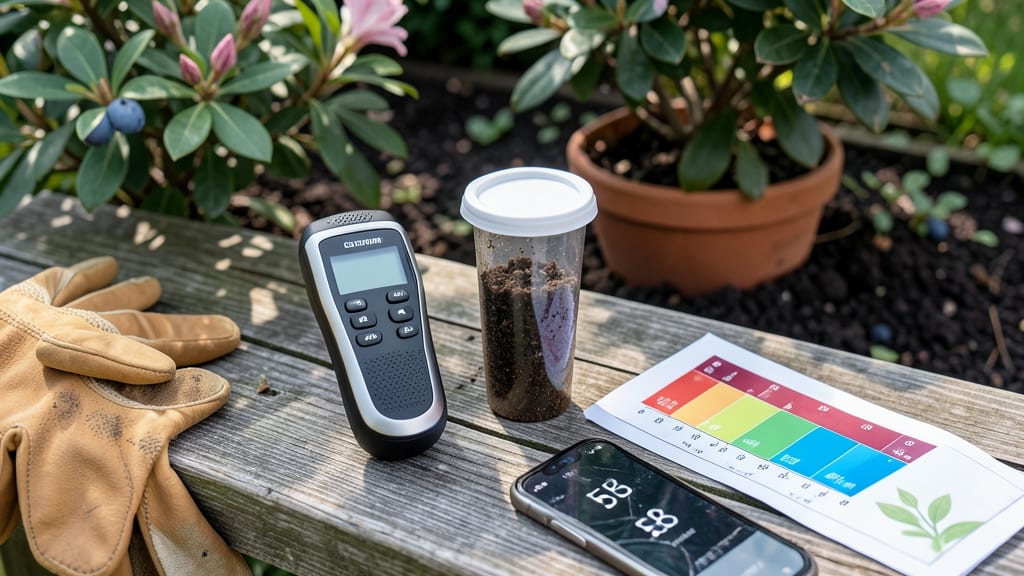
A soil acidity tester in your gardening toolkit means no more guessing whether your blueberries will thrive or your azaleas will sulk. 🌱 The right pH level transforms struggling plants into lush, productive powerhouses—without costly soil tests or lab fees.
I’ve used mine for three seasons now, and the difference in my garden’s health is night-and-day.
Testing takes just 5 minutes with a simple kit: grab a small soil sample, mix it with distilled water, and dip in the tester strips. The color change tells you exactly where your soil stands—whether it’s too acidic for your roses or just right for your blueberries.
Most kits even come with a handy chart to match colors to pH numbers.
Once you know your soil’s pH, adjusting it is straightforward. Lime raises pH for acid-loving plants like hydrangeas, while sulfur lowers it for blueberries and potatoes. A little goes a long way—think of it like fine-tuning your garden’s chemistry for peak performance.
This method works for containers, raised beds, or in-ground gardens. Whether you’re troubleshooting yellowing leaves or prepping for a new planting season, a soil acidity tester gives you the confidence to grow exactly what you want—without the guesswork.
📚 In This Guide
- What you need
- Instructions
- Tips and common mistakes
- Wrapping up and next steps
What you need
- ● Soil Acidity Tester (pH Meter or Test Kit) – Choose a digital pH meter (for instant readings) or a test kit with color-coded strips (budget-friendly). Look for a 0-14 pH range with ±0.1 accuracy.
- ● Fresh Soil Sample – Collect 1-2 cups of topsoil (0-6 inches deep) from 3-5 spots in your garden/yard. Avoid contaminated areas (e.g., near pet waste or chemical spills).
- ● Distilled Water – 1 cup per test (tap water can skew results due to mineral content).
- ● Small Container or Bowl – A clean, non-reactive plastic or glass container (avoid metal).
- ● Spoon or Trowel – For mixing soil and water evenly.
- ● Rubbing Alcohol (70% or higher) – Small bottle to sterilize the pH meter probe between tests.
- ● Notebook & Pen – To record pH levels by plant type/location.
- ● Calibration Buffer Solution – If using a digital meter, a pH 4.0 and 7.0 buffer ensures precise readings.
- ● Soil pH Adjustment Products – Lime (to raise pH) or sulfur/peat moss (to lower pH) if you plan to amend soil.
- ● Gloves – To keep hands clean while handling soil or chemicals.
- ● Smartphone with pH Tracking App – Apps like Gardenate or Soil pH Tester Pro help log and analyze trends over time.
Instructions: how to use a soil acidity tester for accurate pH readings
Here's my go-to method for getting reliable pH results in minutes—not hours.
🌱 Step 1: Prepare Your Soil Sample
Collect 4-6 small soil samples from different spots in your garden bed or container, avoiding surface mulch or thatch. Dig down 2-3 inches to reach the root zone where plants actually experience pH conditions. Use a clean trowel or spoon to gather about 1 cup of soil total.
Remove any visible debris like rocks, roots, or organic matter—these skew results. If your sample feels dry, add 1-2 tablespoons of distilled water and mix thoroughly. The goal is a uniform, clump-free sample that represents your soil's true chemistry. I like to work with damp but not soggy soil—it crumbles easily between my fingers.
💧 Step 2: Calibrate Your Tester
Most soil acidity testers require calibration before use. For liquid testers, fill the provided vial with distilled water to the marked line and add the calibration drops included in your kit. For electronic probes, simply turn it on and wait for the display to stabilize—usually 30-60 seconds. This ensures accuracy by accounting for environmental factors.
I always calibrate outdoors in natural lighting if possible—artificial light can sometimes affect readings. If your tester uses color comparison, check against the provided pH chart immediately after calibration. The reference colors should match perfectly; if not, repeat the calibration process.
☀️ Step 3: Take the Reading
Add your prepared soil sample to the tester according to the manufacturer's instructions. For liquid testers, mix 1 tablespoon of soil with the specified amount of distilled water (usually 2-4 ounces) and stir vigorously for 30 seconds. For electronic probes, insert the sensor directly into the damp soil and wait 2-3 minutes for a stable reading.
Watch for visual cues: With liquid testers, the color change happens quickly—within 1-2 minutes. Compare it against the color chart immediately; even slight delays can lead to misinterpretation. If using an electronic tester, note any fluctuations—the most consistent reading after 2 minutes is your true pH value.
✂️ Step 4: Interpret Results and Adjust
Compare your reading to the ideal pH ranges for your plants. Acid-loving plants like blueberries and azaleas thrive at 4.5-5.5, while vegetables prefer 6.0-7.0. If your soil is too acidic (below 6.0), add dolomitic lime to raise pH gradually. For overly alkaline soil (above 7.5), incorporate sulfur or peat moss.
Remember that soil pH changes slowly—don't expect immediate results. I recommend retesting 2-3 months after amendments to verify progress. Keep a garden journal to track adjustments and their effects over time. This is where the "perfect" part comes in—small, measured changes yield the best long-term results.
Tips & tricks for perfect soil pH testing
Took me years of testing to figure out—these small details make all the difference between accurate readings and wasted effort.
Sample Consistency is Key: In Step 1, when preparing your 4-6 soil samples, focus on uniformity. I crush any remaining clumps with my fingers until the soil feels like fine sand—no larger than a grain of rice. This ensures consistent contact with your tester. For electronic probes, a slightly damp sample (like crumbled cookie texture) works best; liquid testers need a finer consistency to avoid settling issues.
Calibration Environment Matters: The 30-60 second calibration window in Step 2 is more critical than most realize. I've found that calibrating in direct sunlight can cause readings to skew up to 0.3 pH points higher. If you're indoors, position your tester near a window with natural light, but avoid direct beams. For color comparison testers, use the provided chart immediately after calibration—colors fade within 30 seconds.
Timing Precision in Step 3: Those 2-3 minutes with electronic probes might seem simple, but the first 60 seconds are when most fluctuations occur. I tap the probe gently against the soil sample every 20 seconds to dislodge any air bubbles that might form. For liquid testers, the 30-second stirring is crucial—use a clean spoon to scrape the sides of the vial between stirs to prevent color gradients from forming.
Interpretation Nuance: When comparing your reading to plant ranges in Step 4, remember that most testers measure the liquid phase, not the solid soil matrix. For a more accurate picture, consider testing again after adding amendments—sometimes the pH of the amendment itself (like sulfur) can temporarily mask the true soil pH. I keep a small notebook to track both initial readings and follow-up tests after adjustments.
Pro Tips for Soil Acidity Tester
- Took me years of testing to figure out—these small details make all the difference between accurate readings and wasted effort.
- Sample Consistency is Key: In Step 1, when preparing your 4-6 soil samples, focus on uniformity.
- Calibration Environment Matters: The 30-60 second calibration window in Step 2 is more critical than most realize.
Frequently asked questions
Got questions about soil acidity testers?
You’re not alone! Here are answers to the most common queries to help you get the most out of your tool—so you can keep your plants thriving.
How often should I test my soil’s pH?
Test your soil’s pH at least once a year for established gardens, but more frequently if you’re troubleshooting plant health issues or adjusting soil for specific crops. For new gardens or hydroponic setups, test every 2-3 months until you find your ideal range.
Can I use a soil acidity tester on any type of soil?
Most testers work on garden soil, potting mix, and even hydroponic media, but avoid testing sandy or highly compacted soil—these can skew results. For clay-heavy soils, mix a small sample with distilled water (1:1 ratio) before testing for accuracy. Note: Some testers aren’t designed for alkaline soils (pH > 8.5), so check your manual!
What if my soil acidity tester gives inconsistent results?
Inconsistent readings often mean contamination or improper calibration. Clean your tester with distilled water, rinse probes thoroughly, and recalibrate if needed (follow the manufacturer’s guide). Test the same soil sample 3 times—if results vary by more than 0.5 pH, your soil may need remixing or the tester could need replacement.
Are there cheaper alternatives to a digital soil acidity tester?
Yes! pH strips (one-time use, ~$5) or liquid test kits (reusable, ~$15) are budget-friendly options. For quick checks, even a DIY vinegar/baking soda test (mix soil with each and observe bubbles) can give a rough estimate—but digital testers are far more precise for long-term monitoring.
How long do results take with a soil acidity tester?
Most digital testers provide results in 30 seconds to 2 minutes, while liquid kits may take 5-10 minutes to develop color. Always follow the tester’s instructions for the fastest and most accurate reading. Pro tip: Test multiple spots in your garden—soil pH can vary even in small areas!
Wrapping up and next steps
Testing your soil’s acidity doesn’t have to be complicated—with a soil acidity tester, you’re just steps away from unlocking healthier plants and thriving gardens! 🌱 Whether you’re a seasoned gardener or a beginner, understanding your soil’s pH is the first step toward perfect plant care.
Now that you know how to test, adjust, and maintain ideal conditions, it’s time to roll up your sleeves and get growing!
Ready to see real results? Grab your tester, head outside, and let your green thumb shine—your plants will thank you! 🌿