
Lawn
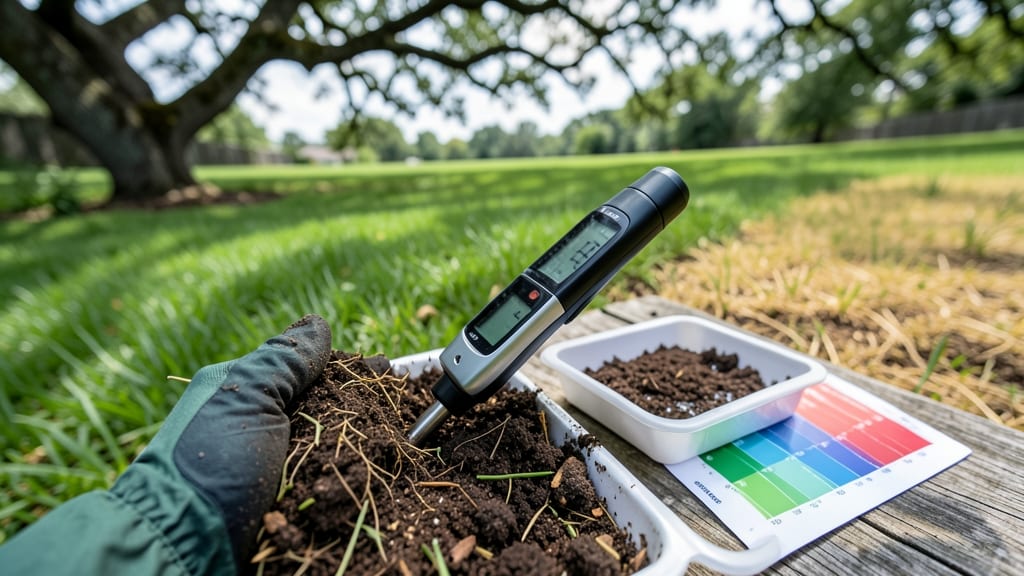
A lawn soil pH tester reveals the hidden key to your grass's health—or why it's struggling. 🌱 I've tested my own yard after years of patchy growth, and those little numbers explained everything: why clover took over, why my Kentucky bluegrass turned yellow, and why fertilizer never seemed to work.
The secret isn't just testing—it's acting on what you find. My soil tested at 6.2, which sounded fine, but my grass needed 6.8 for true vibrancy. Once I adjusted with pelletized lime, the color changed within weeks.
You'll spot these clues too: moss in shady spots (acidic soil), yellowing in sunny areas (alkaline soil), or slow growth that won't respond to fertilizer. You'll learn to read the numbers like a pro, pick the right amendments for your results, and avoid common mistakes that waste time and money.
The payoff? Grass so lush it makes neighbors ask for your secret—without expensive soil replacements or mysterious treatments. This works year-round, but spring and fall are the best times to test and adjust. Let's get your soil perfectly balanced!
📚 In This Guide
- What you need
- Instructions
- Tips and common mistakes
- Wrapping up and next steps
What you need
- ● Lawn Soil pH Tester Kit – Choose a digital pH meter (for accuracy) or test strips (for convenience). Look for kits with a calibration solution (e.g., pH 4.0 & 7.0 buffers). Budget pick: $15–$30; Pro pick: $40+ (e.g., Bluelab or Apera).
- ● Soil Samples – Collect 5–10 small cores (1–2 inches deep) from different spots in your lawn. Use a soil probe or trowel for clean extractions.
- ● Clean Containers – 5–10 small, sealed jars (2–4 oz) to store samples. Avoid metal or treated plastic.
- ● Distilled Water – 1 cup per sample (tap water can skew results).
- ● Rubber Gloves – 1 pair (to keep hands clean and avoid contamination).
- ● Notebook & Pen – To log readings and note variations across your lawn.
- ● Soil pH Adjustment Products – Lime (to raise pH) or sulfur (to lower pH) if you plan to amend soil based on results.
- ● pH Test Kit Calibration Tablets – For monthly meter maintenance (if using a digital tester).
- ● GPS or Grid Map – To track exact sample locations if your lawn has pH hotspots.
- ● pH Test Strips (Backup) – Useful if your digital tester malfunctions.
How to use a lawn soil pH tester for accurate readings
Getting precise pH readings is the first step toward a thriving lawn—here’s how to do it right every time.
🧪 Step 1: Collect Representative Soil Samples
Grab a clean trowel or soil probe and dig 6-8 small samples from your lawn, each about 4-6 inches deep. Space them 10-15 feet apart—this ensures you’re testing the whole area, not just one spot. Avoid areas near sidewalks, driveways, or where you’ve recently applied fertilizer, as those can skew results.
Use a clean bucket to mix the samples together. You’ll need about 1 cup of combined soil for most testers. Break up any clumps with your fingers—smooth, even soil gives the most accurate reading. If your lawn has patches of different grass types, test each area separately since pH needs can vary.
📏 Step 2: Prepare the Soil for Testing
Spread the mixed soil on a clean, dry surface and let it air-dry for 1-2 hours if it’s damp. Moisture can interfere with test results, especially for liquid or electronic testers. If you’re using a soil test kit with liquid reagents, follow the instructions to dissolve the sample—usually, you’ll mix 1 tablespoon of soil with 2 tablespoons of distilled water in a small container.
For digital or probe-style testers, simply press the probe into the dry soil and hold it steady for 10-15 seconds until the reading stabilizes. Don’t pack the soil down—keep it loose so the probe gets an accurate measurement. If your tester requires calibration, do it now using the provided buffer solution.
☀️ Step 3: Take and Record Multiple Readings
Test the soil in 3-4 different spots across your lawn to account for natural variations. Write down each reading—you’ll notice some areas might be 0.5-1.0 pH points different from others. Average these readings to get your lawn’s true pH level. For example, if you get 6.2, 6.5, and 6.3, your lawn’s pH is likely 6.33—round to the nearest tenth for simplicity.
If your readings vary wildly (like 5.8 in one spot and 7.2 in another), your lawn has pH inconsistencies, which means you’ll need to treat different areas separately. This often happens in older lawns where soil hasn’t been uniformly amended over time.
✂️ Step 4: Interpret Results and Plan Amendments
Most lawn grasses thrive in a pH range of 6.0 to 7.0. If your reading is below 6.0, your soil is too acidic—you’ll need to raise the pH with lime (calcium carbonate). If it’s above 7.0, your soil is alkaline, and you’ll need to lower the pH with sulfur or peat moss. For readings between 6.0 and 7.0, no amendments are needed, but monitor the pH annually to catch shifts early.
Don’t panic if your pH is outside the ideal range—most lawns can tolerate 0.5-1.0 points off without immediate action. Focus on organic matter (like compost) first, as it naturally buffers pH over time. If you do amend, test again in 4-6 weeks to confirm the change before applying more.
⏰ Step 5: Retest After Amendments for Accuracy
After applying lime or sulfur, wait 4-6 weeks before retesting. This gives the amendments time to react with the soil. Dig up a new sample from the same spots you tested initially—you’ll often see a 0.5-1.0 pH shift after proper treatment. If the change isn’t enough, you may need to reapply the amendment or adjust your method.
Keep a log of your pH readings over time. Healthy lawns usually stay within 0.2-0.3 pH points of their ideal range year after year. If you notice sudden drops (like from 6.5 to 5.8), check for new fertilizer use, heavy rain, or nearby construction—these can disrupt soil chemistry quickly.
Tips & tricks for perfect soil pH testing
Precision matters when it comes to soil testing—here's how to avoid common mistakes and get reliable results every time.
Sample Location Strategy: I can't stress this enough—those 6-8 samples in Step 1 need to be truly representative. If your lawn has sun/shade differences, test both areas separately. I once tested a single sunny spot and got a reading of 6.8, only to discover the shady side was at 5.9 after testing properly. The solution? Map your lawn and test each distinct zone. This is especially important for larger properties where soil composition can vary significantly.
Drying Time Matters: That 1-2 hour drying period in Step 2 isn't just arbitrary—it's critical for accuracy. I learned this the hard way when I rushed a damp sample and got a reading that was 0.4 points lower than the actual pH. For liquid testers, use distilled water only—tap water can introduce minerals that skew results. And if you're in a hurry, spread the soil on a baking sheet in a warm (not hot) oven for 30 minutes at 200°F to speed up drying without affecting pH.
Probe Placement Technique: When using digital probes in Step 2, don't just press down—insert the probe about 2 inches into the soil and hold it steady for those full 10-15 seconds. I've seen readings jump 0.3 points if someone lifts the probe too soon. For the most accurate results, take three probe readings at each test location and average them. This accounts for any minor variations in soil density that might affect the reading.
Interpretation Insight: That 6.0-7.0 range in Step 4 is ideal for most grasses, but different plants have different preferences. Fescue thrives at 6.0-6.5, while bluegrass prefers 6.5-7.0. If you're planting specific grass types, check their pH requirements before deciding whether to amend. And remember—soil pH naturally fluctuates with seasons, so always test at the same time of year for consistency.
Pro Tips for Lawn Soil Ph Tester
- Precision matters when it comes to soil testing—here's how to avoid common mistakes and get reliable results every time.
- Sample Location Strategy: I can't stress this enough—those 6-8 samples in Step 1 need to be truly representative. If ...
- Drying Time Matters: That 1-2 hour drying period in Step 2 isn't just arbitrary—it's critical for accuracy. I learned...
Frequently asked questions
Got questions about testing your lawn’s soil pH? Here are answers to the most common ones—so you can get back to growing that green dream lawn!
What’s the ideal pH range for most lawns?
The sweet spot for most lawn grasses is 6.0 to 7.0. Cool-season grasses (like fescue or bluegrass) thrive in slightly acidic soil (6.0–6.5), while warm-season grasses (like Bermuda or Zoysia) prefer a neutral to slightly alkaline range (6.5–7.0). Adjust based on your grass type!
How often should I test my lawn’s soil pH?
Test your soil once a year if your lawn is healthy, or every 3–6 months if you’re making big changes (like new grass, heavy foot traffic, or frequent fertilization). Spring is the best time—it gives you a full growing season to adjust pH before winter sets in.
Are digital pH testers more accurate than liquid test kits?
Digital testers (like lawn soil pH testers) are faster and more precise for real-time readings, but liquid test kits are budget-friendly and great for beginners. For critical adjustments (like lime or sulfur applications), a digital tester’s accuracy pays off. Pro tip: Calibrate your tester every few uses!
What if my pH is too high or too low—how do I fix it?
| Low pH (Acidic, <6.0) | High pH (Alkaline, >7.0) |
|---|---|
| Add pelletized lime (follow package rates). Spread evenly and water in. | Apply elemental sulfur or peat moss. Re-test in 2–3 months. |
| Bonus: Compost can also help raise pH gradually. | Tip: Avoid over-fertilizing—it can worsen alkalinity. |
Why does my pH tester give inconsistent readings?
Inconsistent readings often mean dirty soil, moisture issues, or calibration drift. Clean your tester’s probe with vinegar, test in multiple spots (avoid fresh fertilizer areas), and ensure soil is moist but not soggy. If problems persist, recalibrate or try a new tester.
Wrapping up and next steps
Testing your lawn’s soil pH with a lawn soil pH tester is the first step toward a thriving, vibrant green space! 🌱 By understanding your soil’s acidity or alkalinity, you can make informed decisions about fertilizers, amendments, and plant choices—ensuring your lawn stays healthy and resilient.
Don’t wait for problems to arise; take action now and give your grass the perfect foundation it deserves.
Next step: Grab your tester, follow the steps, and start optimizing your soil today! Your future lawn will thank you. 🌟