
Propagation
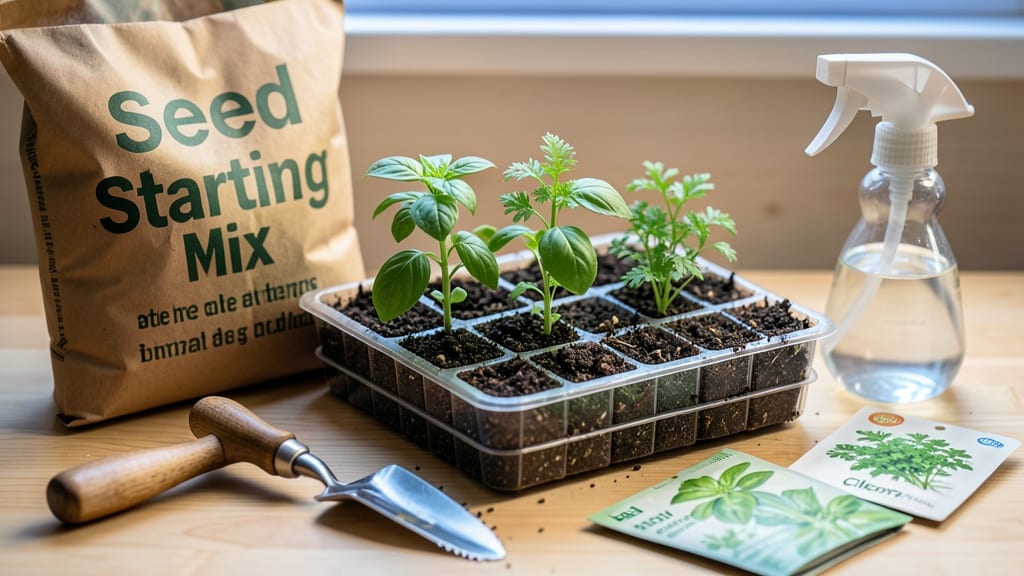
The right potting soil for seeds makes all the difference—lightweight, sterile, and fluffy enough to help tiny roots spread without drowning. 🌱 I learned this the hard way after my first batch of seedlings rotted in dense, nutrient-heavy mix that trapped moisture like a swamp.
The secret lies in a blend designed specifically for germination, not mature plants, with just enough nutrients to kickstart growth without overwhelming delicate sprouts.
Commercial seed-starting mixes are your best bet—they’re pre-sterilized to kill fungus and pests, and their fine texture holds moisture while still allowing airflow. Brands like FoxFarm or Black Gold are beginner-friendly, but you can also DIY with equal parts peat moss, perlite, and vermiculite for a budget option.
Avoid garden soil or regular potting mix, which compact too easily and harbor hidden pathogens that can wipe out your seedlings before they even peek through.
When you plant, fill your trays or pots with moistened mix, tap gently to settle it, then tuck seeds just below the surface—most need light to germinate, so don’t bury them deep.
After sowing, keep the soil consistently damp (not soggy) and warm, and you’ll see those first green shoots in as little as 3-10 days, depending on the plant. The payoff? Strong, healthy seedlings that transplant like pros instead of leggy, struggling weaklings.
Pro tip: Label your trays with seed names and dates, and store them in a bright spot (or under grow lights) away from drafts. If you’re reusing containers, sterilize them with a 10% bleach solution to prevent disease carryover.
Once you master this step, you’ll be amazed how much easier the rest of seed starting becomes—no more wasted efforts or heartbreaking failures.
📚 In This Guide
- What you need
- Instructions
- Tips and common mistakes
- Wrapping up and next steps
What you need
- ● Seed Starting Mix (Pre-Mixed): 1–2 bags (1–2 cubic feet) of sterilized, peat-based or coco coir blend (e.g., Black Gold Seedling Mix or FoxFarm Seedling Soil). Avoid garden soil—it’s too dense and may harbor pathogens.
- ○ DIY Mix Ingredients (Optional but Recommended for Customization): 50% peat moss or coco coir (holds moisture, lightweight)
- ● 30% perlite or vermiculite (1–2 parts; improves aeration and drainage)
- ● 20% worm castings or compost (1 part; adds nutrients without compacting)
- ● Containers: Seed trays, cell packs, or small pots (2–4 inches deep) with drainage holes.
- ○ Optional: Clear plastic domes or plastic wrap to retain humidity.
- ● Sterilization Supplies (If DIY Mix): Baking sheet or large tray
- ● Oven or microwave (to sterilize components at 200°F/93°C for 30+ mins)
- ● Watering Tools: Spray bottle (for gentle watering) or a watering can with a fine rose.
- ● pH testing kit (ideal range: 5.8–6.5 for most seeds)
- ● Fungicide (e.g., hydrogen peroxide 3% or mycorrhizal inoculant for disease prevention)
- ● Grow lights or a sunny windowsill (6–8 hours of light daily)
- ● Seedling heat mat (for cold-weather germination)
How to prepare the perfect potting soil for seed germination
Here's how I create a foolproof mix that gives seeds the ideal start—lightweight, sterile, and packed with nutrients.
🌱 Step 1: Start with a Base of Quality Seed-Starting Mix
Grab a sterilized seed-starting mix—this is your foundation. I like mixes labeled "organic seed starter" because they're formulated to prevent damping-off and provide just the right balance of moisture retention and drainage. Avoid garden soil or potting mix meant for established plants; they're too dense and can harbor pathogens that will rot your seeds before they even sprout.
If you're using a bagged mix, you can skip sterilization since most commercial seed-starting mixes are heat-treated. But if you're blending your own, spread the mix in a shallow tray and bake it at 200°F for 30 minutes to kill any lurking fungi or bacteria. Let it cool completely before using—warm soil can shock seeds and delay germination.
🌿 Step 2: Lighten the Mix for Better Aeration
Seeds need air around their roots to grow strong, so I always amend the mix with perlite or vermiculite. These materials create tiny air pockets that prevent compaction. For every 4 quarts of seed-starting mix, add 1 quart of perlite—it's lightweight, sterile, and won't break down over time. Vermiculite works too, but it holds more moisture, so use it if your climate tends to dry out quickly.
Gently fold the perlite into the mix with your hands or a small garden trowel. You want an even distribution so every seed gets the same airy environment. If you're feeling fancy, add a handful of sand (coarse, not fine) to further improve drainage, but this is optional for most seed-starting scenarios.
💧 Step 3: Add Nutrients Without Overloading
Seeds don't need heavy feeding at first, but a light boost of nutrients helps them grow into sturdy seedlings. Mix in 1 tablespoon of balanced organic fertilizer (like 5-5-5 or 3-4-6) per 2 gallons of mix. I prefer organic options because they release nutrients slowly, giving seedlings a steady supply without burning tender roots. Avoid chemical fertilizers—they can concentrate too quickly and harm young plants.
If you're starting delicate seeds like lettuce or snapdragons, skip the fertilizer entirely and wait until the first true leaves appear before adding any nutrients. For heartier seeds like beans or marigolds, the light feeding helps them push through the soil faster.
✂️ Step 4: Moisten the Mix to the Right Consistency
Now for the tricky part—getting the moisture just right. Fill a clean spray bottle or watering can with lukewarm water (cold water can shock seeds) and gently mist the mix until it's damp but not soggy. You want it to hold together when squeezed lightly but not drip water. Think of it like a wrung-out sponge: firm but not wet.
Test it by grabbing a handful of the mix. If it crumbles easily when you open your hand, it's too dry. If it sticks together tightly, it's too wet. The perfect mix will hold its shape when you squeeze it but fall apart with a light tap. This consistency ensures seeds stay hydrated without drowning in their own moisture.
☀️ Step 5: Store or Use Immediately
If you're not using the mix right away, store it in a sealed container for up to 2 weeks. Moisture will evaporate over time, so give it a quick mist before planting. For best results, use the mix within a few days—freshly mixed soil holds its structure better and provides the ideal environment for germination.
Once you're ready to plant, fill your seed trays or pots to about 1 inch below the rim. Tap the container gently on the table to settle the soil, then smooth the surface with your fingers. This ensures even contact between the soil and seeds, which helps with consistent germination. Now you're ready to sow!
Tips & tricks for perfect seed germination mix
These small adjustments can make all the difference between seeds that sprout reliably and ones that disappoint.
Sterilization Secret: If you're mixing your own soil blend, the 200°F for 30 minutes sterilization step isn't just about killing pathogens—it also activates beneficial microbes that help seeds establish faster. Spread the mix in a shallow tray for even heat distribution, and let it cool completely before use. Warm soil can shock seeds and delay germination by up to 48 hours.
Texture Test: For Step 2, when mixing in perlite, take an extra moment to test the final texture. The ideal mix should feel like a damp sponge—it should hold its shape when squeezed but crumble with gentle pressure. Too much perlite makes the mix too airy, while too little defeats the purpose of improved aeration. Think "fluffy but cohesive."
Fertilizer Timing: The 1 tablespoon per 2 gallons fertilizer recommendation works perfectly for most seeds, but here's what I've learned: For seeds with large embryos (like beans or peas), add the fertilizer directly to the mix. For tiny seeds (like lettuce or carrots), it's better to withhold fertilizer until after germination—just sprinkle it lightly on the soil surface after the first true leaves appear.
Moisture Maintenance: After you've achieved that perfect wrung-out sponge consistency in Step 4, store your mix in a sealed container with a damp paper towel on top. This prevents the mix from drying out completely while you're not using it. If you notice the top layer drying faster than the rest, give it a light mist before planting—just enough to refresh the surface without oversaturating.
Pro Tips for Potting Soil For Seeds
- These small adjustments can make all the difference between seeds that sprout reliably and ones that disappoint.
- Sterilization Secret: If you're mixing your own soil blend, the 200°F for 30 minutes sterilization step isn't just ab...
- Texture Test: For Step 2, when mixing in perlite, take an extra moment to test the final texture. The ideal mix shoul...
Frequently asked questions
Got questions about the best potting soil for seeds? You’re not alone! Here are answers to the most common concerns—from timing to troubleshooting—to help your seeds sprout like a pro.
What’s the difference between potting soil and seed-starting mix?
A regular potting mix is heavier and may contain fertilizer or additives that can harm delicate seedlings. A seed-starting mix is sterilized, lightweight, and free of large particles or nutrients that could impede germination. Think of it as a cozy, sterile blanket for your tiny sprouts!
Can I use garden soil from my yard for seeds?
Not ideal! Yard soil is often compacted, contains weeds, pathogens, or pests, and lacks the airy texture seeds need. If you’re in a pinch, sterilize it by baking at 200°F (93°C) for 30 minutes or soaking in a 1:10 bleach-water solution (let it dry completely first). But for best results, stick with a sterilized seed mix.
How do I know if my potting soil is too wet or too dry for seeds?
Test it like this: Squeeze a handful gently—if water drips out, it’s too wet (seeds can rot). If it crumbles like dust, it’s too dry. The perfect mix should hold moisture but not feel soggy. Aim for consistent dampness, like a wrung-out sponge. Pro tip: Use a spray bottle for even moisture!
What if my seeds aren’t germinating? Could the soil be the problem?
Maybe! Check these soil-related culprits:
- Too cold: Seeds need warmth (70–85°F for most). Use a heat mat if your home is chilly.
- Poor drainage: Compacted soil suffocates seeds. Fluff the mix with perlite or vermiculite.
- Old or stale soil: Nutrients break down over time. Replace soil every 6–12 months.
- Depth issues: Bury seeds too deep? Follow the packet’s guidelines (usually 2–3x seed width).
Are there eco-friendly alternatives to commercial seed-starting mixes?
Try these DIY options:
Material
Ratio
Notes
Coconut coir
100% or 50% coir + 50% perlite
Sustainable, retains moisture, and mimics peat moss.
Compost + perlite
70% compost + 30% perlite
Use worm castings for nutrient boost (sterilize first!).
Sphagnum peat moss
100% or blended with sand
Lightweight but non-renewable—opt for reclaimed peat if possible.
Sterilize homemade mixes by baking or steaming to kill pathogens. For extra safety, add a fungicide like hydrogen peroxide (3% solution, 1 part to 10 parts water).
Wrapping up and next steps
Choosing the right potting soil for seeds is your first step toward a thriving garden—sterilized, lightweight, and nutrient-rich mixes create the perfect foundation for germination. Remember, drainage, aeration, and moisture retention are key, so don’t skip sterilizing your soil to avoid mold or pests.
With the right mix and a little patience, you’ll watch those tiny seeds sprout into strong, healthy plants! 🌱
Ready to get growing? Start by testing a small batch of your mix, then scale up as you gain confidence. Happy planting—your future garden awaits! 🌿