
Propagation
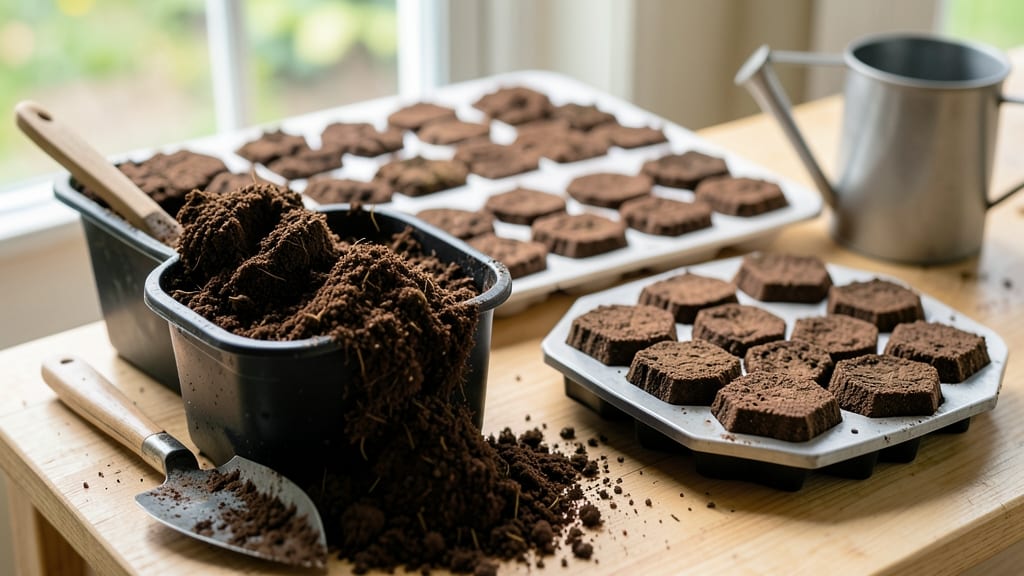
Creating the perfect seed starting mix for soil blocks means faster germination and stronger seedlings—no fuss, just results. 🌱 I’ve spent years perfecting this blend, and it’s the reason my seedlings outpace store-bought plants by weeks.
The magic lies in balancing moisture retention with aeration, so roots grow bold and roots don’t rot. This mix skips the heavy, compacted soil of traditional seed-starting mixes.
Instead, it’s lightweight—50% coconut coir, 30% perlite, and 20% compost—giving seedlings room to breathe while holding just enough moisture. The blocks themselves are easy to handle, so you’re not wrestling with fragile pots later.
You’ll see sprouts in 3-5 days (sometimes faster!) and transplants that hit the ground running. No more leggy, weak seedlings—just sturdy, fast-growing plants ready for the garden. The blocks break down naturally, so you can pop them right into the soil.
Works for tomatoes, peppers, herbs, and more—just adjust watering based on your climate. Here’s how to mix it up in minutes!
📚 In This Guide
- What you need
- Instructions
- Tips and common mistakes
- Wrapping up and next steps
What you need
- ● Coco coir (or peat moss) – 2 parts (holds moisture and structure)
- ● Perlite – 1 part (for aeration; 1-2mm size recommended)
- ● Vermiculite – 1 part (retains moisture; medium-grade preferred)
- ● Compost or worm castings – ½ part (adds nutrients; organic-only)
- ○ Lime (optional but helpful) – 1 tsp per 5 gallons (balances pH if needed)
- ● Soil block maker (manual or electric; 1-2” block size ideal for seeds)
- ● Large mixing bin or wheelbarrow (for blending ingredients)
- ● Garden trowel or shovel (for stirring)
- ● Spray bottle with water (to moisten mix before use)
- ● Flat tray or seedling mat (for drying blocks; elevated to prevent sogginess)
- ○ pH test kit (optional but recommended; aim for 6.0–7.0)
- ● A well-ventilated workspace (perlite/vermiculite can be dusty!)
- ● Clean hands or gloves (soil block mix is sterile—keep it that way!)
- ● Access to water (filtered or rainwater preferred to avoid chemicals)
- ● Patience (3–5 days) – Blocks need time to dry and firm up before planting.
Step-by-Step instructions for making fast-germinating soil blocks
Here’s the foolproof method I use to create soil blocks that germinate in days, not weeks.
🌱 Step 1: Combine Materials for the Perfect Texture
In a large mixing bowl, combine 2 parts peat moss, 1 part coco coir, and 1 part perlite by volume. I like to measure by weight for consistency—aim for 20% perlite to ensure aeration without compacting. The mix should resemble damp, crumbly potting soil with visible air pockets when squeezed.
Add 1 tablespoon of worm castings per 4 cups of mix to boost microbial activity. This isn’t just about nutrients; the castings help the blocks hold together while still allowing roots to penetrate easily. Mix everything thoroughly until the color is uniform and the texture is even.
💧 Step 2: Hydrate the Mix to the Right Consistency
Gradually add warm water while stirring until the mix reaches the consistency of damp sand—it should hold together when pressed but not drip water. You’ll know it’s right when a handful forms a firm block that crumbles slightly when tapped. Overwatering here will make the blocks too dense; under-watering will leave them dry and brittle.
Let the mix rest for 10 minutes to absorb moisture evenly. This step is critical: if the mix is too wet, your blocks will fall apart when handling; if too dry, seeds won’t germinate consistently. I test by squeezing a handful—if water beads form on the surface, it’s still too wet.
⏰ Step 3: Press Blocks Using the Soil Block Maker
Fill the soil block maker’s reservoir with the hydrated mix, pressing firmly but evenly to eliminate air pockets. Tap the sides of the maker 3-4 times to compact the mix uniformly. Overfilling leads to messy overflow, while underfilling creates weak, uneven blocks. I like to press just until the mix reaches the top edge of the mold.
Flip the maker onto a flat surface and press down firmly to release the block. It should pop out cleanly with minimal sticking. If blocks crumble when removed, your mix was too dry—add a splash of water and remix. If they stick badly, your mix was too wet; let it dry slightly before retrying.
🌿 Step 4: Plant Seeds Directly Into the Blocks
Use a toothpick to poke a ¼-inch deep hole in the center of each block. Drop 1-2 seeds into the hole—so many beginners overcrowd, leading to weak seedlings. Cover lightly with a pinch of the mix, then mist the surface with water until damp but not soggy. The goal is to keep the block’s structure intact while ensuring seeds stay hydrated.
Place the blocks in a humidity dome or clear plastic bag to retain moisture. I like to prop them up slightly on a wire rack to allow airflow at the base. Seeds should germinate in 3-7 days, depending on the species. Watch for the first true leaves—that’s your cue to remove the dome immediately to prevent damping-off.
☀️ Step 5: Provide Ideal Conditions for Fast Germination
Position the blocks in a warm, bright location with 70-75°F soil temperature. A seedling heat mat helps if your space runs cooler. Avoid direct sunlight at this stage—it dries out the blocks too quickly. Instead, use a grow light 4-6 inches above the blocks for 12-14 hours daily. You’ll see the difference in just days: strong, stocky seedlings vs. leggy, weak ones.
Water gently every 2-3 days by bottom-watering—place the blocks in a tray of ½-inch water for 10 minutes, then drain. This method ensures even moisture without disturbing the delicate root systems. Once seedlings have 2-3 true leaves, they’re ready to transplant directly into the garden or larger containers.
Tips & tricks for perfect soil block mix
These game-changing tricks will help you create blocks that germinate faster and grow stronger—no guesswork involved.
Mix Consistency is Everything: The 10-minute rest in Step 2 lets the moisture distribute evenly, which is critical for block integrity. If you skip this, your blocks may crumble when handling. I find it helps to cover the bowl loosely with plastic wrap during this time to prevent moisture loss while still allowing airflow. This small pause prevents both overwatering and under-hydration issues that plague beginners.
Perlite Percentage Matters: Stick to that 20% perlite target in Step 1—this isn't just about aeration, it's about creating the perfect balance. Too little perlite (under 15%) makes blocks too dense, while too much (over 25%) creates weak structures that collapse. I've ruined batches both ways, so trust the ratio! The perlite should be visibly distributed but not clumping together.
Block Release Technique: When pressing blocks in Step 3, the 3-4 taps on the maker's sides are more important than you might think. These taps eliminate hidden air pockets that would otherwise create weak spots. After flipping, press firmly but evenly—if the block sticks, it's either too wet (add more perlite) or your maker needs a light coating of mineral oil to prevent sticking. A clean release means strong blocks that hold their shape.
Seed Placement Precision: That ¼-inch hole in Step 4 is your seed's lifeline. Use a toothpick to make it just deep enough to cover seeds lightly without burying them. I've seen beginners poke holes too shallow (seeds dry out) or too deep (seeds rot). Place seeds on their sides rather than upright for more stable germination. The goal is to maintain block structure while creating an ideal micro-environment for roots.
Pro Tips for Seed Starting Mix For Soil Blocks
- These game-changing tricks will help you create blocks that germinate faster and grow stronger—no guesswork involved.
- Mix Consistency is Everything: The 10-minute rest in Step 2 lets the moisture distribute evenly, which is critical fo...
- Perlite Percentage Matters: Stick to that 20% perlite target in Step 1—this isn't just about aeration, it's about cre...
Frequently asked questions
Got questions about seed starting mix for soil blocks? You’re not alone—this method has its quirks! Here are answers to the most common ones to help you grow like a pro.
What’s the best ratio of peat moss to perlite for soil blocks?
The classic 70% peat moss (or coco coir) to 30% perlite is ideal—it balances moisture retention and aeration. For faster drainage, bump perlite to 40%. Avoid sand; it compacts over time and disrupts airflow. Pro tip: sterilize your mix (bake at 200°F for 30 mins) to prevent mold!
How long do soil blocks take to dry before planting seeds?
Fresh blocks dry in 24–48 hours at room temp, but speed it up with a fan or sunny spot. Test readiness by pressing gently—if it holds shape but crumbles slightly, it’s ready. Over-drying? Mist lightly before planting. Never soak blocks; they’ll stay soggy and suffocate roots!
Can I reuse soil blocks for a second planting?
Yes! Clean and sterilize used blocks (soak in 1:9 hydrogen peroxide/water for 10 mins, then dry). Reuse them for fast-growing crops like lettuce or radishes, but avoid heavy feeders (tomatoes, peppers) that deplete nutrients. Warning: Reused blocks may harbor pests—inspect closely before repurposing!
What if my soil blocks crack or crumble when handling?
Cracking = too much perlite or over-drying. Fix it by adjusting your mix (reduce perlite to 20–25%) or water lightly before handling. For crumbly blocks, add 10% worm castings or compost to bind the mix. Store blocks in a humid, shaded container between uses to prevent drying.
Are there eco-friendly alternatives to peat moss in soil blocks?
Swap peat for coco coir (50–70%) + perlite (a sustainable, renewable option). Other choices: composted hardwood bark (for structure) or rice hulls (for moisture control). Just ensure your mix stays lightweight and fluffy—dense materials can smother seedlings.
Wrapping up and next steps
Creating your own seed starting mix for soil blocks is a game-changer for gardeners—it’s easy, cost-effective, and eco-friendly! 🌱 With just a few simple ingredients, you’ll unlock faster germination, healthier seedlings, and a mess-free growing experience.
Whether you’re a seasoned pro or a beginner, this method saves time and resources while giving your plants the perfect start.
Ready to take the next step? Grab your supplies, follow the mix, and watch your seeds thrive! For extra inspiration, explore soil block variations or dive into transplanting tips to keep your garden flourishing all season long.