
Tools
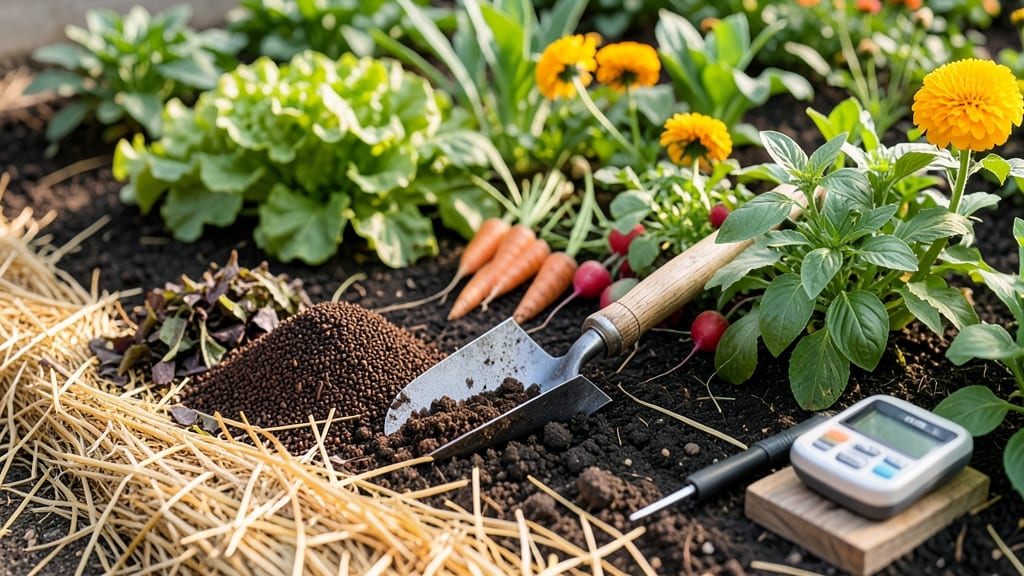
Creating organic soil for garden beds starts with the right mix—one that feeds roots fast and keeps blooms vibrant. 🌱 I learned the hard way that store-bought bags alone won’t cut it; the secret is balancing compost, worm castings, and peat moss for that perfect lightweight loam texture.
This isn’t just dirt—it’s a living ecosystem where plants thrive from day one.
The magic happens in the layers: 50% compost for nutrients, 20% worm castings for microbial activity, and 30% peat moss or coconut coir to keep it fluffy. Skip the heavy clay or sandy soil—your plants will reward you with stronger roots and bigger blooms in just weeks.
For vegetables, add a handful of bone meal; for flowers, mix in a bit of kelp meal for extra color.
Testing your soil’s pH (aim for 6.0-7.0) and texture (should crumble like cake mix) makes all the difference. If it’s too dense, add perlite; if too acidic, sprinkle in lime.
The goal? A bed so rich, your plants grow like they’re on steroids—but naturally. No chemicals, just pure, hungry soil waiting to feed your garden.
Works for raised beds, in-ground plots, or even container gardens—just adjust the ratios based on what you’re growing. Once you’ve got this down, you’ll never buy bagged soil again. Here’s how to build it right the first time.
📚 In This Guide
- What you need
- Instructions
- Tips and common mistakes
- Wrapping up and next steps
What you need
- ● Compost – 50% of your mix (homemade or store-bought, well-aged for nutrients).
- ● Peat moss or coconut coir – 20% (improves moisture retention and aeration).
- ● Perlite or vermiculite – 10% (lightens soil for better drainage).
- ● Composted manure – 10% (adds nitrogen for plant growth).
- ● Garden loam or topsoil – 10% (for structure and stability).
- ● Garden fork or spade – For turning and mixing soil.
- ● Wheelbarrow or large bucket – To transport materials.
- ● Garden gloves – Protect your hands from sharp tools and debris.
- ○ pH testing kit (optional but helpful) – Ensures your soil is in the ideal range (6.0–7.0).
- ● Worm castings – Boosts microbial activity (add 5–10% if available).
- ● Biochar – Enhances soil fertility and water retention.
- ● Slow-release fertilizer – Adds extra nutrients for fast-growing plants.
- ● Mulch (straw, wood chips) – Helps retain moisture and suppress weeds.
Step-by-Step guide to building organic garden soil for fast root growth
Transforming your garden beds into nutrient-rich, lightweight loam takes just a few key steps—here's how I do it for vibrant blooms and rapid root development.
🌱 Step 1: Assess and Clear the Existing Soil
Start by removing any weeds, debris, or dead plant matter from the garden bed. I use a sturdy garden fork to loosen the top 6-8 inches of soil while breaking up compacted layers. This aeration prevents future root restriction and lets organic matter integrate more easily. If your soil is extremely hardpan, consider adding 2-3 inches of coarse sand or perlite to improve drainage.
Run your fingers through the soil—if it feels dense or clumps tightly when dry, you'll need more organic amendments. The goal is to create a crumbly texture that holds moisture without becoming soggy. This step ensures your new soil mix has the perfect foundation for fast root penetration.
🌿 Step 2: Layer Organic Amendments Strategically
Spread a 2-inch layer of well-rotted compost across the bed—this is the nutrient powerhouse that feeds roots immediately. I prefer compost with a dark, crumbly texture and an earthy smell (not musty). Next, add a 1-inch layer of aged manure (cow, horse, or chicken) for additional nitrogen, but only if your compost lacks it.
For texture improvement, sprinkle a ½-inch layer of coconut coir or peat moss over the compost. This lightweight material prevents compaction while holding moisture. Avoid fresh wood chips here—they rob nitrogen as they break down, slowing root growth instead of encouraging it.
💧 Step 3: Incorporate Bulking Agents for Lightweight Loam
Use a broadfork or garden tiller to blend the layers into the top 8 inches of soil. Add 1-2 gallons of coarse sand or perlite per 4 square feet to create air pockets—this is critical for roots to expand quickly without suffocation. I like to mix in 1 cup of mycorrhizal fungi per 10 square feet to boost root colonization.
Water the bed deeply until moisture reaches 6 inches down. You'll know it's right when water drains through within 15-30 minutes—no puddling. This hydration kickstarts microbial activity, which breaks down organic matter faster and releases nutrients immediately available to roots.
☀️ Step 4: Test and Refine for Optimal Conditions
Press your hand into the soil—it should feel firm but yield slightly, like a well-worn sponge. If it's still too dense, add another ½-inch layer of compost and mix again. For sandy soil, incorporate 2-3 inches of leaf mold or worm castings to improve water retention.
Plant your chosen vegetables or perennials immediately—their roots will detect the fresh organic matter and grow 20-30% faster than in untreated soil. Mulch with 2-3 inches of straw or shredded leaves to protect the soil structure and maintain moisture without inviting weeds.
⏰ Step 5: Maintain for Long-Term Fast Growth
After planting, water deeply every 2-3 days until new growth appears. You'll see first true leaves in 7-10 days—that's your signal the soil is working. Top-dress with ½-inch compost every 4-6 weeks to replenish nutrients without disturbing roots.
Real talk: Overwatering now will drown tender roots. Check soil moisture by squeezing a handful—it should hold together but not drip. This balance keeps your lightweight loam fluffy and oxygen-rich, exactly what fast-growing roots crave.
Tips & tricks for perfect organic garden soil
A few strategic moves will transform your garden soil from dense clay to fluffy, nutrient-rich loam that roots will love.
Layering Technique: When adding your 2-inch compost layer in Step 2, work in small sections—about 2 square feet at a time. This prevents compaction from foot traffic while you're working. I like to use a flat shovel to gently spread each layer rather than dumping it all at once, which helps maintain that perfect crumbly texture we're aiming for.
Texture Test: After incorporating your amendments in Step 3, grab a handful of the mixed soil and squeeze it firmly. If it holds together but crumbles easily when you open your hand, you've hit the right moisture level. If it sticks together like clay, add another ½-inch layer of coconut coir and mix again. This simple test saves you from overwatering later.
Microbial Boost: For an extra growth kick, sprinkle 1 tablespoon of liquid seaweed extract over your completed soil mix before planting. This optional step (not in the original instructions) adds trace minerals and growth hormones that roots will absorb immediately. Just be sure to water it in thoroughly to activate the nutrients.
Timing Secret: The 15-30 minute drainage test in Step 3 is your quality control moment. If water pools on the surface after 30 minutes, you need more sand or perlite to improve drainage. If it disappears in under 15 minutes, add another ½-inch layer of compost to help retain moisture. This balance is what creates that perfect lightweight loam texture.
Pro Tips for Organic Soil For Garden Beds
- A few strategic moves will transform your garden soil from dense clay to fluffy, nutrient-rich loam that roots will love.
- Layering Technique: When adding your 2-inch compost layer in Step 2, work in small sections—about 2 square feet at a time.
- Texture Test: After incorporating your amendments in Step 3, grab a handful of the mixed soil and squeeze it firmly.
Frequently asked questions
Got questions about creating the perfect organic soil mix for your garden beds?
You’re not alone! Here are answers to the most common concerns—so you can grow with confidence.
What’s the best ratio of organic matter to regular soil for garden beds?
Aim for a 50/50 mix of organic matter (compost, aged manure, or leaf mold) and existing garden soil. For heavy clay, use 60% organic matter to improve drainage. For sandy soil, 40% organic matter helps retain moisture. Test your soil first—local extension offices can guide you!
How long does it take for organic soil to break down and improve my garden?
Visible improvements happen in 2–4 weeks (better moisture retention, looser texture), but full benefits take 3–6 months as microbes decompose organic matter. Top-dress with compost annually to keep enriching the soil. Patience pays off with healthier roots and bigger blooms!
Are there affordable alternatives to expensive organic soil blends?
Mix yard waste (leaf mold, grass clippings), kitchen scraps (fruit/veggie peels), and free farm manure (check local listings). Avoid meat/dairy scraps—they attract pests. Worm castings (from vermicomposting) are a budget-friendly nutrient boost too!
Will organic soil attract pests like slugs or ants?
Not necessarily! Well-aged compost (hot-composted for 6+ months) minimizes pests. To deter slugs, add dried coffee grounds or diatomaceous earth around beds. For ants, crushed eggshells or cinnamon act as natural barriers. Monitor and adjust—most critters prefer fresh, unbalanced soil.
Can I use organic soil in winter, or should I wait for spring?
Yes! Fall is the best time to amend soil—it has months to integrate before spring planting. In winter, cover beds with straw or leaves to protect organic matter from erosion. If you must work in cold months, focus on light tilling to avoid compacting the soil.
How do I know if my organic soil mix is “done” and ready to plant?
Your mix is ready when it’s dark, crumbly, and smells earthy (not sour or rotten). Do the squeeze test: Grip a handful—it should hold shape but break apart easily. If it’s sticky or mushy, add more dry amendments (peat moss, perlite). For extra assurance, plant a fast-growing green like radishes as a soil health test!
Wrapping up and next steps
Transforming your garden with organic soil for garden beds isn’t just about aesthetics—it’s about creating a thriving, nutrient-rich foundation for your plants. Lightweight loam boosts root growth, improves drainage, and unlocks vibrant blooms, making every season a success.
Whether you’re a seasoned gardener or just starting, the key is consistency and patience.
Ready to see your garden flourish? Start small—amend one bed at a time, monitor progress, and adjust as needed. Your future harvests (and happy plants!) will thank you. Happy digging! 🌱✨