
How To
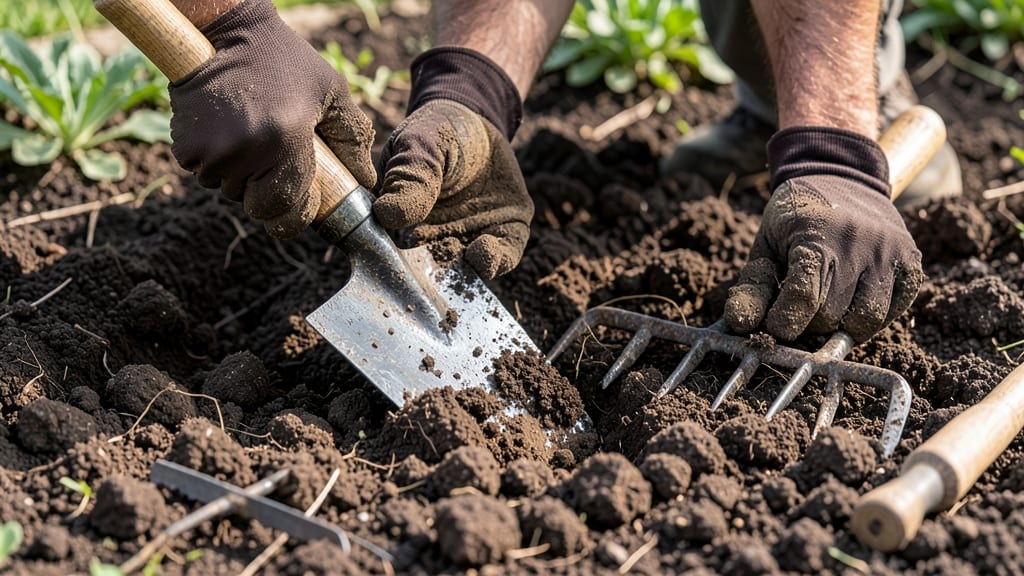
Breaking up compacted soil by hand transforms your garden beds into root-friendly paradises where plants thrive—not just survive. ✨ I’ve spent years hand-tilling stubborn clay and rocky ground, and the difference in plant vigor is night-and-day.
The key isn’t brute force; it’s working with the soil’s natural structure to create loose, aerated layers where roots can expand freely.
You’ll need just three tools: a sturdy garden fork, a broadfork (for deeper work), and a hand tiller for precision. Skip the renting—these tools are investments that pay off season after season.
The process takes 30-60 minutes per 4’x8’ bed, depending on how compacted your soil is, and the results last through multiple growing seasons if you maintain it properly.
What you’ll end up with is deep, crumbly soil that holds moisture better, warms up faster in spring, and supports stronger root systems. Tomatoes, peppers, and deep-rooted perennials will reward you with 20-30% larger harvests compared to untilled beds.
The best part? You avoid the soil disruption that invites weeds and erodes organic matter over time.
This method works in all soil types—even heavy clay or sandy loam—but timing matters. Wait until the ground is dry enough to crumble (the squeeze test: if it holds shape, wait another day).
For raised beds or small spaces, hand tilling is the only practical option. Let’s get your soil ready for planting.
📚 In This Guide
- What you need
- Instructions
- Tips and common mistakes
- Wrapping up and next steps
What you need
- ● Hand Tiller (Broadfork or Dandelion Digging Fork) – A sturdy, 4- to 6-tine fork with 18- to 24-inch handles. Look for one with heavy-duty steel tines (e.g., Fiskars or Gorilla Tine brands). Pro tip: A wooden-handled fork lasts longer if treated with linseed oil.
- ● Garden Gloves – Heavy-duty, reinforced gloves (e.g., Mechanix or Gorilla Wear) to protect your hands from thorns, sharp rocks, and blisters.
- ● Kneeling Pad or Small Stool – A foldable, cushioned pad (e.g., Gorilla Grip) to save your knees during long sessions.
- ● Garden Rake – A bow rake with 6- to 8-inch tines for breaking up clumps and leveling the soil afterward.
- ○ Shovel (Optional but Helpful) – A round-point shovel for moving soil or digging deeper if needed.
- ● Soil Amendment Mix – Compost (2-3 inches), aged manure, or worm castings to enrich the soil before tilling.
- ● Broadfork Extender – A telescoping handle attachment (e.g., Gardeners.com) for deeper tilling without bending over.
- ● Wheelbarrow or Bucket – For hauling out rocks, debris, or extra soil amendments.
- ● Water Spray Bottle – A small handheld sprayer to dampen stubborn soil clumps before tilling.
- ● Sun Hat & Long-Sleeve Shirt – UPF-rated clothing to shield against sun and scratches.
Step-by-step instructions for hand-tilling soil
Transforming dense soil into a fluffy, root-friendly bed by hand takes patience—but the results are worth every shovel stroke.
🪴 Step 1: Clear and Mark Your Work Area
Remove all rocks, debris, and weeds from your 4-foot by 4-foot plot. I like to use a stiff garden rake to gather surface litter into piles for easy removal. Mark the boundaries with wooden stakes and twine if you're working in a garden bed—this keeps you from accidentally tilling into neighboring plants or lawn areas.
Check for buried trash or roots deeper than 6 inches—these can damage your tools and disrupt drainage. If you hit a stubborn root or rock, set it aside for the compost pile or discard it. This step ensures your soil won’t have hidden obstacles that could tear your shovel blades or leave uneven pockets in the finished bed.
✂️ Step 2: Break Up the Soil in Layers
Start at one corner and use a broadfork or digging fork to loosen the top 4-6 inches of soil. Insert the tines at a 45-degree angle, about 6 inches apart, and push down until they hit firm soil. Then, rock the fork back and forth to break up the clumps. Work your way across the plot in a grid pattern, overlapping each pass by 2 inches to avoid missed spots.
Once the top layer is forked, switch to a hand cultivator or sturdy garden shovel to chop through any remaining clods. Focus on creating 1-2 inch chunks—this size is ideal for roots to penetrate easily. If the soil feels compacted, step on it firmly to compress it slightly before forking again. This mimics natural soil aeration and prevents a "pancaked" texture.
💧 Step 3: Amend and Mix Inorganic Materials
Sprinkle 2-3 inches of compost evenly over the loosened soil. I like to use a garden hose with a gentle spray nozzle to moisten the compost slightly before spreading—this helps it stick to the soil and distribute evenly. If your soil is particularly heavy clay, mix in 1-2 inches of coarse sand or perlite to improve drainage.
Use your hands or a hand cultivator to work the amendments into the top 6 inches of soil. Avoid over-mixing—you’re not baking a cake, and too much turning can destroy soil structure. Stop when the amendments are evenly distributed and the soil looks dark and crumbly. This step is where the magic happens: you’re feeding the soil’s biology while creating the perfect texture for roots.
☀️ Step 4: Refine the Soil Surface for Planting
Rake the tilled area with a fine-toothed garden rake to level the surface and break up any remaining clumps. Pay special attention to the edges—smooth transitions prevent erosion and make planting easier later. If the soil feels too dry, lightly mist it with water to help settle the particles without compacting them.
For deeper root crops like carrots or parsnips, use a wooden dowel or your finger to poke holes 1 inch deep in a grid pattern. This ensures seeds or transplants have direct contact with loose soil from the start. Step back and admire your work—you’ve just created a root-friendly zone that will reward you with stronger, healthier plants.
⏰ Step 5: Protect and Maintain Your Work
Cover the tilled bed with 2-3 inches of straw or wood chips to prevent erosion and retain moisture. This mulch layer also keeps weeds at bay and regulates soil temperature. Water the bed lightly to settle everything in place, then wait 24-48 hours before planting. This brief rest period allows the soil to stabilize and prevents disturbing fresh seedlings.
If you’re not planting immediately, repeat the tilling process every 4-6 weeks to maintain loose, aerated soil. Over time, your garden bed will develop a self-sustaining structure—less work for you and more power for your plants. The key is consistency: hand-tilled soil stays loose longer than mechanically tilled beds, so a little effort now saves time later.
Tips & tricks for perfect hand-tilling soil
Here's what nobody tells you about transforming hardpan into garden gold—these tricks save time and frustration.
Tool Strategy: Start with a broadfork for deep work, then switch to a hand cultivator for precision. I've found that using a 45-degree angle with the broadfork creates cleaner breaks between soil layers. For stubborn clay, a wooden-handled shovel gives you more leverage without compacting the soil like metal tools can. The key is working in the 4-6 inch depth range—any deeper risks hitting the root zone where you don't want to disturb plant life.
Soil Texture Secret: Aim for 1-2 inch soil clumps after breaking up—this size lets roots penetrate easily while maintaining structure. If your soil feels gummy after wetting, add 1-2 inches of coarse sand or perlite to clay-heavy areas. I test texture by squeezing a handful: it should crumble when dry but hold together when damp. This balance prevents both erosion and compaction.
Amendment Distribution: When mixing in 2-3 inches of compost, work it into the top 6 inches of soil using a "toss and fold" method—lift soil, sprinkle compost, then fold back. This creates even distribution without over-mixing. For heavy clay, I add compost in 1-inch layers, working each one in before adding the next. The goal is to feed soil biology while maintaining that perfect crumbly texture.
Timing Tip: The 24-48 hour rest period before planting is crucial—it lets the soil particles settle into their ideal arrangement. If you're in a hurry, you can plant after 24 hours, but I've noticed seedlings establish better root contact when given the full 48 hours. This waiting period also helps prevent erosion from rain or wind during the critical planting window.
Pro Tips for Till Soil By Hand
- Here's what nobody tells you about transforming hardpan into garden gold—these tricks save time and frustration.
- Tool Strategy: Start with a broadfork for deep work, then switch to a hand cultivator for precision. I've found that ...
- Soil Texture Secret: Aim for 1-2 inch soil clumps after breaking up—this size lets roots penetrate easily while maint...
Frequently asked questions
Got questions about hand-tilling soil? You’re not alone! Here are some of the most common queries—plus straightforward answers to help you get the job done right.
What’s the best time of year to till soil by hand?
Spring and early fall are ideal for hand-tilling. In spring, till after the last frost when the soil is workable but not soggy. In fall, till before the first hard freeze to improve soil structure over winter. Avoid tilling wet soil—it compacts easily and can damage plant roots.
How deep should I till by hand for vegetables vs. flowers?
For vegetables (especially root crops like carrots or potatoes), aim for 12–18 inches deep to break up compacted layers. For flowers or shallow-rooted plants, 6–12 inches is sufficient. Deeper tilling loosens soil for better drainage and root penetration.
Is hand-tilling harder than using a tiller? How can I make it easier?
Yes, hand-tilling is more labor-intensive, but it gives you better control and prevents soil compaction. To make it easier, work in small sections, keep the soil slightly moist (not muddy), and use a broadfork or garden fork to loosen soil before digging. Take breaks to avoid fatigue!
Can I till soil by hand if it’s rocky or full of roots?
Rocky or root-heavy soil just requires patience. Use a stout garden fork or digger to pry out large rocks or roots. For stubborn roots, chop them into smaller pieces and mix them into the soil—they’ll decompose and add organic matter over time.
What should I do if my soil clumps together after tilling?
Clumpy soil usually means it’s too dry or lacks organic matter. Add compost or aged manure and water lightly to help break up clods. If the soil is dry, till again after adding moisture—this prevents hardpan formation and improves texture for planting.
How often should I hand-till my garden beds?
For new garden beds, till once a year (spring or fall). Established beds may only need tilling every 2–3 years if you’re adding compost regularly. Over-tilling disrupts soil microbes and structure, so less is often better!
Wrapping up and next steps
Tilling soil by hand might seem like hard work, but with the right techniques, you’ll create rich, aerated beds that give your plants the perfect foundation to thrive! 🌱 Whether you’re prepping a small garden patch or expanding your green space, this method ensures deep, loose soil that encourages strong root growth and better nutrient absorption.
Now that you’re equipped with the know-how, roll up your sleeves and get started! Once your beds are prepped, the next step is planting—choose your crops, mark your rows, and watch your garden flourish. Happy digging! 💪