
How To
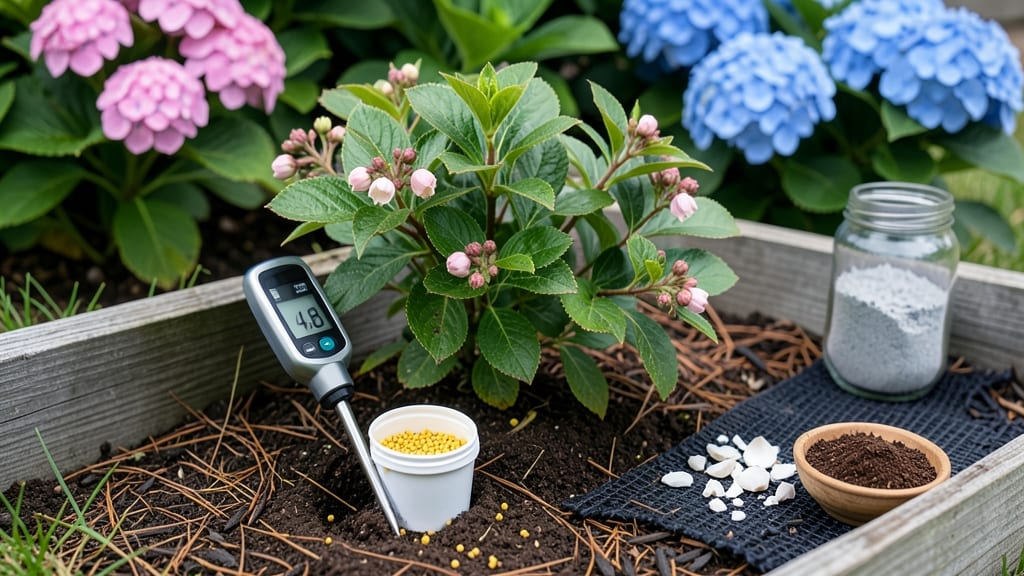
How to reduce soil pH was the game-changer for my struggling blueberries—until I discovered these quick fixes that work in weeks, not years. 🌱 Testing first with a simple kit revealed my garden soil was practically alkaline, and that’s why my acid-loving plants were struggling. The solution? Targeted amendments that lower pH safely without burning roots or disrupting soil life.
You’ll need elemental sulfur for fast results (works in 2-4 months), peat moss for organic acidity, or pine needles for a slow-release boost. My go-to combo is sulfur mixed into the top 6 inches of soil—just follow the package rates to avoid overdoing it.
For container gardens, use sphagnum peat moss in your potting mix instead.
Within a month, your blueberries, azaleas, or hydrangeas will show signs of improvement: deeper green leaves, new growth, and—if you’re lucky—those first blush of blueberries. The key is patience and re-testing every few months to keep pH in the ideal range for your plants.
This method works for in-ground beds, raised gardens, and even potted plants. Just remember: too much acidity can harm other plants, so test often and adjust carefully. Your soil’s health matters more than just the numbers on that pH test.
📚 In This Guide
- What you need
- Instructions
- Tips and common mistakes
- Wrapping up and next steps
What you need
- ● Soil pH testing kit – Digital or liquid test kits (e.g., LaMotte or MySoil) for accurate readings.
- ● Elemental sulfur – 1–2 lbs per 100 sq ft (for moderate pH reduction; adjust based on current pH). Choose powdered or pelletized forms for even distribution.
- ● Peat moss or pine bark – 2–3 inches mixed into the top 6–12 inches of soil (organic matter helps buffer pH over time).
- ● Garden fork or tiller – For aerating and mixing amendments into the soil.
- ● Gloves and dust mask – Protect your hands and lungs, especially when handling sulfur.
- ● Watering can or hose – To hydrate soil before and after amendments (sulfur works best in moist conditions).
- ● Measuring tape or grid system – To calculate soil area for precise sulfur application.
- ● Aluminum sulfate – Faster-acting than sulfur (5–10 lbs per 100 sq ft), but use sparingly to avoid over-acidification.
- ● Composted leaves or coffee grounds – Natural, slow-release acidifiers (mix 1–2 inches into soil).
- ● pH-lowering fertilizers – Look for acid-loving plant formulas (e.g., azalea/camellia blends).
- ● Soil pH calculator app – Helps determine exact sulfur/compost ratios based on your soil type and target pH.
How to lower soil pH: fast adjustments for acid-loving gardens
Here’s the method I’ve used to prep soil for blueberries, azaleas, and rhododendrons—no waiting months for slow organic fixes.
🔍 Step 1: Test Your Current Soil pH
Before adding anything, grab a soil pH test kit (digital or liquid) and take a sample from 6 inches deep where your plants will grow. Most kits include clear instructions, but I like to test in the morning when soil is cooler—results are more accurate. Aim for a reading between 4.5-5.5 for acid-loving plants; if you’re above 6.0, you’ve got work to do.
Don’t guess—soil pH varies wildly even in small areas. I’ve seen one side of a raised bed at 6.8 while the other hit 5.2 just 18 inches away. Mark your test spots with flags so you remember where to apply amendments later.
⚗️ Step 2: Choose the Right Acidifier for Your Needs
For quick results, elemental sulfur is your best bet—it lowers pH by 1-2 points per pound when worked into the soil. Use 1-2 pounds per 100 square feet for a 1-point drop (e.g., from 6.5 to 5.5). Sprinkle it evenly over the bed and water lightly to help it dissolve.
If you prefer organic options, peat moss (not composted) or pine needles work slowly but safely. Spread 2-3 inches of peat moss over the area and mix it into the top 6 inches of soil. This takes 2-4 weeks to show results, so it’s better for long-term projects. I’ve found pine needles easiest to work with—they break down naturally and add organic matter too.
💧 Step 3: Apply and Incorporate Amendments
Water the soil thoroughly before applying amendments—dry soil resists change. For sulfur, use a broadcast spreader or sprinkle by hand, then rake or till it into the top 6 inches. If you’re using peat moss, mix it in while the soil is still damp to help it bind. Avoid overdoing it; too much sulfur can harm beneficial microbes and plants.
For container plants, mix 1 part sulfur to 20 parts potting mix (e.g., 1 tablespoon sulfur per gallon of soil). Water the amended soil until it’s evenly moist but not soggy. You’ll see a difference in 1-2 weeks with sulfur, but organic methods take longer—so be patient.
☀️ Step 4: Monitor and Retest After 4-6 Weeks
Wait 4-6 weeks before retesting—this gives amendments time to fully react. If your pH is still too high, repeat the process with a slightly higher dose (but never exceed 2 pounds of sulfur per 100 sq ft in one season). I like to test again at 2 weeks, 4 weeks, and 6 weeks to track progress without overcorrecting.
Watch your plants for signs of improvement: blueberries should develop deeper purple leaves, azaleas will bloom more profusely, and rhododendrons will show stronger new growth. If you see yellowing leaves or stunted growth, you may have gone too far—rinse the soil with water to dilute excess acidity.
⏰ Step 5: Maintain pH with Regular Care
Soil pH isn’t static—rain, decomposition, and plant uptake shift it over time. To keep it stable, reapply sulfur or peat moss every 6-12 months, especially in sandy or fast-draining soils. I set a reminder in my gardening journal to retest before planting season starts.
For containers, flush the soil with distilled water every few months to prevent salt buildup from amendments. If you’re growing highly acidic plants like gardenias or hydrangeas, consider using acid-loving plant fertilizer (like Miracle-Gro Azalea, Camellia, and Rhododendron) to maintain the right conditions without drastic pH swings.
Tips & tricks for fast soil pH adjustments
These game-changing tips will help you achieve the perfect acidity range for your acid-loving plants without wasting time or money.
Precision Testing: When using a soil pH test kit in Step 1, take multiple samples from different areas of your garden—soil pH can vary dramatically even within a few feet. I've seen readings jump from 6.8 to 5.2 just 18 inches apart in the same raised bed. Mark your test spots with small flags or stakes so you remember where to apply amendments later. This attention to detail prevents over- or under-correcting different sections of your garden.
Sulfur Application Strategy: For the elemental sulfur application in Step 2, I recommend using a broadcast spreader for even distribution, but if you're working with small areas, a simple hand sprinkle works too. The key is to water lightly after application to help dissolve the sulfur—this prevents clumping and ensures even incorporation. Remember, sulfur lowers pH by 1-2 points per pound when properly worked into the top 6 inches of soil, so measure carefully to avoid overdoing it.
Organic Alternative Breakdown: If you choose peat moss or pine needles in Step 2, here's what I've found works best: Spread 2-3 inches of peat moss over the area and mix it into the top 6 inches of damp soil. For pine needles, I recommend using them fresh (not composted) and spreading them about 1-2 inches thick over the soil surface. Both options take 2-4 weeks to show results, so they're better for long-term projects rather than quick fixes. The pine needles also add organic matter that improves soil structure over time.
Container Plant Special Care: For container plants in Step 3, mix 1 part sulfur to 20 parts potting mix (like 1 tablespoon of sulfur per gallon of soil). This ratio ensures you don't over-acidify the small volume of soil in containers. After mixing, water until the soil is evenly moist but not soggy—this helps activate the sulfur's pH-lowering properties. You'll typically see visible changes in your plants within just 1-2 weeks when using sulfur in containers.
Pro Tips for Reduce Soil Ph
- These game-changing tips will help you achieve the perfect acidity range for your acid-loving plants without wasting time or money.
- Precision Testing: When using a soil pH test kit in Step 1, take multiple samples from different areas of your garden—soil pH can vary dramatically even within a few feet.
- Sulfur Application Strategy: For the elemental sulfur application in Step 2, I recommend using a broadcast spreader for even distribution, but if you're working with small areas, a simple hand sprinkle works too.
Frequently asked questions
Got questions about lowering your soil’s pH? You’re not alone! Here are answers to the most common concerns—so you can get back to gardening with confidence.
How long does it take to lower soil pH?
Adjusting soil pH isn’t instant—expect 4 to 6 weeks for noticeable changes, depending on your soil type and amendments used. Sandy soils react faster, while clay holds onto pH adjustments longer. Test your soil every 2–3 weeks to track progress and reapply amendments if needed.
Can I overdo it and make my soil too acidic?
Yes! Overusing sulfur or acidic amendments (like peat moss) can drop pH too low (below 5.0), harming plants. Aim for gradual changes—0.5 to 1 pH point per season. Monitor with a soil test kit and adjust applications based on plant needs (e.g., blueberries thrive at 4.5–5.0, while most veggies prefer 6.0–7.0).
What’s a natural alternative to sulfur or lime?
If you prefer organic methods, try:
- Pine needles or oak leaves: Slowly acidify soil as they decompose.
- Coffee grounds: Mix into the soil (1 cup per plant) for a mild pH drop.
- Aluminum sulfate: A faster-acting organic option (follow package rates).
Why won’t my soil pH change after adding amendments?
Several factors can stall progress:
- Incorrect application: Amendments must mix into the top 6–12 inches of soil.
- Rain or irrigation: Flushes out amendments—reapply after heavy watering.
- Buffering soil: Clay or high-organic soils resist pH shifts. Increase amendment doses by 25–50%.
- Testing errors: Use a reliable kit (like LaMotte) and test multiple spots.
When’s the best time to adjust soil pH?
Plan ahead! Early spring or fall are ideal—soil is workable, and plants have time to adapt before active growth. Avoid adjusting mid-summer when roots are stressed. For container gardens, amend soil before planting or refresh potting mix annually.
Wrapping up and next steps
Reducing your soil’s pH doesn’t have to be a guess—just follow the steps and materials we’ve shared, and you’ll be well on your way to happy, thriving plants! 🌱 Whether you’re adjusting for blueberries, azaleas, or other acid-loving greens, consistency is key.
Start small, test often, and soon you’ll see the difference in your garden’s health.
Ready to take the next step? Grab your soil pH kit and monitor progress every few weeks. If you’re still curious, explore organic amendments or DIY pH solutions to fine-tune your approach. Your garden (and plants!) will thank you. 💚