
How To
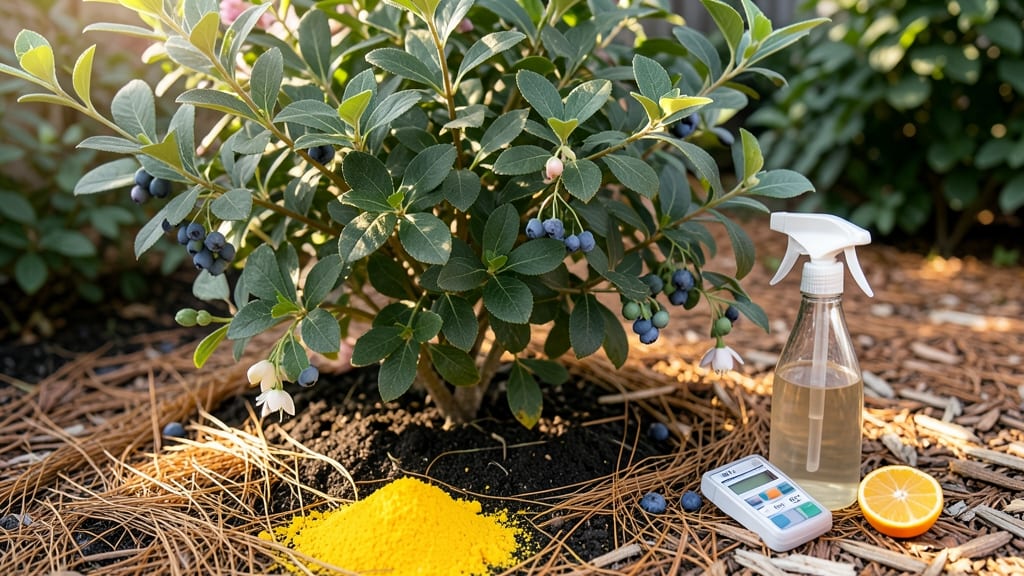
How to make soil more acidic naturally—your blueberry bushes are begging for a pH adjustment, and pine needles and coffee grounds are the secret weapons. 🌱 The right soil acidity unlocks vibrant blooms and sweet fruit, and these natural amendments work faster than you’d think without harsh chemicals. Start with a simple soil test using pH strips (available at garden centers for under $5). Aim for a pH between 4.5 and 5.5—this is the sweet spot for acid-loving plants like azaleas, rhododendrons, and potatoes. If your soil tests higher, it’s time to act. Spread 2-3 inches of pine needles (or chopped pine bark) over the soil surface and work them into the top 6 inches. Add used coffee grounds—about 1 cup per square foot—and mix lightly. This combo lowers pH gradually over 4-6 weeks, giving roots time to adjust. For stubborn high-pH soil, repeat the process every 6-12 months. Just avoid overdoing it—too much acidity can harm beneficial microbes. Test again in a few months to fine-tune your mix!
📚 In This Guide
- What you need
- Instructions
- Tips and common mistakes
- Wrapping up and next steps
What you need
- ● Pine needles – 1–2 cups per 10 sq ft of soil (fresh or dried; avoid chemically treated ones). Pro tip: Collect from healthy, untreated pine trees for best results!
- ● Used coffee grounds – ½–1 cup per 10 sq ft (fresh or composted). Pro tip: Brew a batch just for your garden—no artificial additives!
- ○ Peat moss or sphagnum peat – 1–2 inches mixed into the top 6 inches of soil (optional but effective for quick acidity boost). Pro tip: Skip if you’re avoiding peat due to sustainability concerns—pine needles alone work!
- ○ Aluminum sulfate – 1–2 lbs per 100 sq ft (optional, for faster results; follow package instructions). Pro tip: Use sparingly—it’s potent!
- ● Garden trowel or shovel – For mixing materials into the soil.
- ● Gloves – To protect your hands from sharp pine needles or gritty coffee grounds.
- ● Watering can or hose – For hydration after mixing.
- ● pH testing kit – Digital or liquid test strips to monitor soil acidity (target: 4.5–6.0 for most acidic-loving plants).
- ● Compost bin – To store pine needles and coffee grounds until use.
- ● Wheelbarrow or bucket – For hauling materials if working in large areas.
- ● Mulch (straw or leaves) – To top-dress and retain moisture/acidity over time.
Step-by-step guide to lowering soil pH naturally
Here's how I transform garden beds into thriving acid-loving environments—no harsh chemicals needed.
🌱 Step 1: Test Your Current Soil pH
Before adding amendments, grab a soil pH test kit or use a digital meter to measure your current pH. Most acid-loving plants thrive in soil between 4.5 and 6.0. If your reading is above 6.5, you'll need to lower it. I like to test in multiple spots since pH can vary by 0.5 to 1.0 points across a single bed.
Take samples from 4-6 inches deep—surface amendments won't affect deeper layers. If you're working with potted plants, test the top 2-3 inches of soil. The test results will tell you how aggressive you need to be with amendments. For example, moving from 7.0 to 6.0 requires more effort than dropping from 6.5 to 5.5.
🪴 Step 2: Gather and Prepare Acidifying Materials
Collect pine needles—they're nature's slow-release acidifier. Spread them fresh or use dried ones from your yard. Coffee grounds work too, but use them sparingly since they can compact soil. For a 4-square-foot area, I mix 2-3 inches of pine needles with ½ inch of coffee grounds.
Don't use pine bark mulch instead—it raises pH over time. Fresh pine needles are best, but if you're using dried ones, soak them in water for 24 hours first. This kickstarts decomposition and makes nutrients available faster. I also add a thin layer of sulfur powder (if needed) at 1 pound per 100 square feet for faster results.
☀️ Step 3: Apply Materials and Work Into Soil
Spread the pine needles evenly across the soil surface, then lightly rake them in so they're partially buried. This prevents them from blowing away and ensures they decompose where roots can access the acid. For coffee grounds, sprinkle them directly on the soil and mix into the top 1-2 inches.
Water the area thoroughly after applying amendments. The moisture helps activate decomposition and washes acidifying compounds into the root zone. You'll see the pine needles darken and soften within 1-2 weeks—that's your sign they're breaking down properly. Avoid tilling too deeply, as this can bury the amendments beyond root reach.
💧 Step 4: Monitor and Maintain Acid Levels
Retest soil pH after 4-6 weeks to check progress. If needed, apply another layer of amendments. Some plants, like blueberries, need constant monitoring since they prefer 4.5-5.0 pH. I retest mine every 2-3 months during growing season to adjust as needed.
Keep adding organic matter like peat moss or composted leaves to maintain acidity. These materials naturally lower pH as they decompose. Avoid lime or wood ash—they raise pH and undo all your work. Instead, think of this as a long-term process where you're building a soil ecosystem that naturally stays acidic.
⏰ Step 5: Adjust Watering for Acid-Loving Plants
Acid-loving plants often need slightly more frequent watering because their root zones stay moister. Check soil moisture by feeling 1 inch deep—if it's dry, water until moisture reaches 4-6 inches down. Rainwater is ideal since it's naturally acidic, but tap water works too if you let it sit out for 24 hours first.
You'll notice healthier growth within 4-8 weeks if the pH is right. Leaves will darken slightly, and plants may produce more flowers or fruit. If you see yellowing leaves, it could mean the pH is still too high—add more amendments and retest. This process takes patience, but once balanced, your soil will stay acidic for years with minimal maintenance.
Tips & tricks for perfectly acidic soil
Transforming your garden soil into an acid-loving haven requires patience and precision—here's how to avoid common pitfalls and maximize results.
Testing Accuracy: When using a soil pH test kit, take multiple samples from different spots in your garden bed—pH can vary dramatically even within a single 4-square-foot area. I've seen readings jump from 6.8 to 7.3 just a few feet apart! For most accurate results, test at least 3-4 spots and average them. If you're working with potted plants, focus on the top 2-3 inches of soil where roots are most active.
Material Preparation: The 24-hour soaking of dried pine needles is absolutely critical—it jumpstarts the decomposition process and prevents clumping in your soil. I like to use a large bucket with just enough water to cover the needles completely. After soaking, squeeze out excess water before applying to avoid oversaturating your soil. For coffee grounds, use only fresh, used grounds—never instant coffee powder, which won't break down the same way.
Application Technique: When raking pine needles into the soil, aim for partial burial—about half the thickness should be visible above the surface. This creates a natural mulch layer that slowly releases acid while preventing erosion. For coffee grounds, mix them into the top 1-2 inches only; deeper application can create a compacted layer that roots struggle to penetrate. Think of it like layering a lasagna—each component has its place!
Monitoring Strategy: The 4-6 week retest timeline is your best friend, but don't wait until then to check progress. After 2-3 weeks, perform a quick visual inspection: if pine needles have darkened significantly and softened, decomposition is working. For more precise monitoring, invest in a digital pH meter—it gives immediate feedback without waiting for test kit results. I keep mine in my gardening toolkit for quick checks between scheduled tests.
Pro Tips for Make Soil More Acidic Naturally
- Transforming your garden soil into an acid-loving haven requires patience and precision—here's how to avoid common pitfalls and maximize results.
- Testing Accuracy: When using a soil pH test kit, take multiple samples from different spots in your garden bed—pH can vary dramatically even within a single 4-square-foot area.
- Material Preparation: The 24-hour soaking of dried pine needles is absolutely critical—it jumpstarts the decomposition process and prevents clumping in your soil.
Frequently asked questions
Got questions about naturally acidifying your soil? You’re not alone! Here are some of the most common concerns—and straightforward answers to help you get it right.
How quickly will my soil pH change after adding acidic materials?
Most natural amendments like pine needles or coffee grounds take weeks to months to show noticeable pH shifts. Test your soil every 4–6 weeks for progress. For faster results, mix amendments into the top 6–12 inches of soil and water thoroughly. Patience is key—soil chemistry isn’t an overnight transformation!
Can I over-acidify my soil? What are the signs?
Yes! Overly acidic soil (pH < 5.0) can harm plants by locking out essential nutrients like phosphorus and calcium. Signs include yellowing leaves, stunted growth, or wilting despite proper watering. Test your soil regularly, and if pH drops too low, amend with lime or wood ash to balance it.
Are coffee grounds the best option for acid-loving plants?
Coffee grounds are effective, but they’re not the only game in town! Pine needles, peat moss, and sulfur are also great. The best choice depends on your plants: Blueberries and azaleas thrive with pine needles, while tomatoes and potatoes benefit from sulfur. Mix and match based on your garden’s needs!
How often should I reapply acidic amendments?
Annual reapplication is ideal for most gardens, but it varies by plant and soil type. Evergreens and acid-loving perennials may need amendments every 6–12 months, while vegetables like strawberries might only need a boost once a year. Monitor pH levels and adjust as needed—think of it like tuning a guitar!
Will acidic soil affect my lawn or other non-acid-loving plants?
Grasses like fescue or rye prefer neutral to slightly acidic soil (pH 6.0–7.0), while bluegrass thrives in pH 6.0–7.5. If you’re acidifying for specific plants, keep amendments localized (e.g., in garden beds) and avoid spreading them across your entire lawn. A soil test can help you map out safe zones!
Wrapping up and next steps
Transforming your soil into a thriving acidic haven is simpler than you think—just a few natural tweaks can make all the difference! 🌱 By leveraging pine needles, coffee grounds, and organic matter, you’re not only boosting acidity but also nurturing plants that crave a tangier environment.
Start small, monitor progress, and soon your garden will flourish with vibrant, happy plants.
Ready to take the next step? Test your soil’s pH every few months to track changes and adjust as needed. Happy gardening—your plants (and future harvests) will thank you! 🌿