
How To
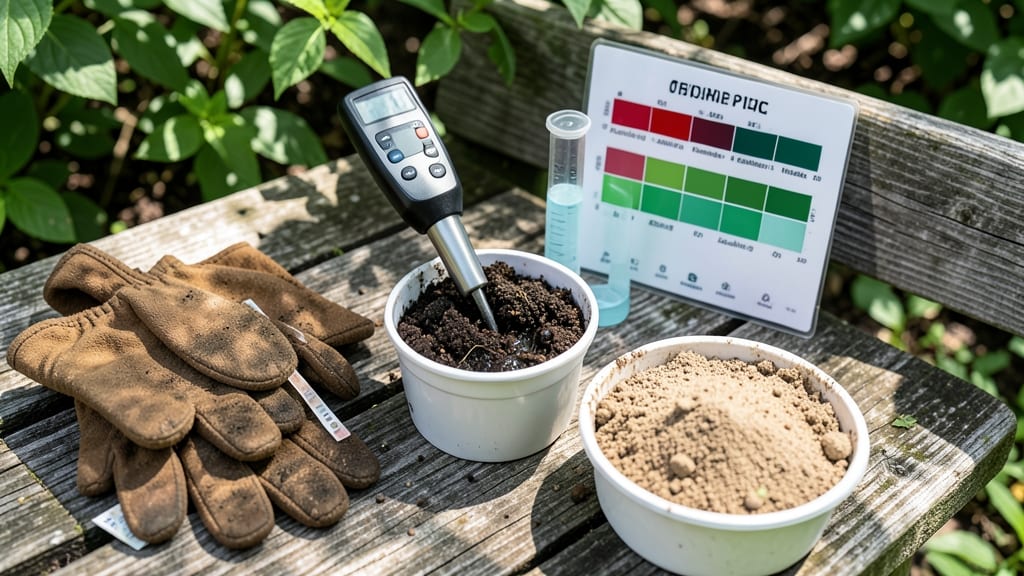
How to check soil acidity reveals why your plants are starving—you just can’t see it. Checking soil acidity reveals why your tomatoes stay small, your blueberries turn sour, or your lawn looks like straw. The quickest way is with a simple pH test kit, but you can also DIY it with vinegar and baking soda for under $5. Most gardeners don’t realize soil pH directly controls what nutrients plants can absorb, and fixing it can transform a struggling garden into a thriving one.
The easiest method uses a basic test kit (available at garden centers or online) that gives you results in 10 minutes with just a soil sample and water.
For a no-cost option, the vinegar-baking soda test tells you if your soil is too alkaline or acidic—but it won’t give you the exact pH number. Digital meters offer precision but require calibration.
Whichever you choose, grab a clean trowel, a small container, and you’re ready to dig into the science behind your soil’s health.
Once you know your pH, you’ll see why some plants thrive while others fight. Acid-loving plants like azaleas and blueberries need a pH between 4.5 and 5.5, while veggies prefer 6.0 to 7.0.
A quick adjustment—like adding sulfur for alkaline soil or lime for acidic—can make all the difference. Think of this test as your first step toward a garden that finally grows what you plant, not what you hope for.
No lab skills needed—just a little dirt and a few minutes. Whether you’re troubleshooting a struggling garden bed or planning a new planting, this test is your secret weapon.
And if you’re curious about how to adjust your soil after the test, I’ve got a simple guide waiting for you next. Let’s get that soil talking.
📚 In This Guide
- What you need
- Instructions
- Tips and common mistakes
- Wrapping up and next steps
What you need
- ● Soil sample: Fresh, undisturbed soil (about 1 cup or 240 mL per test). Avoid top layers—dig 4–6 inches (10–15 cm) deep.
- ● pH test kit: Digital pH meter: Battery-operated (e.g., Bluelab Soil pH Meter or generic models with 0–14 pH range and ±0.1 accuracy).
- ● or pH test strips: 10–20 strips (e.g., LaMotte Soil pH Test Strips) with a color chart for easy comparison.
- ● or DIY vinegar/baking soda solution: ½ cup white vinegar + ½ cup baking soda (for a visual fizz test).
- ● Distilled water: 1 cup (240 mL) (tap water may skew results due to minerals).
- ● Small container: Clear plastic or glass cup (e.g., 8 oz/240 mL) for mixing soil and water.
- ● Spoon or trowel: For collecting soil samples.
- ● Notebook: To record pH levels and observations.
- ● pH calibration solution: For digital meters (e.g., pH 4.0 and 7.0 buffers to ensure accuracy).
- ● Gloves: To keep hands clean while handling soil.
- ● Magnifying glass: For inspecting soil texture (affects pH absorption).
- ● Lime or sulfur: If you plan to adjust pH after testing (only use after confirming results).
Step-by-Step instructions for testing soil pH at home
Here’s how to check your soil’s acidity in minutes using simple tools you already own.
Collect a Representative Soil Sample
Grab a clean trowel or small shovel and dig down 4-6 inches in multiple spots around your garden. Mix these samples together in a bucket—this gives you an accurate reading of your entire planting area. Avoid surface soil, which can be misleading due to mulch or organic matter buildup. You’ll need about 1 cup of soil for testing.
If testing a large garden, take samples from different zones (sunny vs. shady areas) separately. The pH can vary even within a small yard. Once you’ve combined your samples, remove any rocks, roots, or debris. This ensures your test reflects only the soil’s natural chemistry.
Choose Your Testing Method
For a quick, no-cost test, use the vinegar and baking soda method. Fill a small bowl with 1 tablespoon of soil and add ½ cup of white vinegar. If it fizzes vigorously, your soil is alkaline (pH 7.0+). Next, take another tablespoon of soil and mix it with ½ cup of baking soda and water. If it fizzes, your soil is acidic (pH below 7.0). No fizz? Your soil is likely neutral (pH 7.0).
For a more precise reading, use a digital pH meter or pH test kit from a garden center. These tools give you a numerical pH value (0-14 scale) and are reusable. If you’re testing multiple garden beds, a kit is worth the investment—it’s faster and more accurate than household methods.
Interpret Your Results and Adjust as Needed
Most vegetables thrive in slightly acidic to neutral soil (pH 6.0-7.0). Blueberries and azaleas need acidic soil (pH 4.5-5.5), while lawns prefer mildly alkaline (pH 6.5-7.5). If your soil is too acidic, amend it with lime (calcium carbonate) in the fall. For alkaline soil, work in sulfur or peat moss in the spring.
Don’t overcorrect—small adjustments (like adding 1 pound of lime per 100 square feet) are safer than drastic changes. Re-test your soil 3-6 months later to confirm the pH is in the ideal range for your plants. This gives you time to see how the soil responds to amendments.
Maintain Healthy Soil pH Long-Term
Soil pH isn’t static—it shifts over time due to rain, organic matter breakdown, and plant uptake. Test your soil annually if you’re growing acid-loving plants like potatoes or blueberries, or every 2-3 years for general gardening. Keep a log of your pH readings to track changes year to year.
Add compost or well-rotted manure regularly—this naturally buffers pH swings. Avoid over-fertilizing with synthetic nitrogen, which can acidify soil over time. If you notice yellowing leaves or stunted growth, re-test your soil before assuming it’s a nutrient deficiency—pH imbalances are often the real culprit.
Tips & tricks for quick soil acidity testing
Here's what I've learned after testing soil pH hundreds of times—these little tricks save time and frustration while ensuring accurate results.
Sampling Depth Matters: When collecting your soil in Step 1, resist the urge to just scrape the surface. Dig down to 4-6 inches where plant roots actually grow—this is where the real chemistry happens. I've seen surface samples give misleading results, especially in gardens with mulch or fresh compost. For container plants, sample from the middle of the pot where roots are densest.
Vinegar/Baking Soda Test Precision: In Step 2, use 1 tablespoon of soil each time for consistency. I've found that using a measuring spoon works better than eyeballing—it ensures you're testing the same amount each time. Also, use ½ cup of vinegar and baking soda each time, but add them slowly to watch for the first signs of fizzing. The reaction happens fast, so be ready to observe immediately.
Interpreting Fizzing: The vigor of the fizz matters! In Step 2, vigorous bubbling with vinegar means alkaline soil, but gentle fizzing could indicate only slightly alkaline conditions. With baking soda, strong fizz means acidic, while minimal fizz suggests near-neutral soil. I keep a small notebook to compare reactions between different garden zones—some areas can vary by 1-2 pH points just a few feet apart.
Long-Term Tracking Tip: For Step 4, start a simple soil journal now. Record your initial pH reading and note which plants you're growing. After 3-6 months, retest the same spot and compare. I've seen pH shift dramatically after heavy rains or when I added compost—tracking helps you understand what affects your soil most.
Pro Tips for Check Soil Acidity
- Here's what I've learned after testing soil pH hundreds of times—these little tricks save time and frustration while ensuring accurate results.
- Sampling Depth Matters: When collecting your soil in Step 1, resist the urge to just scrape the surface.
- Vinegar/Baking Soda Test Precision: In Step 2, use 1 tablespoon of soil each time for consistency.
Frequently asked questions
Got questions about testing soil acidity? You’re not alone—here are some of the most common concerns and quick answers to help you get it right!
How often should I check my soil’s pH?
Check your soil’s pH at least once a year in the spring, especially if you’ve added amendments like lime or compost. For vegetable gardens or high-value crops, test twice a year—spring and fall—to catch shifts early. Pro tip: If your plants look stressed (yellow leaves, stunted growth), test immediately!
What if my DIY test doesn’t match a lab result?
DIY tests (like vinegar/baking soda or pH strips) give a general idea, but lab tests are precise. If results differ, double-check your sampling method—test multiple spots (6+ inches deep) and avoid surface soil. For critical gardens, cross-verify with a lab kit for accuracy.
Can I use lemon juice or orange peels instead of vinegar?
Yes! Both work—lemon juice (citric acid) or orange peels (organic acid) will fizz with alkaline soil (pH > 7). However, vinegar (acetic acid) is stronger and faster for quick tests. For a gentler option, steep peels in hot water for 24 hours to concentrate the acid.
What do I do if my soil is too acidic (low pH) for my plants?
Raise pH gradually by adding garden lime (calcium carbonate) or wood ash (for quick fixes). Work it into the top 6 inches of soil, then water thoroughly. Warning: Over-limeing can harm plants—aim for a slow adjustment (0.5 pH units per year). Test again in 2–3 months!
Are there plants that thrive in acidic soil?
Acid-loving plants (pH 4.5–6.0) include blueberries, azaleas, rhododendrons, potatoes, and strawberries. If your soil is naturally acidic, embrace it—just avoid lime and opt for organic matter (like pine needles or peat moss) to maintain balance.
What’s the best time of day to test soil?
Test soil when it’s damp but not soggy—early morning or late afternoon works best. Avoid testing after rain (soil pH can spike temporarily) or in extreme heat (which may dry out samples). Store soil samples in a cool, dry place if testing later.
Wrapping up and next steps
Checking your soil’s acidity doesn’t have to be complicated—with just a few household tools, you can unlock the secrets to healthier plants! 🌱 Whether you’re using a simple pH test kit, vinegar and baking soda, or even a DIY litmus test, understanding your soil’s pH is the first step toward a thriving garden.
Now that you’re equipped with the knowledge, take action—grab your supplies, test a few spots in your yard, and adjust as needed to give your plants the perfect growing conditions.
Ready to grow? Start testing today and watch your garden flourish! 🌟