
Orchid Care
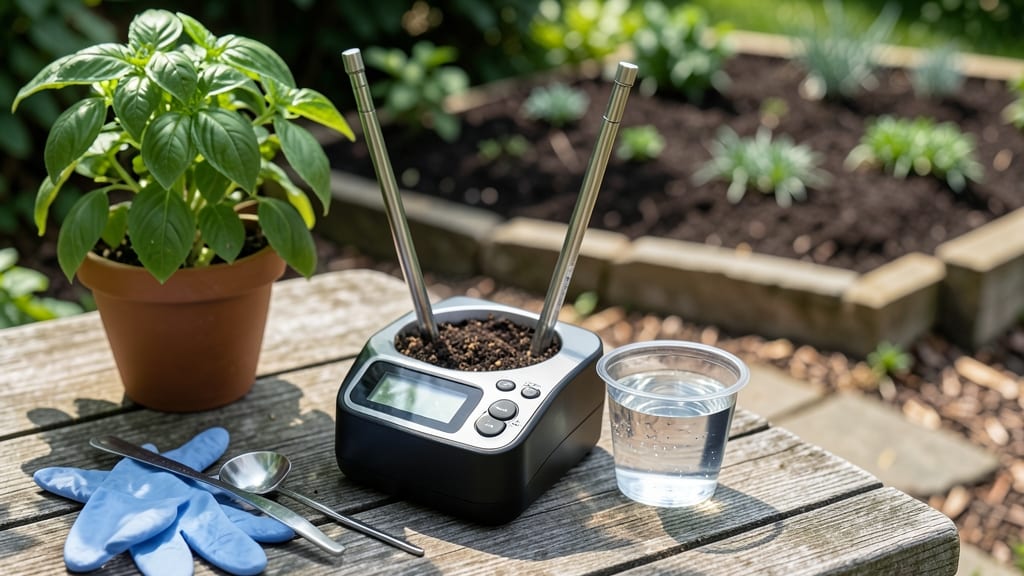
A pH meter for soil and water unlocks the secret language of orchids. 🌸 I learned the hard way that my orchids weren't thriving because of my "perfect" care routine—they were silently starving from pH imbalances that kept nutrients locked away.
That one tool changed everything by giving me numbers instead of guesswork.
The magic happens when you match the pH to what orchids actually need: 5.5 to 6.5 for most varieties. Too high or too low, and your plants can't absorb phosphorus, nitrogen, or iron—even if you're fertilizing religiously.
My Phalaenopsis suddenly responded within weeks after I adjusted my watering pH to match its needs.
You'll start seeing stronger roots, brighter blooms, and fewer yellow leaves within 4-6 weeks of proper pH management. The meter itself costs less than a fancy fertilizer, but saves you from wasting money on supplements that won't work because the pH is wrong.
Works for hydroponics too—just rinse the probe between soil and water tests. Here's how to get started without the common mistakes that throw off readings every time.
📚 In This Guide
- What you need
- Instructions
- Tips and common mistakes
- Wrapping up and next steps
What you need
- ● pH Meter: A waterproof, digital pH meter with a 0-14 pH range and ±0.1 accuracy (e.g., Bluelab pH Meter or Apera Instruments).
- ● Calibration Solutions: 2 bottles—pH 4.00 (for acidic) and pH 7.00 (neutral) calibration buffers.
- ● Distilled Water: 1 bottle (for rinsing the probe).
- ● Sample Containers: 2 small, clean containers (one for soil, one for water).
- ● Orchid Soil: A fresh sample (avoid fertilized soil for accurate readings).
- ● Tap Water or Orchid Water: 1 cup (room temperature).
- ● Paper Towels or Soft Cloth: For drying the probe between tests.
- ● pH Adjustment Kits: Lime (to raise pH) or sulfur (to lower pH) for orchid mixes.
- ● Water Filter: If testing tap water for hardness/mineral interference.
- ● Notebook: To log pH readings over time.
- ● Probe Protector: A storage case to prevent damage when not in use.
How to use a pH meter for orchid care
Accurate pH readings are the secret to orchid health—here's how to get reliable results every time.
🔍 Step 1: Calibrate Your pH Meter Before Use
Orchids thrive in pH 5.5-6.5 for soil and pH 5.0-6.0 for water, so precision matters. Start by rinsing the electrode with distilled water—never tap water, as minerals can skew readings. Most meters come with pH 4.0 and 7.0 calibration solutions. Dip the electrode into the pH 7.0 solution first, wait 30-60 seconds until the reading stabilizes, then press the calibration button. Repeat with the pH 4.0 solution—if readings vary by more than 0.2 pH units, recalibrate or clean the electrode.
I always calibrate before testing orchid media because old calibration can drift over time. A quick test: if your meter reads 6.8 in distilled water (which should be neutral), it’s time to recalibrate. Store calibration solutions tightly sealed—they degrade after 3-6 months of use.
💧 Step 2: Test Water pH for Orchid Irrigation
Fill a clean glass or plastic container with 2-3 inches of distilled or rainwater (never tap water—chlorine and minerals throw off readings). Submerge the electrode 1-2 inches deep, stir gently for 10 seconds, then wait 30 seconds for the reading to stabilize. Orchids prefer pH 5.0-6.0—if your water reads above 6.5, use rainwater or reverse osmosis water instead. For acidic adjustments, add a tiny pinch of citric acid (follow package instructions).
Here’s the thing—orchid roots are sensitive. If your water pH is below 5.0, it can damage roots over time. I test water once a month or whenever I switch water sources. Pro tip: Use a new container each time—old residue can contaminate readings.
🌱 Step 3: Measure Soil or Bark Media pH
For potted orchids, remove a small sample of bark or sphagnum moss from the pot (about 1 tablespoon). Mix it with 2 tablespoons of distilled water in a clean container until it forms a thick paste—this mimics the orchid’s root zone. Insert the electrode, stir gently, and wait 60 seconds for accuracy. Ideal orchid media pH is 5.5-6.5. If it’s below 5.0, mix in a tiny amount of crushed limestone (start with 1/8 teaspoon per gallon of media).
Don’t pack the sample too tightly—air pockets can delay stabilization. I like to test 3-4 spots in the pot if the orchid looks unhealthy, as pH can vary by depth. If the meter flickers or reads erratically, the electrode may need cleaning with vinegar (5% acetic acid) and rinsing thoroughly before retesting.
⏰ Step 4: Maintain and Troubleshoot Your Meter
After each use, rinse the electrode with distilled water and store it in storage solution (if your meter includes it) or distilled water. Replace the electrode every 6-12 months—old electrodes develop a gel-like coating that slows response time. If readings are inconsistent or take too long to stabilize, soak the electrode in storage solution overnight to rehydrate the gel.
Real talk: orchid pH issues often aren’t about the meter but user error. I’ve seen growers blame their meter when they forgot to calibrate or used tap water for rinsing. Always double-check: if your orchid’s leaves turn yellow with brown tips, it’s often high pH or overwatering, not a faulty meter. Keep a testing log to spot trends—sudden pH swings can signal root rot or fertilizer buildup.
Tips & tricks for perfect orchid pH readings
Precision is everything when it comes to orchid care—here's how to get the most accurate readings possible every single time.
Calibration Consistency: Don't skip the two-point calibration with pH 4.0 and 7.0 solutions—this is non-negotiable for accuracy. I've seen readings off by 0.5 pH units when growers only calibrate at one point. Always start with the neutral pH 7.0 solution first, then verify with pH 4.0. If your meter drifts by more than 0.2 units between these points, recalibrate immediately or clean the electrode with vinegar and rinse thoroughly.
Sample Preparation Matters: When testing soil or bark media, create a thick paste with exactly 1 tablespoon of media and 2 tablespoons of distilled water—this mimics natural conditions. The paste should be smooth but not packed too tightly, as air pockets can delay stabilization. I test multiple spots in the pot (3-4) when orchids show stress symptoms, since pH can vary by depth. For water testing, always use a clean container and fresh distilled or rainwater—never reuse containers unless you've scrubbed them with vinegar and rinsed with distilled water.
Electrode Maintenance: Store your electrode in storage solution (if provided) or distilled water when not in use—never in tap water. Replace electrodes every 6-12 months, as the gel coating degrades and slows response time. I keep a maintenance log that tracks calibration dates, electrode changes, and any unusual readings. If your meter takes longer than 60 seconds to stabilize during soil testing or shows erratic readings, soak the electrode overnight in storage solution to rehydrate the gel.
Troubleshooting Tips: If your orchid leaves develop yellow tips or brown edges, check both water and soil pH first—these symptoms often indicate high pH (above 6.5) or overwatering. For acidic adjustments, use citric acid sparingly (follow package instructions) rather than vinegar, which can be too harsh. I've found that keeping a testing log helps identify patterns—sudden pH swings often signal root rot or fertilizer buildup before visible symptoms appear.
Pro Tips for Ph Meter For Soil And Water
- Precision is everything when it comes to orchid care—here's how to get the most accurate readings possible every single time.
- Calibration Consistency: Don't skip the two-point calibration with pH 4.0 and 7.0 solutions—this is non-negotiable for accuracy.
- Sample Preparation Matters: When testing soil or bark media, create a thick paste with exactly 1 tablespoon of media and 2 tablespoons of distilled water—this mimics natural conditions.
Frequently asked questions
How often should I check the pH of my orchid’s water and soil?
For orchids, aim to test water pH every 2–4 weeks (especially if using tap water) and soil pH every 1–3 months. Orchids prefer slightly acidic water (pH 5.5–6.5) and soil (pH 5.5–6.5 for most varieties). Frequent checks help catch fluctuations before they stress your plants.
Can I use a pH meter for both soil and water, or do I need separate ones?
Most high-quality pH meters (like those with dual probes) work for both soil and water, but calibration is key. Always calibrate with buffer solutions (pH 4.0 and 7.0) before switching between tasks. For soil, rinse the probe thoroughly to avoid residue buying.
What should I do if my pH meter readings seem inconsistent or off?
Inconsistent readings often stem from poor calibration, dirty probes, or temperature fluctuations. Troubleshoot by:
- Recalibrating with fresh buffer solutions.
- Rinsing the probe with distilled water and wiping gently.
- Storing the meter in a dry, stable environment (not in water).
- Testing with a second pH strip for comparison.
Is distilled water better for calibrating a pH meter than tap water?
Absolutely!
Tap water often contains minerals (like chlorine or calcium) that skew readings. Use distilled or deionized water for rinsing probes and mixing buffer solutions. For soil tests, use dechlorinated tap water (let it sit out overnight) to avoid contamination.
What’s a good alternative if I don’t have a pH meter?
If a meter isn’t in your budget, try:
- pH test strips: Affordable and quick, but less precise (ideal for water checks).
- Plant indicators: Yellowing leaves or stunted growth in orchids often signal pH imbalances (too acidic/alkaline).
- DIY vinegar/baking soda test: Mix equal parts vinegar and water (acidic) or baking soda and water (alkaline) to test soil reactions—but this is not a substitute for accuracy.
Wrapping up and next steps
Mastering the pH meter for soil and water is your secret weapon for cultivating stunning, thriving orchids! 🌱 By understanding and adjusting pH levels, you’re not just nurturing plants—you’re unlocking their full potential.
Whether you’re a seasoned grower or just starting, this precision tool makes orchid care simpler and more rewarding.
Ready to take the next step? Test your soil and water today—your orchids (and future blooms!) will thank you. 🌸 Start small, stay consistent, and watch your green babies flourish!