
How To
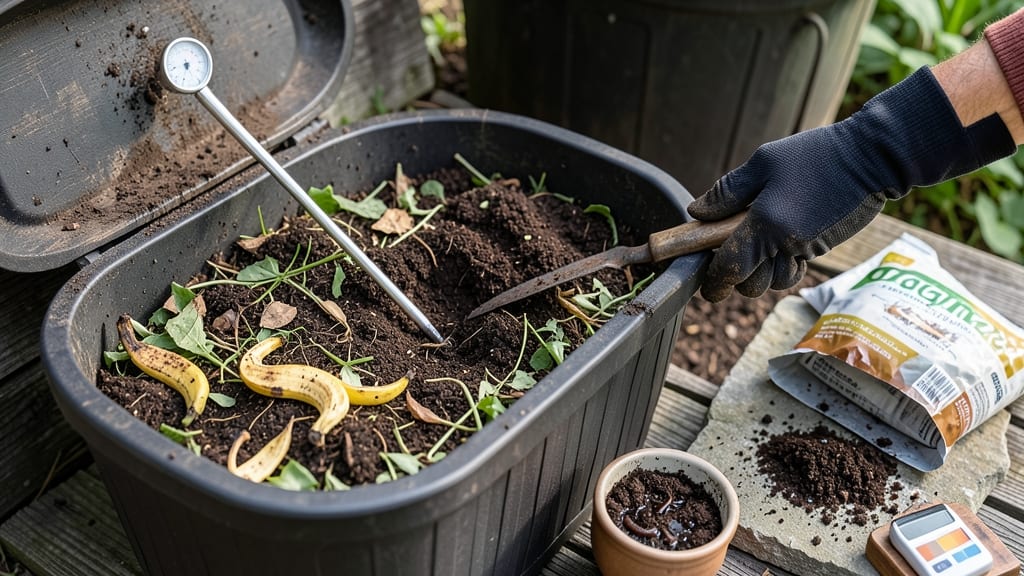
Making soil fertile isn't about quick fixes—it's about building a living ecosystem under your plants. 🌱 I learned the hard way that skipping this step means struggling with weak growth, yellowing leaves, and plants that never seem to thrive, no matter how much you water them.
The secret lies in layered organic matter: compost, mulch, and natural amendments that feed soil microbes, which in turn make nutrients available to your plants. Think of it like a slow-cooked stew—what you add today will keep your garden productive for years.
Even my first attempt with a simple compost pile and leaf mulch cut my fertilizer costs by nearly half. By the end of this, you'll have soil that's dark, crumbly, and full of life—exactly what your plants crave. The best part?
You'll notice stronger stems, deeper green leaves, and plants that resist pests better than ever before. This works for vegetable gardens, flower beds, and even container plants. Start small if you need to—even a single raised bed transformed when I focused on soil health. The key is consistency, not perfection.
Let's get those nutrients working for you!
📚 In This Guide
- What you need
- Instructions
- Tips and common mistakes
- Wrapping up and next steps
What you need
- ● Compost: 2–3 inches (5–7.5 cm) of well-aged, nutrient-rich compost (avoid fresh manure—it can burn plants). Quantity: ~1–2 cubic feet per 100 sq. ft. of garden bed.
- ● Leaf Mold or Shredded Leaves: 1–2 inches (2.5–5 cm) of decomposed leaves or leaf mold for moisture retention and organic matter. Quantity: ~1 cubic foot per 100 sq. ft.
- ● Well-Rotted Manure: Cow, horse, or chicken manure (composted for at least 6 months). Quantity: 1–2 inches (2.5–5 cm) mixed into the top 6 inches (15 cm) of soil.
- ○ Peat Moss or Coco Coir: 1–2 inches (2.5–5 cm) to improve soil structure and aeration. Quantity: ~½ cubic foot per 100 sq. ft. (optional if your soil is already loose).
- ○ Wood Ash (optional but helpful for alkaline soils): A thin layer (¼ inch or 0.6 cm) to neutralize acidity. Use sparingly!
- ● Bone Meal or Fish Emulsion: 1–2 tablespoons per square foot for phosphorus-rich boost (great for root and flower growth).
- ● Kelp Meal or Seaweed: 1–2 tablespoons per square foot for micronutrients and trace minerals.
- ● Garden Tools: Shovel or spade (for turning soil)
- ● Garden fork (to loosen compacted soil)
- ● Rake (for leveling and mixing)
- ● Gloves (to protect your hands!)
- ● Worm Castings: ½ cup per square foot for a gentle, nutrient-packed boost.
- ● Biochar: 1–2 inches (2.5–5 cm) mixed in to improve water retention and microbial activity.
- ● Cover Crops (like clover or vetch): Plant these in off-seasons to fix nitrogen naturally.
- ● Mulch (Straw, Grass Clippings, or Pine Needles): 2–3 inches (5–7.5 cm) to retain moisture and suppress weeds.
- ● pH Test Kit: To check soil acidity/alkalinity before amending.
- ● Compost Thermometer: Ensures your compost is fully decomposed (ideal temp: 140–160°F or 60–71°C).
Step-by-step instructions for building fertile soil
Here's the method I swear by for transforming tired soil into a thriving ecosystem.
🌱 Step 1: Clear and Loosen the Existing Soil
Start by removing any weeds, rocks, or debris from your 4 square foot area. I like to use a broadfork to loosen the top 6-8 inches of soil without disturbing the lower layers too much. This aeration helps roots penetrate deeper and prevents compaction.
Work the soil until it crumbles easily between your fingers. If it feels hard or clumpy, you'll need to add more organic matter later. Think of this as giving your soil a deep stretch—it needs room to breathe and grow.
🌿 Step 2: Add a Foundation Layer of Coarse Organic Matter
Spread a 2-inch layer of coarse material like chopped leaves, straw, or wood chips across the area. This layer improves drainage and prevents future compaction. I prefer straw because it breaks down slowly and adds structure without creating a mat that blocks water.
Don't skip this step—it's like laying down a moisture-wicking base for your plants. If your soil drains poorly, add a 1-inch layer of perlite or coarse sand mixed into the top few inches to improve aeration.
💧 Step 3: Layer with Nutrient-Rich Materials
Next, add a 3-inch layer of nitrogen-rich materials like grass clippings, coffee grounds, or fresh manure (composted is best). Then top with a 2-inch layer of phosphorus-potassium sources like banana peels, crushed eggshells, or wood ash. This creates a balanced nutrient profile for your plants.
I like to alternate layers—think of it like building a lasagna where each ingredient contributes something valuable. Press down lightly after each layer to eliminate air pockets, but don't compact it. You want fluff, not density.
✂️ Step 4: Top with Finished Compost
Spread a 1-2 inch layer of well-aged compost across the entire area. This is the powerhouse of fertility—it adds microbes, nutrients, and structure all at once. I use a mix of kitchen scraps and yard waste that's been composting for at least 6 months.
Work the compost into the top 6 inches of soil using your hands or a garden fork. You'll see dark, crumbly soil with earthworms and beneficial fungi—these are your fertility indicators. If you don't see these, add more compost.
☀️ Step 5: Mulch and Protect the New Soil
Finish by adding a 2-3 inch layer of organic mulch like straw, shredded leaves, or wood chips. This protects your new soil from erosion, retains moisture, and continues to break down slowly. I prefer straw because it breaks down evenly without creating a thatch layer.
Water thoroughly after mulching to help everything settle. Your soil should now look dark, crumbly, and inviting—like a five-star hotel for plant roots. Check moisture weekly by sticking your finger 2 inches deep. If it's dry, water again.
Tips & tricks for building fertile soil
Transforming your garden into a thriving ecosystem doesn't have to be complicated—just strategic. Here's what I've learned after years of trial and error to make this process even more effective.
Layering Like a Pro: When building your layers, think "coarse to fine" from bottom to top. Start with your 2-inch layer of straw or wood chips—this creates the perfect drainage foundation. Then work your way up to finer materials like compost. This gradient helps water move through the soil while retaining nutrients exactly where plant roots need them. The key is to avoid compacting any layer; just press lightly with your hands to eliminate air pockets.
Compost Quality Check: That 1-2 inch layer of finished compost is where the magic happens, so don't skimp. Look for compost that's dark, crumbly, and smells earthy—not sour or ammonia-like. If you're unsure about your compost's quality, do the "squeeze test": grab a handful and squeeze. It should hold its shape briefly but crumble easily when released. If it sticks together like wet sand, it needs more time to break down. I've found that compost with visible earthworms and fungi is always the most effective.
Mulch Selection Matters: For your final 2-3 inch mulch layer, straw is my go-to because it breaks down evenly without creating a thatch layer that blocks water. If you're using wood chips, opt for hardwood varieties that decompose slowly. The color of your mulch matters too—darker mulches absorb more heat, which can help in cooler climates, while lighter mulches reflect heat better for warmer regions. This final layer isn't just decorative; it's your soil's protective blanket against erosion and moisture loss.
Troubleshooting Common Issues: If your soil feels too dense after adding layers, you might need to incorporate more coarse material like perlite or sand into the top 6 inches. For clay-heavy soils, I've had success mixing in a 1-inch layer of perlite before adding the organic layers—this dramatically improves aeration. And if you notice your soil drying out too quickly after watering, that's a sign you need more organic matter to help retain moisture. The goal is soil that feels like a well-loved sponge—firm but never compacted.
Pro Tips for Make Soil Fertile
- Transforming your garden into a thriving ecosystem doesn't have to be complicated—just strategic.
- Layering Like a Pro: When building your layers, think "coarse to fine" from bottom to top.
- Compost Quality Check: That 1-2 inch layer of finished compost is where the magic happens, so don't skimp.
Frequently asked questions
Got questions about reviving your soil? Here are some of the most common ones—and their practical answers—to help you get growing!
How often should I add organic matter to my soil?
For most gardens, once a year (spring or fall) is ideal, but it depends on your soil type. Sandy soils need more frequent top-ups (every 6–12 months), while clay or loamy soils can go 1–2 years between amendments. Pro tip: Mix in compost or aged manure before planting for best results!
Can I use kitchen scraps directly in my garden?
Yes, but with caution! Cooked foods, meat, or dairy can attract pests and create odors. Stick to fruit/vegetable scraps, coffee grounds, eggshells, and plant trimmings in a compost bin first. If adding directly, bury scraps 6–8 inches deep to avoid critters. Bonus: Eggshells add calcium over time!
How long does it take for soil to become fertile after adding compost?
Visible improvements (like better drainage or earthworm activity) may appear in 2–4 weeks, but full fertility takes 3–6 months as microbes break down organic matter. For quick fixes, top-dress with compost before planting. Patience pays off—think of it as a soil spa!
What if my soil smells bad after adding organic matter?
A sour or rotten odor usually means too much fresh material (like grass clippings or manure) or poor drainage. Fix it by:
- Mixing in dry leaves or straw to balance moisture.
- Avoiding overwatering—soil should feel like a damp sponge, not a swamp.
- Adding lime or wood ash (sparingly) if the smell is overly acidic.
If the problem persists, your soil may need aeration (tilling or fork-loosening) to improve airflow.
Are there cheap or free alternatives to store-bought compost?
Try these zero-cost options:
- Leaf mold: Collect fallen leaves in a bin for 6–12 months—they’ll turn into nutrient-rich "dirt."
- Grass clippings: Let them dry for 1–2 days before spreading (prevents matting).
- Cardboard/newspaper: Shred and bury under mulch to break down into carbon-rich soil food.
- Weeds (seed-free!):strong> Chop and drop them directly into garden beds.
Warning: Avoid dandelions or bindweed—they’re invasive!
Wrapping up and next steps
Transforming your soil into a thriving, fertile ecosystem is totally within your reach—and the rewards are huge! By layering organic matter like compost, mulch, and green manures, you’re not just feeding your plants—you’re building a self-sustaining foundation for long-term growth.
Start small, stay consistent, and watch your garden flourish with healthier plants, richer harvests, and less work over time.
Ready to take the next step? Pick one technique from this guide—whether it’s composting, mulching, or planting cover crops—and give it a try this season. Your future plants (and your future self!) will thank you. 🌱✨