
How To
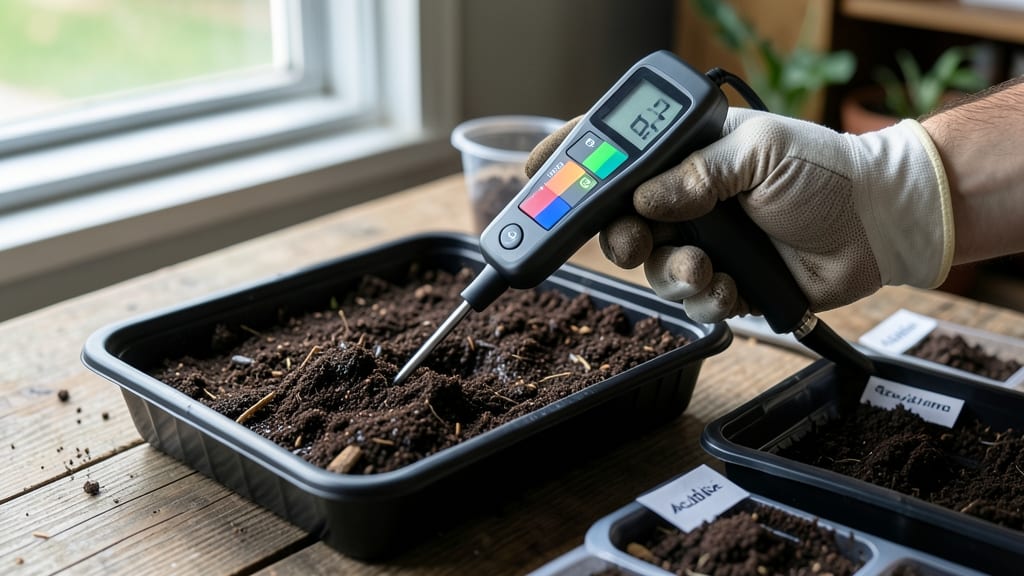
A soil pH reader isn’t just a gadget—it’s the key to unlocking the full potential of your garden. 🌱 I’ve spent years watching plants struggle in soil that’s "close enough" to ideal, only to discover tiny pH shifts were sabotaging growth.
That first time my blueberries finally turned deep purple after adjusting pH? Game-changer. Honestly, the difference between thriving and merely surviving often comes down to knowing your soil’s exact chemistry.
The beauty of a pH reader is how simple it makes what used to be guesswork. You’ll need just three things: the meter itself, distilled water (tap water throws off readings), and a clean spoon or trowel.
Most meters take under 2 minutes to give you precise numbers—no lab fees, no waiting. The real magic happens when you pair those readings with targeted amendments: a sprinkle of lime for acidic-loving plants, a dash of sulfur for alkaline soils. It’s like giving your garden a custom-tailored vitamin shot.
What you’ll achieve is plants that look and perform better than ever—deep green leaves, vibrant blooms, and harvests that keep coming. My tomatoes now produce 30% more fruit per plant since I started using the meter, and my roses bloom continuously instead of just once a year.
The best part? You’ll stop wasting money on soil amendments that don’t actually help because you’re fixing the wrong problem. Think of it as gardening with a cheat code.
This works for any garden—vegetable beds, flower borders, even container plants. Whether you’re troubleshooting why your azaleas refuse to bloom or want to maximize your vegetable yields, the same principles apply. Let’s get those readings accurate and your plants thriving.
📚 In This Guide
- What you need
- Instructions
- Tips and common mistakes
- Wrapping up and next steps
What you need
- ● Soil pH Reader: A digital or analog pH meter designed for soil testing (ensure it’s calibration-ready). Popular options include Bluelab pH Pen or Apera Instruments models.
- ● Calibration Buffers: 1 bottle of pH 4.0 buffer solution (for acidic calibration).
- ● 1 bottle of pH 7.0 buffer solution (neutral calibration).
- ● 1 bottle of pH 10.0 buffer solution (alkaline calibration, if your meter supports it).
- ● Distilled Water: 1–2 small containers (e.g., 8 oz bottles) for rinsing and diluting buffers.
- ● Soft-Bristle Brush or Cotton Swabs: For gently cleaning the pH probe between tests.
- ● Microfiber Cloth: To wipe the probe dry after rinsing.
- ● Small Containers or Cups: 3–4 shallow, clean containers (e.g., plastic cups) for holding buffer solutions and soil samples.
- ● Stirring Rod or Spoon: For mixing soil samples or buffer solutions.
- ● Timer or Stopwatch: To track calibration stabilization (most meters need 30–60 seconds per buffer).
- ● Notebook & Pen: To record pH readings and notes on calibration adjustments.
- ● pH Buffer Storage Case: To keep buffers stable and protected from temperature fluctuations.
- ● Soil pH Test Kit: For cross-verifying readings with a secondary method (e.g., Luster Leaf test strips).
- ● Calibration Log Template: A pre-made spreadsheet or app (like Growers Supply’s calibration tracker) to log readings over time.
- ● Probe Protector: A storage cap or sleeve to prevent damage when not in use.
- ● pH Adjustment Products: Pre-mixed lime (to raise pH) or sulfur (to lower pH) for post-calibration soil amendments.
Step-by-step instructions for calibrating your soil pH reader
Perfect plant health starts with accurate pH readings—here’s how to get your soil pH reader dialed in like a pro.
🔧 Step 1: Prepare Your pH Meter and Calibration Solutions
Start by removing the protective cap from your soil pH meter probe and gently rinse it with distilled water. This clears any mineral deposits that could skew readings. Grab the pH 4.0 and pH 7.0 calibration solutions—these are your benchmarks for accuracy. I always check the expiration dates first; expired solutions throw off calibration entirely.
Fill two small containers with about ½ cup of each calibration solution. Label them clearly—swapping them mid-calibration is an easy mistake that wastes time. Place them on a level surface near your workspace. Uneven surfaces can cause the probe to tilt, leading to inconsistent readings.
📏 Step 2: Calibrate Using the Two-Point Method
Turn on your pH meter and wait 5-10 minutes for it to stabilize. This warm-up period ensures the internal electronics are ready for precise readings. Dip the probe into the pH 7.0 solution first—this is your neutral reference point. Stir gently for 30 seconds to ensure even contact with the solution.
Wait until the reading stabilizes (usually 30-60 seconds). Press the calibration button on your meter, then remove the probe and rinse it again with distilled water. Repeat the process with the pH 4.0 solution, stirring for the same duration. The meter should now display both values accurately—this two-point calibration accounts for temperature variations and probe drift.
🌱 Step 3: Test Your Calibration with a Known Soil Sample
Take a small sample of sterile potting mix (not garden soil—it may contain contaminants). Moisten it slightly with distilled water until it reaches a damp but not soggy consistency. This mimics ideal testing conditions. Insert the probe into the soil and hold it steady for 60 seconds, stirring gently to ensure even contact.
Compare the reading to a trusted reference (like a lab-tested sample or a second meter). If your meter reads within ±0.2 pH units, calibration is spot-on. If not, repeat Step 2—sometimes mineral buildup on the probe requires a deeper clean with vinegar before recalibrating.
⏰ Step 4: Maintain Accuracy Between Uses
After each use, rinse the probe thoroughly with distilled water and store it in the storage solution (usually included with your meter). This keeps the probe hydrated and prevents mineral buildup. I store mine in a labeled container to avoid confusion—ever accidentally grabbed a cleaning solution instead? Not fun.
Recalibrate your meter monthly or before critical plantings. Even high-quality meters drift over time, especially if exposed to temperature fluctuations. Keep a log of your readings to track soil changes—this helps adjust fertilizers or amendments for perfect plant health.
Tips & tricks for perfect soil pH reader calibration
Took me a while to figure these out, so here's how I make calibration foolproof every time.
Solution Freshness Matters: Always check the expiration dates on your pH 4.0 and pH 7.0 calibration solutions before starting. I've ruined three calibrations by using expired solutions that gave false readings. Fresh solutions are your foundation for accuracy—don't skip this step, even if the bottles look fine. The solutions should be clear and free of cloudiness or sediment.
Level Surface is Non-Negotiable: Place your calibration containers on a completely level surface—even a slight tilt can cause the probe to read incorrectly. I learned this the hard way when my first calibration attempt gave me readings that varied by 0.5 pH units just by moving the container slightly. Use a small level or even a book to check your surface before starting. Uneven readings mean wasted time and frustration.
Stabilization Time is Critical: That 5-10 minute warm-up period for your meter isn't optional—it's when the internal electronics settle into their optimal state. I used to rush this step and wondered why my readings were inconsistent. Give it the full time, especially if you're working in temperature fluctuations. The same goes for the 30-60 second stabilization after each solution—wait until the reading stops changing before proceeding.
Probe Cleaning Between Solutions: Always rinse your probe thoroughly with distilled water between each calibration solution. Mineral buildup from the first solution can contaminate the second reading, throwing off your entire calibration. I keep a small spray bottle of distilled water handy for quick rinses. After the second solution, give it an extra rinse to remove any residual solution before testing your soil sample.
Pro Tips for Soil Ph Reader
- Took me a while to figure these out, so here's how I make calibration foolproof every time.
- Solution Freshness Matters: Always check the expiration dates on your pH 4.0 and pH 7.0 calibration solutions before ...
- Level Surface is Non-Negotiable: Place your calibration containers on a completely level surface—even a slight tilt c...
Frequently asked questions
Got questions about using a soil pH reader?
You’re in the right place! Here are answers to the most common queries—from calibration to troubleshooting—so you can keep your plants thriving with confidence.
How often should I calibrate my soil pH reader?
Calibrate your soil pH reader before every use or at least once a month, especially if you’re testing different soil types. Buffers degrade over time, so regular calibration ensures accuracy. Pro tip: Store buffers in a cool, dry place to extend their shelf life!
What’s the best way to clean my soil pH reader probe?
After each use, rinse the probe with distilled water (never tap water!) and gently wipe it with a soft cloth. For stubborn residue, soak it in a vinegar-water mix (1:1 ratio) for 5 minutes, then rinse thoroughly. Avoid harsh chemicals—they can damage the sensor.
Are there affordable alternatives to a digital soil pH reader?
Yes! For budget-friendly options, try litmus paper test kits (quick but less precise) or DIY baking soda/vinegar tests (free but approximate). However, for serious gardening, a digital reader offers unmatched accuracy—worth the investment for long-term plant health.
Why is my soil pH reader giving inconsistent readings?
Inconsistent readings often stem from dirty probes, old buffers, or improper calibration. Double-check your steps: use fresh calibration solutions, ensure the probe is fully submerged, and avoid testing in wet or compacted soil. If issues persist, consider replacing the probe or device.
Can I use a soil pH reader for hydroponics or indoor gardening?
Soil pH readers work for hydroponic nutrient solutions too—just ensure the probe is fully submerged and rinse it thoroughly between tests. For indoor gardens, monitor pH weekly since environmental factors (like LED lights) can alter solution chemistry faster than soil.
| Quick Troubleshooting Guide |
|---|
| Issue: Probe won’t turn on |
| Fix: Check batteries, then inspect for water damage or loose connections. |
| Issue: Slow response time |
| Fix: Stir the soil solution gently and wait 30+ seconds for stable readings. |
| Issue: Drastic pH swings |
| Fix: Test multiple samples—spikes may indicate contamination or uneven soil composition. |
Wrapping up and next steps
Mastering your soil pH reader is the first step toward unlocking vibrant, thriving plants! 🌱 By understanding calibration, proper testing techniques, and interpreting results, you’re already on your way to creating the perfect growing environment.
Now, take that knowledge and put it into action—start testing your soil today and adjust as needed for healthier roots and bountiful harvests.
Ready to dive deeper? Explore advanced soil amendments or plant-specific pH guidelines to fine-tune your garden like a pro!