
Vegetables
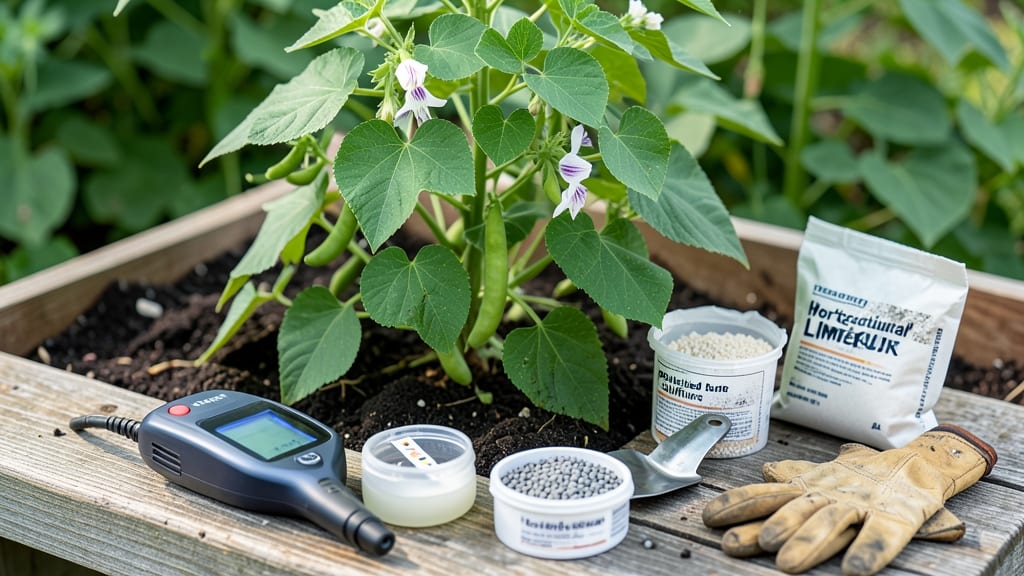
Growing green beans 🌱 thrives when soil pH hits the sweet spot between 6.0 and 7.0—anything outside that range can leave your plants stunted, hungry, or worse, inviting disease.
Picture this: you’ve planted your seeds, watered them faithfully, and even given them the perfect sunny spot—but your green beans refuse to grow. The culprit? Soil pH that’s either too acidic or alkaline, blocking nutrients like nitrogen and phosphorus that your plants desperately need.
Testing your soil’s pH is the first step to unlocking a bountiful harvest. Once you know where you stand, adjusting it—whether by adding lime to raise pH or sulfur to lower it—can turn a struggling garden into a thriving one.
In this guide, I’ll walk you through everything: how to test your soil, when to amend it, and the common mistakes that even experienced gardeners make. Let’s get those green beans growing strong!
Ideal soil pH range for green beans: what you need to know
Green beans thrive when your soil pH falls within a specific range—one that ensures they absorb all the nutrients they need. The ideal soil pH for green beans is between 6.0 and 7.0, which is slightly acidic to neutral.
This range maximizes nutrient availability, especially nitrogen, phosphorus, and potassium, which are critical for strong vines and abundant harvests.
If your soil pH strays too far from this range, your green beans may struggle with poor growth, yellowing leaves, or even disease susceptibility.
For example, soil that’s too acidic (below 6.0) can lock out essential minerals like calcium and magnesium, while alkaline soil (above 7.0) may reduce iron and manganese uptake, leading to weak plants. Testing your soil before planting is the first step to avoiding these issues.
| Factor | Optimal Range | Effect on Green Beans |
|---|---|---|
| Soil pH | 6.0–7.0 | Maximizes nutrient uptake, promotes healthy growth |
| pH < 6.0 | Too acidic | Reduces calcium/magnesium; increases aluminum toxicity |
| pH > 7.0 | Too alkaline | Limits iron/manganese; causes yellowing leaves |
| Nutrient Uptake | 6.0–7.0 | Optimal for nitrogen, phosphorus, potassium absorption |
| Disease Risk | 6.0–7.0 | Lowers susceptibility to fungal/bacterial infections |
Testing your soil’s pH is simpler than you might think. You can use a home soil test kit, which typically costs around $10 and provides results in minutes. Alternatively, send a sample to a local cooperative extension office for a more detailed analysis.
Dig a small hole near where you plan to plant, collect soil from about 6 inches deep, and follow the kit instructions for accuracy.
Once you know your soil’s pH, you can take corrective action if needed. For example, if your soil is too acidic (below 6.0), adding garden lime will raise the pH over time.
Conversely, if your soil is too alkaline (above 7.0), incorporating elemental sulfur or peat moss can help lower it. Both adjustments should be made 2–3 months before planting to allow time for the soil to stabilize.
Signs of pH imbalance in green beans include yellowing leaves (often a sign of iron deficiency in alkaline soil) or stunted growth (common in acidic soil). Poor germination or weak stems can also indicate that your soil isn’t providing the right conditions.
Addressing these issues early can mean the difference between a thriving garden and a disappointing harvest.
Remember, green beans aren’t picky about soil type as long as it’s well-draining. However, sandy or clay-heavy soils may require additional amendments to maintain the ideal pH. Mixing in compost or aged manure can improve soil structure while also helping to balance pH naturally.
This is especially useful if you’re working with soil that’s naturally heavily acidic or alkaline.
If you’re growing green beans in containers or raised beds, you have even more control over the soil environment. Use a high-quality potting mix and amend it with perlite or vermiculite to ensure proper drainage.
You can also blend in composted pine bark to lower pH slightly if needed, or crushed eggshells to raise it naturally over time.
Finally, don’t forget that regular soil testing is key to maintaining the right pH. Even if your soil was perfect when you planted, factors like rainfall, organic matter breakdown, and fertilizer use can shift pH over time.
Aim to test your soil every 1–2 years, especially if you notice your green beans struggling year after year. A little proactive care can lead to bigger, healthier plants and a bountiful harvest.
With the right soil pH, your green beans will have everything they need to grow strong, produce plenty of pods, and resist common garden pests. Start testing today—your future harvest will thank you! 🌱
How to adjust soil pH for green beans: step-by-step guide
Green beans thrive when your soil’s pH level sits between 6.0 and 7.0. If your soil tests outside this range, you’ll need to adjust it—either by raising pH (for acidic soils) or lowering pH (for alkaline soils).
The good news? You can make these changes naturally, without harsh chemicals. Let’s break down the process step by step, so your green beans get the perfect growing environment.
Before you start, grab a soil pH test kit (or send a sample to a local extension office) to confirm your soil’s current pH. Once you know where you stand, you can choose the right amendment.
For example, if your soil is too acidic (pH below 6.0), you’ll need to add lime or wood ash. If it’s too alkaline (pH above 7.0), elemental sulfur or peat moss will do the trick.
- Raise pH (acidic soil): Garden lime (calcium carbonate) or wood ash.
- Lower pH (alkaline soil): Elemental sulfur or peat moss.
Timing is everything when adjusting soil pH. For lime, apply it 2–3 months before planting to give it time to break down. If you’re in a hurry, use pelletized lime, which works faster.
For sulfur, apply it 3–4 months ahead because it takes longer to acidify the soil. Always follow the package instructions for precise application rates.
Once you’ve adjusted the pH, monitor your green beans for signs of improvement. Healthy plants will show vibrant green leaves, strong stems, and abundant flowering. If you notice yellowing leaves or stunted growth, retest the soil and make further adjustments as needed.
Remember, soil pH isn’t a one-time fix—it’s an ongoing process, especially in sandy soils that drain quickly or clay soils that hold amendments longer.
For organic gardeners, compost is a great way to gradually adjust pH while improving soil fertility. Mix in 2–3 inches of compost before planting, and top-dress annually. It won’t shift pH drastically, but it’ll create a balanced environment that supports healthy green bean growth over time.
Pair this with regular mulching to maintain soil moisture and stability.
Don’t let soil pH stress your green beans—take action now with these simple steps. With the right adjustments, you’ll be on your way to a bountiful harvest of crisp, flavorful pods. Happy gardening! 🌱