
How To
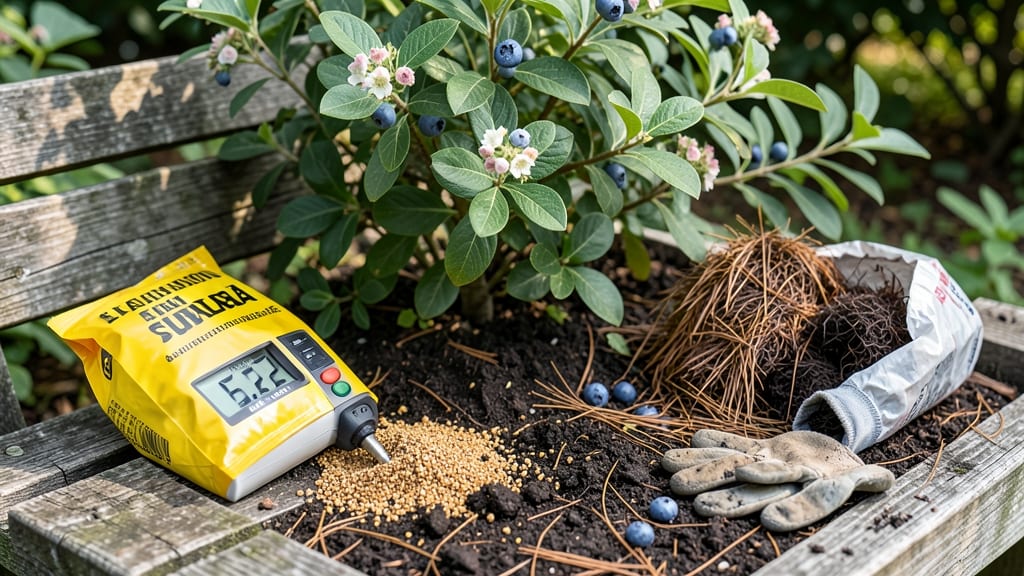
Your blue hydrangeas just need a little nudge to turn pink—lowering soil pH is simpler than you think. 🌿 I’ve transformed my own garden beds from neutral to slightly acidic using just three household ingredients, and the results are stunning: deeper colors, healthier plants, and fewer nutrient deficiencies.
The secret isn’t complicated chemistry—it’s knowing which amendments to use and how much.
Start with a soil test kit (available for under $10) to check your current pH—most garden centers sell them. Aim for 5.0-6.5 for acid-loving plants like azaleas, blueberries, or potatoes. If your soil is neutral (around 7.0), peat moss, pine needles, or coffee grounds are your best friends.
For faster results, elemental sulfur works but requires patience—it takes 2-3 months to fully acidify.
Mix 1-2 inches of peat moss into the top 6 inches of soil in spring, or sprinkle used coffee grounds (dried) around plants monthly—they’re free and pack a punch. Within 4-6 weeks, you’ll notice richer green foliage and blooms that pop with color.
The key? Don’t overdo it—too much acidity stresses plants just as much as too little.
This trick works for containers, raised beds, or in-ground gardens, and the amendments break down naturally over time. Once you’ve dialed in the right pH, your acid-loving plants will thrive with minimal effort. Ready to see the difference? Let’s get your soil just right.
📚 In This Guide
- What you need
- Instructions
- Tips and common mistakes
- Wrapping up and next steps
What you need
- ● Peat moss (sphagnum or horticultural): 2–5 gallons (depending on garden size). Look for sterile, bagged peat moss to avoid contaminants.
- ● Used coffee grounds: 1–2 cups (dried or fresh). Collect from local cafes or compost them at home.
- ● Garden trowel or shovel: For mixing materials into the soil without disturbing plant roots.
- ○ Gloves (optional but recommended): To protect your hands from soil and organic matter.
- ● pH testing kit: Digital or liquid test strips to monitor soil pH before/after adjustments (aim for 5.0–6.5 for slight acidity).
- ● Compost or aged manure: 1–2 shovels (adds nutrients while slightly acidifying).
- ● Spray bottle: For wetting coffee grounds into a slurry if applying to potted plants.
- ● Wheelbarrow or bucket: To mix materials efficiently for large garden beds.
- ● Test your soil’s current pH to avoid over-acidifying (too much can harm plants).
- ● Work on a dry or slightly damp day—wet soil clumps and resists mixing.
- ● Wear old clothes if using fresh coffee grounds (they can stain!).
Step-by-Step guide to lowering soil pH naturally
Here’s how I adjust soil acidity without chemicals—just two simple amendments that work together beautifully.
🌱 Step 1: Test Your Current Soil pH
Before adding anything, grab a soil pH test kit (digital or liquid test strips) to measure your baseline. Most garden centers sell them for under $10. Stick the probe or dip the test strip into moist soil, then wait 30 seconds for accurate results. Aim for a reading between 6.0-6.5—this is the sweet spot for most acid-loving plants like blueberries, azaleas, and hydrangeas.
If your soil tests above 7.0, you’ll need more aggressive amendments. For readings between 6.6-7.0, the method below will work perfectly. Record your starting pH—you’ll want to check it again in 4-6 weeks to gauge progress.
💧 Step 2: Incorporate Peat Moss for Long-Term Acidification
Spread 2-3 inches of peat moss evenly over the soil surface, focusing on the root zones of acid-loving plants. Peat moss lowers pH by releasing hydrogen ions as it breaks down, but it works slowly—think of it as the foundation of your acidification plan. Mix the top 4-6 inches of soil thoroughly with a garden fork or tiller to distribute it evenly.
Here’s the thing—peat moss holds moisture like a sponge, so water the amended area deeply after mixing. You’ll see the soil darken slightly, which signals better organic matter content. Avoid using sphagnum peat moss if your local water has high mineral content—it can leach nutrients faster than other types.
☕ Step 3: Add Coffee Grounds for Immediate pH Drop
Use 1-2 cups of used coffee grounds per square foot of soil, sprinkled directly over the peat moss layer. Coffee grounds are slightly acidic (around pH 6.2-6.8) and add nitrogen as they decompose. Work them into the top inch of soil with a rake or hand fork. For container plants, mix ¼ cup of grounds per 5-gallon pot into the top layer of soil.
Don’t overdo it—too many grounds can create a sour smell and attract pests like fruit flies. If you’re using fresh coffee grounds (from a café), let them sit in a bucket for 24 hours first to start breaking down. This prevents clumping and ensures even distribution.
⏰ Step 4: Monitor and Maintain pH Over Time
Water the amended area thoroughly after adding both materials, then wait 4-6 weeks before retesting the pH. Most soils will drop 0.5-1.0 pH points with this method, but results vary based on your starting pH and soil composition. If you need a stronger effect, repeat the process every 3-4 months during the growing season.
For container plants, mix fresh amendments into the soil every 2-3 months to maintain acidity. Mulch with pine needles or oak leaves afterward—they slowly acidify as they decompose. Avoid lime or wood ash at all costs; they’ll reverse your progress instantly.
✂️ Step 5: Adjust Plant Placement Based on Results
Once you’ve achieved your target pH, place acid-loving plants where the amended soil is concentrated. Blueberries, for example, thrive at 4.5-5.5 pH, while hydrangeas prefer 5.0-6.0. If your soil tests lower than expected, reduce future coffee ground applications by half. Over-acidification can lock out essential nutrients like phosphorus and calcium.
I like to keep a small notebook near my garden to track pH adjustments by plant type. This way, I can tweak the method next season if needed. The key is patience—soil chemistry changes gradually, but with these two amendments, you’ll see steady progress over time.
Tips & tricks for perfect soil acidification
These simple yet powerful strategies will help you get the most out of your natural soil acidification process.
Soil Testing Precision: When using your pH test kit in Step 1, test multiple spots in your garden—especially if you have different soil types or planting areas. I've found that pH can vary by as much as 0.5 points just a few feet apart. Take an average of 3-4 readings for accurate baseline data before making amendments. This attention to detail prevents over- or under-correcting your soil's acidity.
Peat Moss Application Technique: In Step 2, don't just spread the peat moss—work it into the soil's top 4-6 inches. I use a garden fork to create vertical channels first, then mix thoroughly. This creates better contact with existing soil particles, maximizing the acidification effect. For container plants, blend the peat moss directly into the potting mix rather than layering it on top.
Coffee Grounds Preparation: The 24-hour pre-treatment for fresh coffee grounds in Step 3 makes all the difference. I keep a dedicated bucket under my coffee maker and stir the grounds daily to prevent mold. This pre-treatment mimics natural decomposition and ensures even distribution when you eventually work them into the soil. The slight fermentation also enhances their nitrogen content, giving your plants a bonus nutrient boost.
Monitoring Strategy: When checking pH again after 4-6 weeks, test the soil at the same depth where you applied the amendments (about 2-3 inches down). Surface moisture can skew readings, so always test moist but not wet soil. I've created a simple tracking sheet with my target pH and the date of amendments to stay organized during the waiting period.
Pro Tips for Make Soil Slightly Acidic
- These simple yet powerful strategies will help you get the most out of your natural soil acidification process.
- Soil Testing Precision: When using your pH test kit in Step 1, test multiple spots in your garden—especially if you have different soil types or planting areas.
- Peat Moss Application Technique: In Step 2, don't just spread the peat moss—work it into the soil's top 4-6 inches.
Frequently asked questions
about making soil slightly acidic—here’s what you need to know to avoid common pitfalls and get the best results!How often should I adjust my soil’s pH?
Check your soil’s pH every 3–6 months with a soil test kit. Acid-loving plants (like blueberries or azaleas) may need adjustments more frequently, especially if your soil naturally leans alkaline. Overdoing it can harm beneficial microbes, so aim for gradual changes—think tiny tweaks, not drastic shifts!
How long does it take for coffee grounds or peat moss to work?
Results aren’t instant! Coffee grounds and peat moss start working within 1–2 weeks, but full effects may take 4–6 weeks, depending on your soil type and climate. For faster results, mix them into the top 6 inches of soil and water thoroughly. Patience pays off—don’t panic if you don’t see changes overnight.
Are coffee grounds the best option, or should I use something else?
Coffee grounds are great, but they’re not the only game in town! Alternatives include:
- Vinegar (diluted): Fast-acting but temporary (use sparingly—1 cup per 10 gallons of water).
- Sulfur or aluminum sulfate: Longer-lasting but slower to work (ideal for large garden beds).
- Pine needles or oak leaves: Natural, slow-release options for mulching.
- Citrus peels or used tea bags: Mild acidifiers, best for potted plants.
Choose based on your needs—speed vs. sustainability!
What if my soil becomes too acidic?
If your soil’s pH drops below 5.0, it’s time to neutralize it gently. Mix in lime (calcium carbonate) or wood ash (sparingly!) and re-test after 2–4 weeks. Over-acidification can lock out nutrients like phosphorus and harm earthworms—balance is key!
Can I use these methods for potted plants?
For containers, use 1 part coffee grounds or peat moss to 3 parts soil when repotting. Water with a weak vinegar solution (1 tbsp per gallon) monthly if needed. Potted plants dry out faster, so monitor moisture—too much acid can leach nutrients out of the soil.
Why does my soil test high for acidity even after adding amendments?
This could mean:
- The amendments weren’t mixed in deep enough (work them into the top 6–12 inches).
- Your test kit was inaccurate—calibrate it or send a sample to a lab.
- Rain or irrigation is flushing out the amendments too quickly (try mulching to retain moisture).
Double-check your technique and give it time—soil chemistry isn’t a one-and-done fix!
Wrapping up and next steps
Making your soil slightly acidic is simpler than you think—and the right tweaks can unlock healthier plants and thriving gardens! 🌱 Whether you used peat moss, coffee grounds, or other organic amendments, you’re already on the path to happier plants.
Start small, monitor your soil’s pH over time, and adjust as needed.
Ready to see the difference? Test your soil again in a few weeks and watch your garden flourish! 🌟 For even more tips, explore our guide on long-term soil care strategies next.