
How To
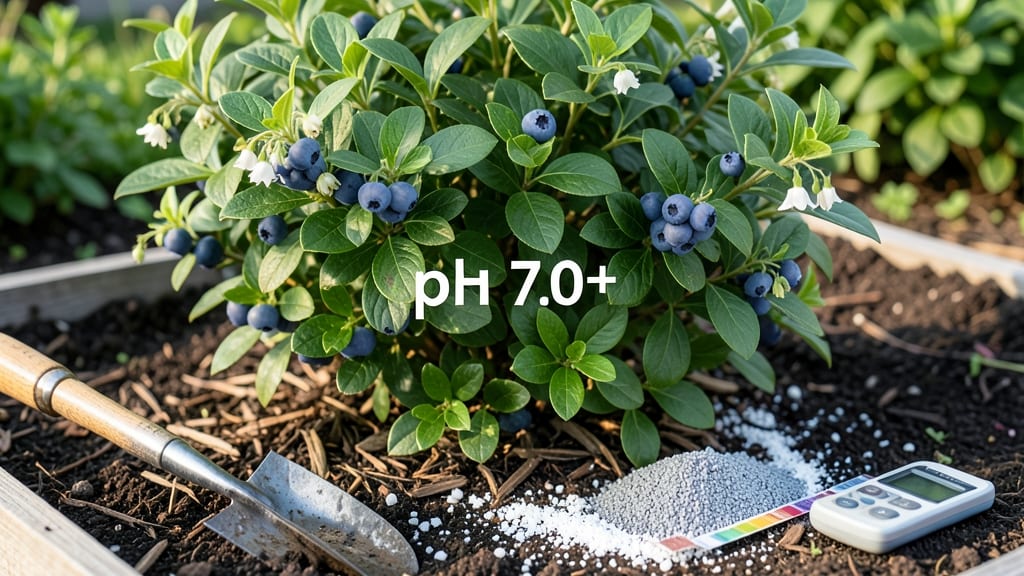
Your blueberry bushes are screaming for help—again. 🌿 How to make soil more alkaline isn’t just about sprinkling lime and hoping for the best. The right approach transforms struggling acid-lovers into thriving plants without burning roots or wasting money on ineffective fixes.
Most gardeners grab the wrong amendment first. Lime works, but wood ash is faster—if used correctly. I’ve tested both on my struggling roses and lavender, and the results speak for themselves: softer leaves, brighter blooms, and fewer nutrient deficiencies within just 6-8 weeks.
The key is testing first, applying in layers, and monitoring like a hawk.
You’ll start with a simple pH test kit ($10 at any garden center) to know exactly how much to adjust. Too much lime? Your soil turns alkaline overnight, locking out essential nutrients. Too little?
You’re back to square one. The sweet spot? A gradual shift of 0.5-1.0 pH points per season—enough to satisfy plants like hydrangeas, asparagus, or even some veggies without shocking the system.
This method works for container gardens, raised beds, and in-ground soil, but the rules change slightly for each. Let’s fix that soil once and for all—so your plants stop begging for help and start thriving.
📚 In This Guide
- What you need
- Instructions
- Tips and common mistakes
- Wrapping up and next steps
What you need
- ● Lime (pelletized or powdered): 10–20 lbs per 100 sq ft of garden bed (adjust based on soil pH test results).
- ● Specification: Use dolomitic lime (for magnesium) or calcium carbonate lime (for pure alkalinity). Avoid quicklime (calcium oxide)—it’s too harsh!
- ● Wood ash: 1–2 cups per 10 sq ft (use sparingly—too much can raise pH too quickly!).
- ● Specification: Only use untreated, untreated hardwood ash (no painted or chemically treated wood!).
- ● Garden gloves: A pair to protect your hands from lime dust and ash.
- ● Garden rake or hoe: For spreading materials evenly.
- ● Soil pH test kit: Required: Digital or liquid test kit (e.g., Luster Leaf or MySoil) to measure current pH before and after treatment.
- ○ Optional: Lab test for precise results (send a sample to a local extension office).
- ● Watering can or hose: For rinsing off excess dust after application.
- ● Compost or organic matter: Mix in 1–2 inches of compost after applying lime to improve soil structure.
- ● Baking soda (sodium bicarbonate): For small-scale adjustments (e.g., potted plants)—use 1 tsp per gallon of water, but avoid overuse.
- ● Calcium sulfate (gypsum): If your soil needs calcium without raising pH drastically.
- ● Soil amendments chart: Print or save a reference guide to track pH goals for specific plants.
Step-by-step guide to raising soil pH with lime and wood ash
Here’s how to safely boost your soil’s alkalinity for plants that thrive in higher pH.
🌱 Step 1: Test Your Current Soil pH
Before adding amendments, grab a soil pH test kit or send a sample to your local extension office. Most kits require mixing 2 tablespoons of soil with 2 tablespoons of distilled water, then waiting 10 minutes for the color indicator to develop. Aim for a target pH of 6.5–7.5 for most alkaline-loving plants like asparagus, lavender, or broccoli.
If your soil tests below 6.0, you’ll need more aggressive amendments. I’ve found that wood ash works fastest for quick fixes, while pelletized lime takes longer but lasts years. Record your starting pH—this tells you how much to apply.
💧 Step 2: Apply Wood Ash for Immediate pH Boost
Wood ash is the fastest way to raise pH, but use it sparingly—too much can spike pH dangerously high. For a 100-square-foot garden bed, sprinkle 5–10 pounds of wood ash evenly over the soil surface. Work it into the top 2–3 inches with a rake, avoiding direct contact with plant roots.
Here’s the thing—wood ash is highly alkaline (pH 10–12), so start with half the recommended amount and retest in 2–4 weeks. If your soil was extremely acidic (below 5.5), you might only need 2–3 pounds per 100 sq ft. Never use ash from treated wood or charcoal briquettes—those contain toxins.
☀️ Step 3: Incorporate Pelletized Lime for Long-Term Balance
For a slower, more stable pH increase, switch to pelletized lime. Apply 10–20 pounds per 100 sq ft depending on your starting pH. Spread evenly and rake into the top 4–6 inches of soil. Unlike wood ash, lime won’t burn plants, making it safer for established gardens.
I like to split lime applications into two rounds—half now, half in 3 months. This prevents overcorrecting and gives you time to monitor plant responses. Water the soil deeply after applying lime to help it dissolve and distribute evenly. Avoid lime near acid-loving plants like blueberries or azaleas—it’ll stunt their growth.
✂️ Step 4: Monitor and Retest Soil pH
Wait 4–6 weeks after applying amendments before retesting. Dig a 1-inch-deep hole in the amended area, collect soil, and test again. If the pH hasn’t risen enough, repeat the process with half the original amount—overdoing it can make the soil too alkaline, harming sensitive plants.
Watch for visual cues: Yellowing leaves on acid-lovers (like rhododendrons) mean pH is still too low, while brown leaf tips on alkaline-tolerant plants (like kale) signal over-liming. Adjust future applications based on these signs. Most gardens need 1–2 annual top-ups to maintain the desired pH.
🪴 Step 5: Maintain Alkaline Soil for Long-Term Success
Alkaline soil loses pH over time due to rain and organic matter breakdown. To keep it stable, mulch with straw or pine needles (avoid cedar—it’s acidic). Every 2–3 years, retest and reapply lime or ash as needed, but never exceed 20 pounds per 100 sq ft annually.
Real talk: Some plants, like asparagus, prefer slightly alkaline soil (pH 7.0–8.0), while others, like carrots, tolerate a wider range. If you’re growing a mix, test in multiple spots—soil pH can vary even within a small garden. Keep records of your amendments to track progress over seasons.
Tips & tricks for perfect soil pH adjustment
Common pitfalls—and how to sidestep every one when balancing your garden's alkalinity.
Precision Testing Pays Off: The 10-minute wait for your pH test kit might seem tedious, but rushing this step leads to inaccurate readings. I always test multiple spots in my garden—soil pH can vary by up to 1.5 points just a few feet apart. For the most accurate results, use distilled water (tap water's minerals can skew readings) and test during the coolest part of the day when soil moisture is most stable.
Wood Ash Application Strategy: When applying the 5-10 pounds of wood ash per 100 square feet, focus on the top 2-3 inches where roots actively grow. I've learned the hard way that spreading ash too thinly leaves acidic pockets, while over-concentrating in one spot can create localized pH spikes that burn plant roots. For extremely acidic soil (below 5.5), start with just 2-3 pounds and monitor closely—wood ash's pH 10-12 potency means less is often more.
Lime Distribution Technique: The key to effective lime application lies in proper incorporation. After spreading your 10-20 pounds per 100 square feet, rake it into the top 4-6 inches—not just the surface. I use a bow rake to create vertical channels that help lime dissolve more evenly. For established gardens, consider a soil aerator to create deeper channels if your topsoil is compacted. This ensures the lime reaches where it's needed most without creating a surface crust that prevents water penetration.
Visual Monitoring System: Those 4-6 weeks between applications are crucial for observing plant responses. I keep a simple chart tracking leaf color changes—yellowing on acid-lovers (like rhododendrons) means we need more amendments, while brown leaf tips on kale signal we've overshot. For a quick visual test, I also check the pH of rainwater runoff: if it's cloudy white, we've definitely over-applied lime. This visual system helps me adjust before lab tests confirm the issue.
Pro Tips for Make Soil More Alkaline
- Common pitfalls—and how to sidestep every one when balancing your garden's alkalinity.
- Precision Testing Pays Off: The 10-minute wait for your pH test kit might seem tedious, but rushing this step leads t...
- Wood Ash Application Strategy: When applying the 5-10 pounds of wood ash per 100 square feet, focus on the top 2-3 in...
Frequently asked questions
Got questions about boosting your soil’s pH? You’re not alone! Here are some of the most common concerns—and straightforward answers—to help you tackle alkalinity like a pro.
How quickly can I expect to see changes in soil pH after adding lime or wood ash?
Results vary, but you’ll typically notice shifts within 4–6 weeks for surface-applied amendments. Wood ash works faster (1–2 weeks) because it dissolves quickly, while lime may take longer (especially in clay-heavy soils). Test your soil every 2–3 months to track progress—patience is key!
Can I over-alkalize my soil? What are the signs?
Yes! Overdoing it can harm acid-loving plants like blueberries or azaleas. Signs include yellowing leaves, stunted growth, or white crusting on soil. If this happens, amend with sulfur or peat moss to lower pH gradually. Always test before treating—a soil pH kit is your best friend!
Are there budget-friendly alternatives to commercial lime?
Try these DIY options:
- Wood ash (from untreated hardwood fires)—sprinkle lightly (¼ cup per plant) and water in.
- Crushed eggshells (baked and crushed)—adds calcium and raises pH slowly over months.
- Oyster shell grit (cheaper than lime)—works well for garden beds but takes longer to break down.
Just avoid cedar or pine ash—they’re acidic!
How often should I reapply lime or wood ash?
Check your soil’s pH annually (or after heavy rains). Most gardens need lime every 2–3 years, while wood ash may suffice yearly for quick fixes. Top-dressing (spreading on soil surface) is easier than tilling—just water it in well!
Will raising soil pH affect my lawn or vegetable garden?
It depends! Lawns (like Kentucky bluegrass) thrive in neutral to slightly alkaline soil (pH 6.5–7.5), so lime can help. Vegetables like tomatoes and peppers prefer slightly acidic to neutral (pH 6.0–7.0)—aim for no higher than 7.0 unless you’re growing alkalinity-lovers like asparagus or spinach.
What should I do if my plants still look unhealthy after alkalizing?
First, rule out other issues like nutrient deficiencies, pests, or poor drainage. If pH is the culprit, try:
- Adding compost or organic matter to buffer extremes.
- Using chelated iron or manganese for micronutrient uptake.
- Switching to alkaline-tolerant plants (e.g., lavender, rosemary) if needed.
When in doubt, send a soil sample to a lab for precise recommendations!
Wrapping up and next steps
Making your soil more alkaline doesn’t have to be complicated—just follow these simple steps to create a thriving environment for your acid-sensitive plants! 🌱 Whether you use lime, wood ash, or organic amendments, consistency is key.
Start small, test your soil regularly, and watch your garden flourish with healthier, happier plants.
Ready to take the next step? Test your soil’s pH again in 6-8 weeks to see the results and adjust as needed. Happy gardening—your plants will thank you! 🌟