
How To
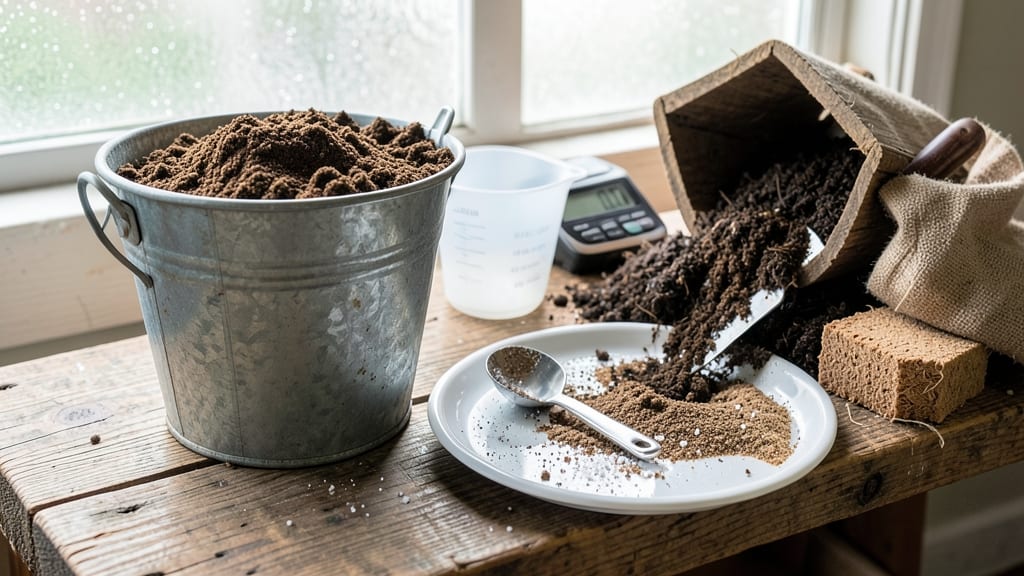
Making your own pot soil at home saves money and grows stronger plants. 🌱 I learned the hard way that store-bought mixes often compact and drain poorly—until I started blending my own. The secret is balancing organic matter, drainage, and nutrients for plants that thrive in containers.
Start with equal parts compost (for nutrients), coconut coir or peat moss (for moisture retention), and perlite or coarse sand (for aeration). Sterilize everything first by baking soil components for 30 minutes at 200°F to kill pests and diseases.
This simple mix works for herbs, veggies, and flowers, but adjust ratios for succulents (add more perlite). You'll notice plants root faster and stay healthier longer. The texture stays loose, preventing the dreaded "compacted soil syndrome" that stunts growth.
Plus, you control exactly what goes into your mix—no mystery additives or chemical fertilizers. For succulents, increase perlite to 50% for better drainage. For heavy feeders like tomatoes, add 10% worm castings. The key is testing and tweaking—your perfect blend is out there!
📚 In This Guide
- What you need
- Instructions
- Tips and common mistakes
- Wrapping up and next steps
What you need
- ● Garden soil or topsoil – 50% of the mix (1 part). Use rich, organic topsoil from your yard or a local nursery.
- ● Compost – 25% of the mix (½ part). Well-aged compost adds nutrients and improves soil structure.
- ● Perlite or vermiculite – 10% of the mix (¼ part). Enhances aeration and drainage (perlite is lighter; vermiculite retains moisture better).
- ● Sand (coarse or horticultural) – 10-15% of the mix (¼ to ⅓ part). Breaks up clay and improves drainage.
- ○ Peat moss or coconut coir – Optional but recommended (up to 10%). Adds moisture retention and acidity balance (skip if your soil is already moist).
- ● Large wheelbarrow or sturdy container for mixing (at least 5-gallon capacity).
- ● Garden gloves (to protect your hands from rough materials).
- ● Garden fork or trowel (for breaking up clumps and aerating).
- ● Measuring tools (bucket or marked container) for precise ratios.
- ● Watering can or hose (to moisten dry ingredients).
- ● Worm castings – Boosts microbial activity (add 5-10% of the mix).
- ● Biochar – Improves water retention and nutrient availability (5-10%).
- ● Slow-release fertilizer – Mix in granules for extra nutrients (follow package instructions).
- ● Lime (if soil is acidic) – Adjust pH for plants like tomatoes or blueberries.
Step-by-Step guide to crafting custom container soil
Here's the method I rely on to create nutrient-rich, well-draining potting mix tailored to your plants' needs.
🪴 Step 1: Gather Your Base Components
Start with 50% peat moss or coconut coir—this holds moisture while allowing airflow. I measure by volume using a clean 5-gallon bucket as my reference. The peat should feel damp but not soggy when squeezed; if it crumbles easily, it's dry enough to use. Next, add 25% perlite or vermiculite for aeration—these lightweight minerals prevent compaction and help roots breathe.
For the remaining 25%, mix compost and coarse sand in equal parts. The compost provides nutrients, while the sand improves drainage. I sift both through a quarter-inch mesh to remove large chunks that could create air pockets. This layered approach mimics natural soil structure while preventing the density problems of garden soil in containers.
🌱 Step 2: Blend Components Thoroughly
Work in small batches to maintain consistency. In a large wheelbarrow or clean tarp, combine the peat moss and perlite first. Use a garden fork to mix them until uniformly distributed—this prevents clumping later. The texture should resemble coarse sand with slightly darker streaks from the peat.
Next, fold in the compost-sand mixture. I use a gloved hand to break up any remaining clumps while ensuring even distribution. Test the blend by filling a small container: when pressed gently, it should hold its shape but not feel rock-hard. If it crumbles too easily, add another 5% perlite; if it stays compacted, incorporate more compost.
💧 Step 3: Condition the Mix for Planting
Moisten the blend gradually with warm water until it reaches the consistency of a damp sponge—squeeze a handful, and just a few droplets should escape. Overwatering now creates a paste that suffocates roots. I use a hose with a gentle spray nozzle to distribute moisture evenly, avoiding clumps.
Let the mix sit for 24 hours in a covered bin. This allows any remaining chemicals in the peat to dissipate and gives the components time to settle. After resting, fluff the mix with a rake to restore aeration. The final product should smell earthy, not sour or chemical. Store extras in sealed bins for up to 3 months—just add fresh compost before reuse.
☀️ Step 4: Customize for Specific Plants
For succulents and cacti, increase perlite to 40% and reduce compost to 10%—these plants need maximum drainage. I add a handful of orchid bark for extra porosity. For heavy feeders like tomatoes, boost compost to 35% and incorporate 1 cup of worm castings per 5 gallons for slow-release nutrients.
Test your mix by filling a temporary container with your custom blend. After watering, check that excess moisture drains within 10 minutes. If water pools, add more perlite; if it drains too quickly, increase the compost ratio. This final adjustment ensures your soil matches the specific needs of what you're planting.
Tips & tricks for perfect custom container soil
Creating ideal potting mix is all about balance—and these pro tips will help you nail it every time.
Component Selection: When choosing your 50% peat moss or coconut coir, opt for the peat that feels slightly damp but not wet. Too much moisture in the peat before mixing can create a gummy texture that suffocates roots. For the 25% perlite or vermiculite, I recommend vermiculite if you're in a cooler climate—it holds moisture better for plants that need consistent hydration.
Mixing Technique: In Step 2, when combining the peat moss and perlite, use a garden fork to break up any existing clumps before mixing. This prevents pockets of pure peat that could create anaerobic zones where roots can't breathe. I like to work in batches no larger than what fits in a 5-gallon bucket to maintain consistency—any larger and you risk uneven distribution of the compost-sand mixture.
Conditioning Wisdom: The 24-hour resting period in Step 3 is non-negotiable for new mixes. This time allows any residual chemicals in the peat to dissipate and lets the components fully integrate. If you're short on time, you can reduce this to 12 hours, but the soil won't be quite as stable. After resting, give the mix a final fluff with a rake to restore aeration—this is especially important if you stored it in a compacted bin.
Plant-Specific Adjustments: For succulents and cacti, when increasing perlite to 40%, I recommend adding a handful of coarse horticultural grit along with the orchid bark. This extra grit creates even better drainage while maintaining the structural integrity of the mix. For tomato plants, the 1 cup of worm castings per 5 gallons can be substituted with ½ cup of fish emulsion for a slightly different nutrient profile—just make sure to mix it in thoroughly.
Pro Tips for Make Pot Soil At Home
- Creating ideal potting mix is all about balance—and these pro tips will help you nail it every time.
- Component Selection: When choosing your 50% peat moss or coconut coir, opt for the peat that feels slightly damp but ...
- Mixing Technique: In Step 2, when combining the peat moss and perlite, use a garden fork to break up any existing clu...
Frequently asked questions
Got questions about crafting your own pot soil? You’re not alone—homemade potting mixes can feel tricky at first! Below, we’ve answered the most common questions to help you get it right the first time.
What’s the best ratio of materials for pot soil?
A balanced mix typically uses 60% coconut coir or peat moss (for moisture retention), 20% perlite or vermiculite (for aeration), and 20% compost or worm castings (for nutrients). Adjust based on your plants—succulents need more perlite, while heavy feeders (like tomatoes) benefit from extra compost.
How long does homemade pot soil last?
With proper storage in a cool, dry place, your mix can last 6–12 months. Over time, organic matter breaks down, so refresh with a top-dressing of compost every few months. If mold appears or the soil smells sour, toss it and start fresh!
Can I skip peat moss? What’s a good alternative?
Peat moss is sustainable but coconut coir is the eco-friendly swap—it holds moisture well and resists compaction. Other options: composted bark (for chunky texture) or sphagnum moss (for acid-loving plants like blueberries). Just ensure your substitute mimics peat’s moisture-retention properties.
Why does my homemade soil smell bad?
A funky odor usually means too much organic matter decomposing too fast or poor aeration. Fix it by adding more perlite/vermiculite to improve airflow, or let the mix "cure" for 1–2 weeks before use. If the smell persists, reduce compost and increase coir/peat.
How do I reuse old potting soil?
Old soil can be revived by sifting out debris, adding 10–20% fresh compost, and mixing in perlite for fluffiness. Avoid reusing soil with pests, diseases, or excessive salt buildup (common in fertilized mixes). For heavy replanting, sterilize with heat (like baking at 200°F for 30 mins).
Wrapping up and next steps
Creating your own pot soil at home isn’t just rewarding—it’s a game-changer for your container gardens! 🌱 With just a few simple ingredients and a little patience, you’ve got the perfect, nutrient-rich mix to help your plants thrive.
Whether you’re a seasoned gardener or just starting out, this layered loam method ensures your plants get the love they deserve.
Now that you’ve mastered the art of DIY pot soil, why not take it a step further? Experiment with additives like compost tea or worm castings to boost nutrients, or try growing your favorite herbs and veggies in your custom blend. Happy gardening! 🌿