
How To
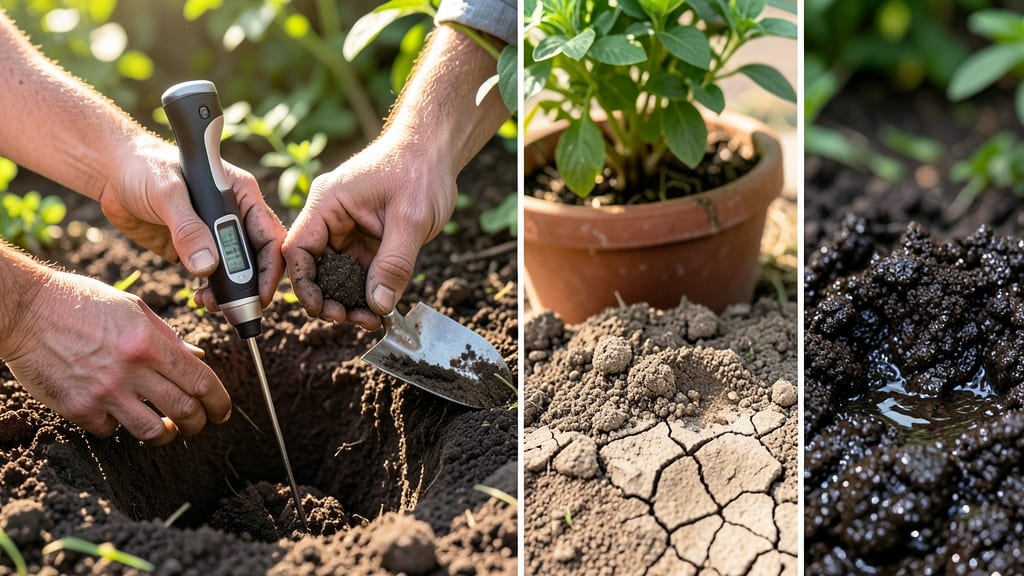
Your plants' health starts with how to check soil moisture—not when you think they need it. ✨ The finger-dip test reveals the truth about soil moisture, helping you avoid both soggy roots and parched leaves that stifle growth.
I learned the hard way that guessing leads to wasted water and stressed plants, but this simple method works every time.
Here's the secret: stick your finger about 1-2 inches deep into the soil—if it feels dry at that level, it's time to water. For thirstier plants like tomatoes or peppers, check 2-3 inches down.
The goal is moist but not soggy—think of a wrung-out sponge, not a swamp. Most gardeners overwater by default, and this test fixes that habit instantly.
You'll notice a difference within days: fewer wilted leaves, stronger stems, and roots that explore deeper for nutrients. The right moisture balance also keeps soil-borne diseases at bay, so your plants stay vibrant and productive all season.
This isn't just about watering—it's about giving your garden the perfect foundation for growth.
Works for containers, raised beds, and in-ground gardens alike. Once you master this, you'll adjust your watering schedule with confidence—no more guesswork, just healthy soil that your plants will thank you for.
📚 In This Guide
- What you need
- Instructions
- Tips and common mistakes
- Wrapping up and next steps
What you need
- ● Garden trowel or small shovel – A 5-inch stainless steel or ergonomic model (e.g., blank">Fiskars) for clean, precise digging.
- ○ Gloves (optional but recommended) – Nitrile or gardening gloves to protect hands from dirt, thorns, or debris.
- ● Notebook & pen – For logging moisture levels, plant types, and dates (or use a phone app like blank">Gardenate or blank">PlantNet).
- ● Water source – A hose, watering can, or spray bottle (for post-test adjustments).
- ● Soil moisture meter – Digital probes (e.g., blank">Xiaomi Mi Flower Care) for real-time readings (0-100% scale).
- ● Moisture sensor kit – DIY capacitive sensors (e.g., blank">Adafruit kits) for tech-savvy gardeners.
- ● pH test kit – To check if moisture issues stem from acidity/alkalinity (e.g., blank">Luster Leaf).
- ● Hand lens (magnifier) – For inspecting soil texture and organic matter up close.
- ● Choose a quiet, dry day (rain or wind can skew results).
- ● Work in morning sunlight to avoid heat-induced evaporation.
- ● Wear comfortable shoes—you’ll be kneeling or bending often!
Step-by-Step instructions for mastering the finger-dip soil moisture test
Here’s the simple method I use to keep every plant thriving—no guesswork, just perfect moisture.
💧 Step 1: Choose the Right Time to Test
Check soil moisture in the morning after the sun has had a chance to warm the earth but before watering. This gives you the most accurate reading of how much water your plants actually used overnight. Avoid testing right after watering or during rain—you’ll get a misleadingly wet result.
Focus on the root zone, which is typically 1-2 inches below the soil surface. This is where most plants’ roots actively absorb moisture. If you’re unsure where to test, follow the plant’s growth pattern—most roots spread outward and downward from the base.
👆 Step 2: Prepare Your Hands and Soil
Wash your hands first to avoid transferring oils or dirt into the soil, which can alter moisture readings. Then, gently part the soil at the base of the plant with your fingers. You want to expose the root zone without disturbing the plant’s structure too much.
If the soil is crumbly and dry on the surface, don’t be fooled—this top layer can be misleading. Push your finger 1-2 inches deep to feel the true moisture level where the roots are actively growing. This is where the real story of your plant’s hydration is happening.
👆 Step 3: Perform the Finger-Dip Test
Insert your index finger into the soil until your first knuckle disappears. Hold it there for a few seconds to get a feel for the moisture. If the soil feels damp but not soggy, your plant is in the ideal range. You’ll know it’s just right when the soil sticks slightly to your finger but doesn’t feel wet or clumpy.
If the soil feels completely dry, it’s time to water. If it’s still damp or wet, hold off—overwatering is just as harmful as underwatering. This test is all about finding that sweet spot where the soil is moist enough to support root growth but not soaking wet that it drowns the roots.
⏰ Step 4: Adjust Your Watering Schedule
Use what you feel to fine-tune your watering routine. If you consistently find the soil dry at the same time each week, adjust your schedule to water just before that point. For example, if the soil is always dry by Wednesday morning, water on Tuesday evening instead.
Pay attention to seasonal changes too. In hotter months, you’ll likely need to water more frequently, while cooler seasons may require less. The finger-dip test is your best tool for adapting to these natural shifts without over- or under-watering.
🌱 Step 5: Observe and Refine Over Time
Keep a simple log of your soil moisture readings and how your plants respond. Note which times of day the soil feels driest and how often you need to water. Over time, you’ll develop an intuitive sense of what your specific plants and soil type need.
If you notice leaves wilting or yellowing, revisit your testing routine—it might be time to adjust either how deeply you’re checking or how often you’re watering. Plants are great communicators; you just have to learn their language through consistent observation.
Tips & tricks for perfect soil moisture testing
Mastering the finger-dip test takes practice, but these insights will help you get it right every time.
Timing Secret: The morning test in Step 1 is non-negotiable for accuracy. Early morning gives you the true picture of overnight water usage, while midday or evening tests can be misleading because evaporation has already occurred. I’ve learned this the hard way—testing in the afternoon once led me to overwater my herbs for a full week before noticing the root rot.
Depth Matters: In Step 2, that 1-2 inch depth is crucial—surface soil can be deceptive. Think of it like checking a patient’s pulse: you wouldn’t judge their health by just looking at their skin color. For container plants, gently press your finger against the side of the pot to check deeper moisture levels without disturbing the roots.
Seasonal Adjustments: Step 4 mentions seasonal changes, but here’s the real trick: in summer, I test twice daily—morning and evening—while in winter, once every other morning suffices. The key is to match your testing frequency to your plant’s actual water needs, not just the calendar.
Visual Cues: When performing the finger-dip in Step 3, look for these three signs: slight stickiness (like damp sand), a faint imprint when you remove your finger, and no visible moisture clinging to your skin. If you see water beads, you’ve gone too far—this means the roots are drowning.
Pro Tips for Check Soil Moisture
- Mastering the finger-dip test takes practice, but these insights will help you get it right every time.
- Timing Secret: The morning test in Step 1 is non-negotiable for accuracy. Early morning gives you the true picture of...
- Depth Matters: In Step 2, that 1-2 inch depth is crucial—surface soil can be deceptive. Think of it like checking a p...
Frequently asked questions
How often should I check soil moisture?
For most plants, check soil moisture every 2–3 days during hot/dry weather or when leaves start wilting. Newly planted seedlings need daily checks, while established perennials may only require weekly monitoring. Adjust based on your climate—overwatering is just as harmful as underwatering!
What if my finger test feels inconsistent?
Inconsistencies often mean uneven watering. Try digging deeper (2–3 inches) or testing multiple spots in the pot/soil. If the top layer feels dry but the bottom is wet, your plant may need better drainage or less frequent watering. Pro tip: Use a moisture meter for a more precise read!
Can I check soil moisture without a finger?
Try these alternatives:
- Moisture meter: Digital tools give instant readings (great for tech-savvy gardeners).
- Wooden skewer test: Insert a chopstick or pencil—if it comes out clean, soil is dry.
- Visual cues: Lift the pot (lightweight = dry); check for mold or crusty surface (signs of overwatering).
Why does my plant wilt even when the soil feels moist?
Wilting with moist soil could signal root rot, overcrowding, or poor drainage. Check for:
- Yellowing leaves (root stress).
- Mushy stems (fungal infection).
- Hardened soil (clay pots may need repotting).
Does soil type affect the finger test?
Yes! Sandy soil drains fast (check more often), while clay soil stays wet longer (wait until it’s truly dry). For potting mixes, press gently—if it crumbles easily, it’s time to water. Adjust your routine based on your soil’s texture and your plant’s needs!
Wrapping up and next steps
Checking soil moisture doesn’t have to be complicated—with just your fingers and a little practice, you can give your plants the perfect care they deserve! 🌱 Whether you’re a seasoned gardener or just starting out, mastering this simple technique ensures your plants thrive without over- or under-watering.
Now that you’re equipped with the knowledge, take action: grab a handful of soil and feel the difference for yourself. Happy gardening!