
How To
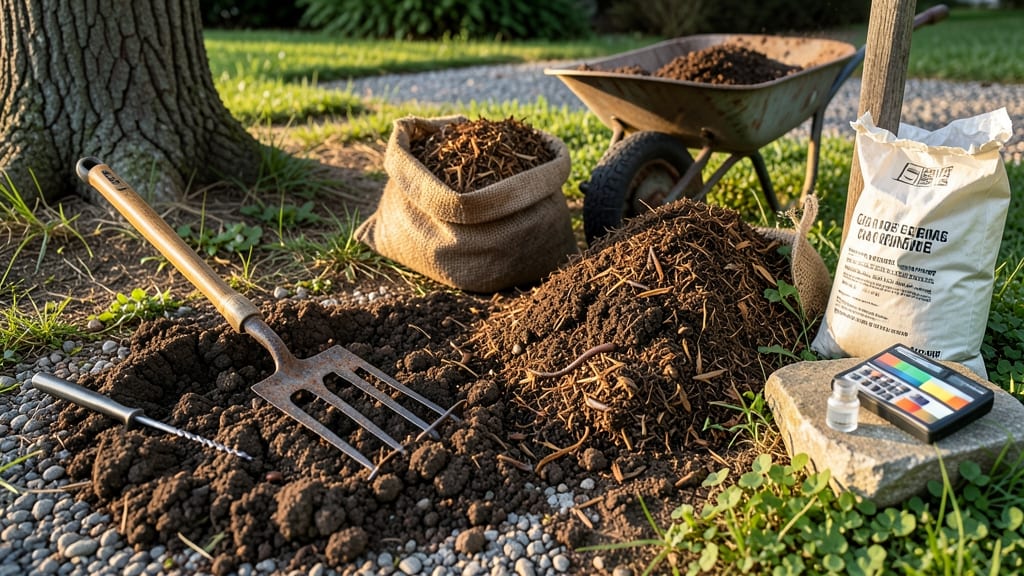
Your plants are struggling to grow, and the soil feels like concrete under your fingers—compacted soil treatment isn’t just helpful, it’s essential for roots to breathe and thrive. 🌱 I’ve turned my own hardpan into loose, crumbly soil that supports deep roots and better water drainage, and it only took three focused layers of work.
The problem starts when soil gets packed down from foot traffic, heavy equipment, or years of neglect. Without air pockets, roots suffocate, water pools instead of draining, and nutrients get locked away. The fix isn’t complicated—just strategic.
We’re talking about aeration to break up the hard layer, organic matter to loosen the structure, and deep tilling to encourage roots to grow downward where moisture lingers.
By the end, you’ll have soil that feels like a fresh garden bed—not a brick. Plants will establish faster, drought tolerance improves, and you’ll see stronger stems and bigger harvests. This method works for lawns, vegetable beds, and even container gardens where soil gets compacted over time.
No fancy tools required—just a few basics and a little elbow grease. Whether you’re prepping for spring planting or reviving a struggling garden now, this approach delivers results without the guesswork. Let’s get those roots growing again.
📚 In This Guide
- What you need
- Instructions
- Tips and common mistakes
- Wrapping up and next steps
What you need
- ● Gypsum: 10–20 lbs per 100 sq. ft. (for breaking up clay and improving drainage). Pro tip: Use food-grade gypsum to avoid harmful additives! 🌡️
- ● Organic Matter: Compost: 2–3 inches spread evenly
- ● Peat moss or coconut coir: 1–2 inches (for moisture retention)
- ● Soil Conditioners: Vermiculite or perlite: 1–2 gallons (for aeration)
- ○ Biochar: 1–2 lbs per 100 sq. ft. (optional but highly effective for long-term structure! ✨)
- ● Tools: Tilling fork or broadfork: rent or borrow if needed—manual tools work best!
- ● Garden rake: For leveling and mixing
- ● Wheelbarrow: 2–3 cubic feet capacity (to haul materials)
- ● Water hose with spray nozzle: For hydration
- ● Mycorrhizal fungi: 1–2 lbs (boosts root growth—worth the splurge! 💡)
- ● Lime (if soil pH is 10–20 lbs per 100 sq. ft. (test pH first!)
- ● Cover crops: Clover or rye seeds (plant after treatment to prevent re-compaction)
- ● Soil test kit: To check pH, nutrients, and organic matter levels before starting.
Step-by-Step guide to reviving compacted soil
Here’s how I transform dense, lifeless soil into a root-friendly haven—layer by layer.
🌱 Step 1: Loosen the Top 6 Inches of Soil
Use a broadfork or digging fork to penetrate the top 6 inches of compacted soil. Insert the tines 4-6 inches apart and rock them gently side to side to break up the dense layer. Avoid tilling—it disrupts soil structure and accelerates compaction over time. You’ll feel resistance at first, but once you hit the loosened zone, the fork will glide more easily.
Work in small sections, no larger than 2 feet by 2 feet, to prevent re-compacting the soil before you finish. If the soil is extremely hard, water it lightly first—moist soil is easier to break apart. Aim for a texture that resembles crumbly cake batter when squeezed in your hand.
🌿 Step 2: Amend With Organic Matter
Spread a 2-3 inch layer of compost or well-aged manure evenly over the loosened soil. This isn’t just about adding nutrients—it’s about improving soil structure. Organic matter creates air pockets, allowing roots to penetrate deeply. For heavy clay soil, mix in 1 part coarse sand to 3 parts organic matter to further enhance drainage.
Lightly rake the amendments into the top 2 inches of soil, just enough to incorporate them without burying them too deep. Avoid overworking the soil—this can undo the loosening you just achieved. Water the area until the soil is damp but not soggy, helping the organic matter settle into place.
✂️ Step 3: Add a Mulch Layer for Long-Term Protection
Top the amended soil with a 3-4 inch layer of mulch, such as wood chips, straw, or shredded leaves. Mulch prevents raindrops from compacting the soil surface and reduces erosion. For best results, use a coarse mulch—fine particles can smother soil life and create a crust. Leave a 1-inch gap around plant stems to prevent rot.
Water the mulch lightly to help it settle and make contact with the soil below. Over time, the mulch will break down, adding more organic matter and improving soil structure further. Check the mulch layer every 2-3 months—top it up as needed to maintain the 3-4 inch thickness. This step is the key to keeping your soil loose and root-friendly for years.
💧 Step 4: Encourage Root Growth With Deep Watering
Water the treated area deeply, 1-2 inches per week, to encourage roots to grow downward rather than staying shallow. Use a soaker hose or drip irrigation to deliver water slowly and evenly, avoiding surface runoff. You’ll know you’re doing it right when water penetrates the soil within 15-30 minutes—if it pools on top, the soil isn’t absorbing it properly yet.
Monitor the soil’s moisture by sticking your finger 2 inches deep. If it feels dry, water again. Over time, the amended soil will hold moisture better, reducing the need for frequent watering. This step is critical for helping roots establish in the newly loosened layers.
Tips & tricks for perfect compacted soil revival
Here's what I've learned from years of transforming hardpan into thriving soil—these details make all the difference.
Tool Technique: When using a broadfork in Step 1, focus on the 6-inch depth by inserting the tines at a slight angle—this creates vertical fractures that roots can follow. I find it helps to wiggle the fork gently rather than forcing it straight down, which prevents compacting the soil further. For stubborn layers, work in 2-foot squares and rotate the fork 90 degrees between passes to maximize coverage. The goal is to create a honeycomb effect, not just poke holes.
Organic Matter Strategy: In Step 2, don't just spread compost—think about texture. For heavy clay soils, I blend the 2-3 inch layer of compost with 1 part coarse sand to create a 4:1 ratio mix. This prevents clumping while still improving structure. Water until damp (not soggy) to help the organic matter settle—this is when it starts working its magic to create those crucial air pockets for roots.
Mulch Layer Insight: The 3-4 inch mulch layer in Step 3 needs to be coarse to work properly. Fine mulches create a crust that blocks water and air. I recommend wood chips or straw for most gardens, but for vegetable beds, shredded leaves work beautifully too. The key is maintaining that 1-inch gap around stems—this prevents rot while still protecting the soil surface from compaction.
Watering Secret: That 15-30 minute absorption test in Step 4 is your best indicator of success. If water pools after 30 minutes, your soil isn't ready yet—go back to Step 1 and loosen deeper. For new beds, I often water twice weekly for the first month to help the organic matter settle. Over time, the amended soil will hold moisture better, and you'll notice roots growing deeper instead of staying shallow.
Pro Tips for Compacted Soil Treatment
- Here's what I've learned from years of transforming hardpan into thriving soil—these details make all the difference.
- Tool Technique: When using a broadfork in Step 1, focus on the 6-inch depth by inserting the tines at a slight angle—...
- Organic Matter Strategy: In Step 2, don't just spread compost—think about texture. For heavy clay soils, I blend the ...
Frequently asked questions
Got questions about treating compacted soil? You’re not alone!
Here are the most common concerns—and practical answers—to help you revive your soil’s structure with confidence.
What’s the fastest way to see results after treating compacted soil?
Results depend on your method, but you’ll often notice improvements in 2–4 weeks with aeration or organic amendments like compost. For deep compaction, combine methods (e.g., gypsum + aeration) and monitor plant growth—roots will follow!
Can I use household items (like coffee grounds or eggshells) instead of commercial treatments?
Coffee grounds add nitrogen and organic matter, while crushed eggshells supply calcium. For deeper compaction, though, pair them with gypsum or sand (for clay-heavy soil) or vermiculite (for sandy soil). Test small areas first—balance is key!
Is it better to treat compacted soil in spring or fall?
Fall is ideal—cooler temps let microbes break down amendments faster, and rain helps distribute them. Spring works too, but prioritize treatments before planting season (6–8 weeks ahead). Pro tip: Avoid treating in freezing or drought conditions!
Why does my soil stay compacted even after adding compost?
Compaction often requires physical disruption (like core aeration or deep tilling) + organic matter. If compost alone fails, check for:
- High clay content (add gypsum or sand)
- Poor drainage (amend with perlite or organic mulch)
- Heavy foot traffic (limit walking on treated areas)
How often should I repeat compacted soil treatment?
Annual maintenance is typical for high-traffic areas (like lawns or gardens). For severe compaction, treat every 6–12 months or after heavy rain/construction. Lightly amend with compost yearly to prevent recurrence. Think of it like a spa day for your soil!
Wrapping up and next steps
Treating compacted soil is all about reviving roots and restoring balance—one layer at a time! 🌱 By combining organic matter, aeration, and proper water management, you’re not just fixing the surface; you’re transforming the foundation for healthier plants and greener landscapes.
The key takeaway? Patience and consistency pay off in lush, thriving growth.
Ready to see the difference? Start small—test a section of your yard, track progress, and gradually expand. Your soil (and plants!) will thank you! 🌿 Grab your tools and get growing!