
Container Gardens
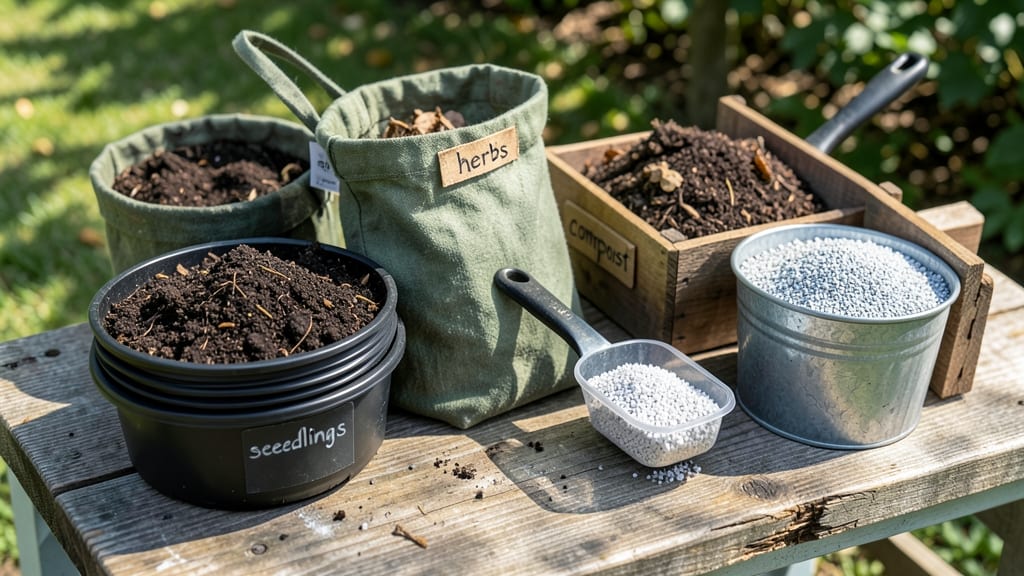
Using the right soil storage containers keeps soil fresh for planting all season long. 🌱 After years of buying bags of potting mix only to find them compacted and moldy by spring, I learned that airflow is the secret weapon for preserving soil quality.
The right storage system prevents clumping, retains nutrients, and keeps weeds from taking over—saving you money and frustration.
Not all containers work equally. Plastic bins with tight lids trap moisture and create anaerobic pockets where soil spoils, while breathable fabric or ventilated plastic bins let air circulate.
I now use 5-gallon buckets with drill holes for my potting mix, and they stay usable for 12+ months without losing quality. The key is keeping soil dry between uses and avoiding direct sunlight, which bakes out moisture and nutrients.
When you store soil properly, it stays loose and ready for planting—no more struggling with hard, clumpy mix that resists roots. Your plants will establish faster, and you’ll waste less money on new soil every season. This system works for gardeners with sheds, garages, or even balcony storage spaces.
For large quantities, consider stacking bins or using under-bed storage to maximize space. Just avoid metal containers, which can rust and contaminate the soil. With the right setup, you’ll have fresh, high-quality soil whenever you need it—no more last-minute trips to the garden center.
Why it happens
Soil storage containers—whether used for composting, seed starting, or long-term gardening—can sometimes become breeding grounds for poor root health if not managed properly. Understanding why these issues arise is the first step to preventing them. Below, we break down the science behind common problems and how they impact your plants.
🌡️ Temperature Fluctuations & Heat Stress
Soil in sealed or improperly ventilated containers can overheat, especially under direct sunlight or in hot climates. When temperatures rise above 85°F (29°C), microbial activity in the soil accelerates, depleting oxygen and producing harmful byproducts like ethylene gas. This creates an anaerobic (low-oxygen) environment that:
- Stunts root growth by limiting nutrient uptake, as roots rely on oxygen to absorb water and minerals.
- Encourages fungal pathogens like Pythium or Phytophthora, which thrive in warm, damp conditions and rot roots.
- Disrupts beneficial microbes, such as mycorrhizal fungi, which form symbiotic relationships with plant roots.
Actionable fix: Use containers with insulated walls (e.g., fabric grow bags or double-layered plastic bins) and place them in partial shade during peak heat. A soil thermometer can help monitor temperatures.
💧 Poor Drainage & Waterlogging
Even "drainage-friendly" containers can fail if they lack proper airflow at the base. When excess water pools, it displaces oxygen in soil pores, leading to:
- Root suffocation: Roots switch from aerobic (oxygen-dependent) to anaerobic respiration, producing ethanol and acetic acid, which are toxic to plants.
- Nutrient leaching: Essential minerals like nitrogen and phosphorus wash away, starving plants even if water is present.
- Bacterial blooms: Anaerobic bacteria (e.g., Erwinia) multiply, causing soft rot and blackened roots.
Actionable fix:
- Add a 2–3 inch layer of perlite or coarse sand at the bottom before filling with soil.
- Use containers with multiple drainage holes and elevate them on feet or a tray to prevent water backup.
- Test soil moisture with your finger—if it stays damp for >48 hours, it’s waterlogged.
🔄 Stagnant Air & Oxygen Depletion
Sealed containers trap carbon dioxide (CO₂) and limit oxygen exchange, creating a suffocating environment for roots. Over time, this leads to:
- Reduced root hair development: Root hairs (which absorb 90% of water and nutrients) wither in low-oxygen conditions.
- Slowed enzymatic activity: Enzymes like nitrate reductase (critical for nitrogen processing) become inactive, stalling growth.
- Increased ethylene buildup: This plant hormone accelerates senescence (aging) in roots, causing them to die prematurely.
Actionable fix: Opt for containers with mesh sides or breathable fabric (e.g., burlap or coconut coir). For rigid bins, drill small ventilation holes along the sides and top. A fan on low speed near the container can also improve airflow.
🧪 Chemical Imbalances & pH Shifts
Improperly stored soil can undergo pH shifts due to microbial activity or decomposition. For example:
- Acidification: Organic matter breaks down, releasing organic acids that lower pH below 6.0, locking out nutrients like phosphorus and calcium.
- Alkalization: In arid climates, evaporation leaves behind sodium and calcium carbonates, raising pH above 7.5 and causing nutrient deficiencies (e.g., iron chlorosis).
- Salt buildup: Fertilizer residues or hard water minerals accumulate, creating osmotic stress that forces roots to expend energy to expel excess salts.
Actionable fix:
Problem
Test
Solution
Low pH (<6.0)
Use a pH meter or test kit.
Add lime (calcium carbonate) or wood ash (sparingly).
High pH (>7.5)
Check for white crust on soil surface.
Amend with sulfur or peat moss and flush with rainwater.
Salt buildup
Taste soil water—salty residue?
Leach with 3–4 inches of water and avoid synthetic fertilizers.
Practical fixes for healthy root growth
Soil storage containers can transform your gardening game—when they work with your plants, not against them. But stagnant soil, poor airflow, and moisture mismanagement can turn your storage system into a root’s worst nightmare.
The good news? Most issues have simple, actionable fixes. Below, we map common problems to easy-to-implement solutions, plus prevention tips to keep your soil storage containers thriving long-term.
Problem: Roots suffocate when soil stays too dense or waterlogged, leading to rot and poor nutrient uptake. Solution:
- Loosen the soil before storage: Use a garden fork or aeration tool to create vertical channels (1–2 inches deep) every 6–12 inches. This mimics natural soil structure and lets air circulate.
- Add organic matter: Mix in compost, coconut coir, or perlite (10–20% by volume) to lighten heavy clay or silt. These amendments hold moisture and improve drainage.
- Layer with breathable materials: If storing soil long-term, separate layers with burlap sacks or cardboard (unbleached) to prevent compaction. Avoid plastic—it traps moisture and suffocates roots.
💡 Prevention Tip: Store soil in 5–10 gallon containers (not giant bags) to avoid crushing. If using bulk storage, flip the container weekly to redistribute weight and prevent settling.
Problem: Too much or too little moisture kills roots. Stored soil can dry out or become a breeding ground for fungi. Solution:
- Test moisture levels before storage: Soil should feel like a wrung-out sponge—not soggy, not bone-dry. If needed, hydrate with a sprinkler (not a hose) to avoid clumping.
- Use moisture-retentive additives: For sandy soil, add hydrogel crystals (soaks up 500x its weight in water). For clay, blend in peat moss or vermiculite to balance absorption.
- Store with a "breather": Place a terracotta pot shard or broken tile at the bottom of storage bins. This creates drainage while allowing excess moisture to evaporate.
⚠️ Warning: Never store soil in airtight containers (like plastic bins with lids). Condensation = mold. Opt for vented bins or fabric bags instead.
Problem: Stored soil can harbor grubs, fungus gnats, or mold, which spread to your garden. Solution:
- Solarize the soil (for outdoor storage): Pile soil in black plastic bags, seal tightly, and leave in the sun for 4–6 weeks. Heat kills pests and pathogens.
- Dust with diatomaceous earth (DE): Sprinkle a thin layer over stored soil to deter insects. Reapply after watering.
- Add beneficial microbes: Mix in mycorrhizal fungi or compost tea to outcompete harmful organisms. These "good guys" boost soil health naturally.
🌡️ Pro Tip: Freeze problematic soil for 48 hours (in a sealed bin) to kill pests—great for small batches. Just thaw before use!
Problem: Stored soil loses nitrogen and microbes over time, starving new plants. Solution: - Top-dress with slow-release nutrients: Before planting, add a thin layer of worm castings or bone meal (for phosphorus) to the surface.
Let rain or watering integrate it naturally. - Use liquid amendments: Stir in fish emulsion or seaweed extract (1 tbsp per gallon of soil) to jumpstart microbial activity. - Rotate storage spots: If storing multiple soil types, label and swap locations seasonally to prevent nutrient leaching from one area affecting others.
🎯 Prevention Tip: Store soil in cool, dark places (like a garage or shed) to slow nutrient breakdown. Avoid direct sunlight, which accelerates microbial die-off.
Problem: Cracked pots, rusty bins, or degraded fabric weaken your storage system. Solution: - Inspect containers annually: Replace warped plastic bins or rotted wooden crates.
Upgrade to food-grade plastic or galvanized metal for longevity. - Line bins with landscape fabric: Poke holes in the fabric to allow airflow but block weeds/seeds.
Secure with a rubber band or bungee cord. - Elevate storage: Use pallets or cinder blocks to keep containers off damp floors, preventing mold and rodent nesting.
🔥 Quick Upgrade: Swap old 5-gallon buckets for stackable, vented soil bins (like those from Growers Supply or Amazon). They’re designed for airflow and easy access.
To keep your stored soil fresh and fertile, follow this 3-step monthly check:
- Fluff the soil with a fork to prevent compaction.
- Check moisture—adjust with a spray bottle if dry.
- Rotate containers to even out weight distribution.
Final Thought: Most soil storage problems stem from one of three issues: airflow, moisture, or neglect. By tackling these with the fixes above, your stored soil will stay lighter, livelier, and ready to grow—no root rot in sight! 🚀
Frequently asked questions about soil storage containers
What’s the best material for storing garden soil long-term?
For airflow and moisture control, use ventilated plastic bins with drill holes or breathable fabric bags. Avoid metal (rust risk) and solid plastic (traps moisture). Pro tip: 5-gallon buckets with holes work perfectly for small batches—just add a terracotta shard at the bottom for drainage.
How do I keep stored soil from getting moldy or compacted?
Prevent compaction by fluffing soil with a fork before storage and adding perlite or coconut coir (10-20%). For mold prevention, store in cool, dry places (like garages) and avoid airtight seals. Rotate containers weekly to redistribute weight—this keeps soil loose and prevents anaerobic pockets.
Can I reuse old plastic containers for soil storage?
Only if they’re food-grade plastic and clean. Drill 1/4-inch holes along the sides and bottom for airflow. Never use containers with cracks or warping—these trap moisture and promote mold. For extra protection, line them with unbleached cardboard before filling.
How long can I store soil before it loses quality?
With proper ventilation and moisture control, potting mix stays fresh for 12-18 months. Garden soil degrades faster (6-12 months) due to organic matter breakdown. Test stored soil by planting a fast-growing crop (like radishes)—if they thrive, your soil is still viable.
What’s the easiest way to sterilize stored soil?
For small batches, freeze soil for 48 hours to kill pests. For larger quantities, solarize by piling in black plastic bags in sunlight for 4-6 weeks. Avoid baking in ovens—it destroys beneficial microbes. Always let soil thaw or cool completely before use.