
How To
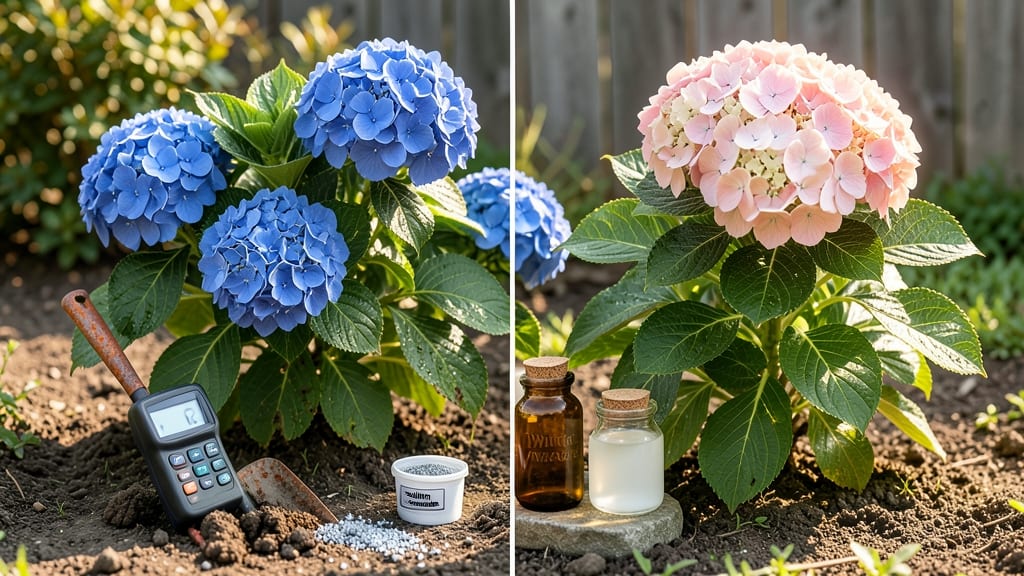
Your hydrangea blooms’ color depends on soil acidity—aim for a pH of 5.2–5.5 to unlock those dreamy blues and pinks 🌸.
Struggling to get your hydrangeas to bloom in vibrant blues and pinks? The secret might be hiding in your soil’s acidity levels—hydrangeas are notoriously picky about their pH environment. If your flowers are turning out dull or the wrong shade, it’s time to dig deeper (literally).
Most gardeners assume their soil is fine, but without testing, you’re flying blind. The right pH isn’t just about color—it’s about plant health, too. Too high or too low, and your hydrangeas might struggle to thrive, let alone put on a show.
In this guide, I’ll walk you through how to test your soil, the best amendments to use, and 5 long-term tricks to keep your hydrangeas happy and blooming year after year.
The ideal hydrangea soil pH range for different bloom colors
If you’ve ever wondered why your hydrangea blooms turn out more pink than blue (or vice versa), the answer likely lies in your soil pH levels. Hydrangeas are famous for their color-changing flowers, but this magical transformation depends entirely on the acidity of your garden soil.
The right pH balance doesn’t just affect color—it also ensures your plants stay healthy and vigorous.
Most hydrangeas thrive in acidic soil, with an ideal pH range of 5.2 to 5.5. However, slight adjustments can shift their blooms from deep blues to soft pinks or even purples. The science behind this?
It’s all about aluminum solubility—a mineral that becomes more available in acidic soils, influencing pigment production. Let’s break down the exact pH targets for each bloom color and how to achieve them.
For blue hydrangeas, aim for a pH of 5.2–5.5. This acidic range increases the availability of aluminum ions in the soil, which react with flower pigments to produce vibrant blue hues.
If your soil tests higher than 5.5, you’ll likely see pink or purple blooms instead. To lower your soil’s pH, try adding sulfur, pine needles, or cottonseed meal in early spring.
On the other hand, pink hydrangeas thrive in slightly less acidic soil, with a pH of 6.0–6.2. At this level, aluminum becomes less available, allowing the natural red pigments in the flowers to dominate.
To shift your blooms toward pink, amend your soil with wood ash or crushed eggshells. Just be cautious—over-amending can make your soil too alkaline, leading to yellowing leaves or poor growth.
Purple hydrangeas fall in between, preferring a pH of 5.6–5.9. This range is a bit trickier because it requires precise adjustments. If your soil is naturally neutral or alkaline, you’ll need to gradually lower the pH using peat moss or compost tea. For gardeners in hot climates, where soil pH can fluctuate, regular testing is key to maintaining that perfect purple balance.
It’s also worth noting that hydrangea color can change year to year if your soil pH shifts. For example, if you planted a blue hydrangea but your soil becomes more alkaline over time, those blue blooms may turn pink by next season.
This is why annual soil testing is a game-changer—it helps you predict and control your hydrangea’s flower color like a pro.
Beyond color, soil pH affects overall plant health. Hydrangeas in extremely acidic soil (below 5.0) may struggle with nutrient deficiencies, such as manganese or iron toxicity, leading to yellow leaves or stunted growth.
Conversely, soil that’s too alkaline (above 6.5) can cause chlorosis (yellowing between leaf veins) because the plant can’t absorb iron properly. The goal is to strike that sweet spot of 5.2–5.5 for optimal blooms and vitality.
If you’re new to soil testing, don’t worry—it’s simpler than you think. Grab a DIY soil pH kit (available at garden centers for under $10) or use a digital pH meter for instant results. For the most accurate readings, test your soil in early spring, before you start amending.
Dig a small hole near your hydrangea’s roots, collect a sample, and follow the kit’s instructions. If your pH is off, you’ll know exactly how much to adjust to achieve those dreamy blues, pinks
How to test and adjust your soil’s acidity for hydrangeas
Testing your hydrangea soil acidity is the first step to unlocking those show-stopping blue or pink blooms. Most hydrangeas thrive in acidic soil between pH 5.2 and 5.5, but many gardeners accidentally plant them in neutral or alkaline soil—often without realizing it.
If your hydrangeas look healthy but produce dull, lackluster flowers, your soil might be the culprit. The good news? Adjusting soil pH for hydrangeas is simpler than you think, whether you use DIY tests or lab kits.
Before diving into amendments, you’ll need to know your current soil pH level. There are two main ways to test it: at-home pH test kits (fast and affordable) or lab soil tests (more precise but pricier).
I’ve used both, and while lab tests give detailed insights, a simple pH meter or test strips can work for most gardeners. Grab a small soil sample from around your hydrangea’s roots—about 6 inches deep—and follow the kit’s instructions.
Most kits give results in just minutes, letting you know if your soil is too alkaline (high pH) or too acidic (low pH).
Many gardeners jump straight to adding sulfur or lime without checking their soil’s pH first. This can worsen the problem—adding sulfur to already acidic soil or lime to alkaline soil can create an imbalance that harms your hydrangeas.
Always test first, then adjust. A quick DIY pH test (costing under $10) saves time, money, and stress in the long run.
Pro Tip: Test your soil in spring and fall to catch seasonal shifts in pH.
If your soil tests above 6.0, your hydrangeas need more acidity. The fastest way to lower pH is by adding elemental sulfur—sprinkle 1 pound per 100 square feet of soil and water it in.
For a slower, organic approach, try pine needles, peat moss, or coffee grounds. I’ve had great success with pine bark mulch, which gradually acidifies the soil over time.
If your soil is below 5.0, you’ll need to raise the pH using garden lime (calcium carbonate) or wood ash. Apply 5 pounds of lime per 100 square feet and mix it into the top 6 inches of soil.
Timing matters when adjusting hydrangea soil pH. For lowering pH, apply amendments in early spring before new growth begins. If you’re raising pH, do it in late winter or early spring so the changes take effect before the growing season.
Avoid adding amendments in summer or fall, as this can disrupt root activity or lead to nutrient imbalances. Always water thoroughly after applying any soil amendment to help it integrate evenly.
Patience is key—soil pH adjustments take time. It can take 2-3 months for amendments to fully take effect, so don’t expect instant results. Re-test your soil after 6-8 weeks to monitor progress.
If you’re still not seeing the color changes in your blooms, consider adding a chelated iron supplement, which can enhance aluminum availability (a critical factor for blue flowers). For pink blooms, aim for a slightly higher pH of 5.5–6.0, as this reduces aluminum uptake.
Remember, hydrangeas thrive in well-draining, acidic soil, so pair your pH adjustments with organic matter like compost to improve soil structure. Avoid over-fertilizing, as excess salts can further disrupt pH balance.
With the right soil acidity adjustments, your hydrangeas will reward you with bold, vibrant blooms year after year.