
How To
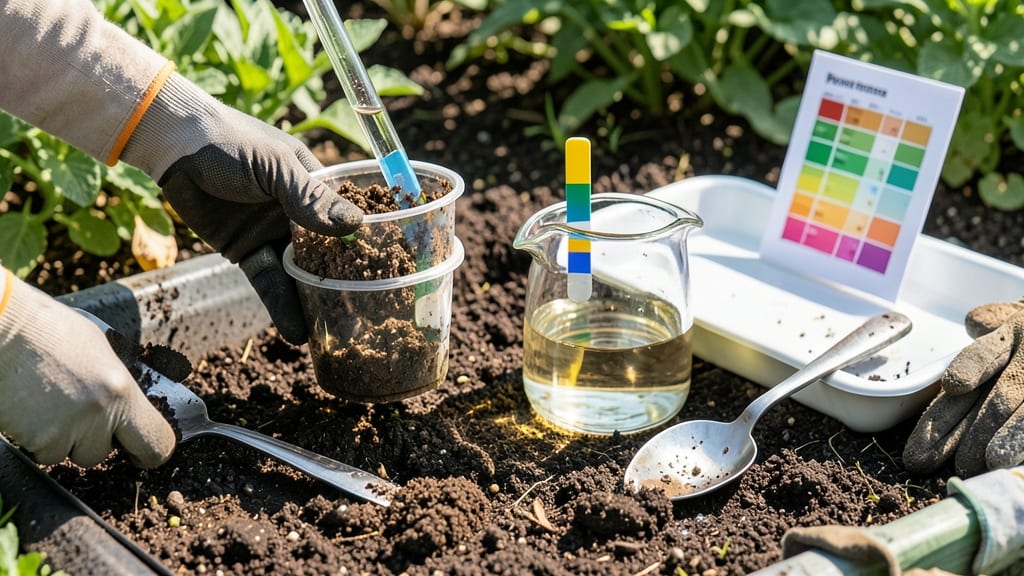
Testing soil pH with strips gives you instant answers that explain why your plants might be struggling. 🌱 I used these strips to diagnose why my blueberries stayed stunted for years—turns out, the soil was too alkaline.
The results come in seconds, and you don’t need fancy equipment or a chemistry degree. Grab a pack of pH strips (they cost under $10), a small container, and some distilled water.
Scoop a soil sample from 6 inches deep, mix it with water until it forms a paste, then dip a strip. Compare the color to the chart within 30 seconds—that’s all it takes to know if your soil is acidic, neutral, or alkaline.
A reading below 5.5 means your soil is too acidic (great for blueberries but bad for beans), while anything above 7.0 signals alkalinity (ideal for lavender but not tomatoes). Most vegetables thrive between 6.0 and 7.0, so aim for that range if you’re growing a mix of crops.
Strips are perfect for quick checks, but for precise adjustments, consider a meter or lab test—especially if you’re dealing with large garden beds. For now, though, these strips will help you troubleshoot plant problems faster than ever.
📚 In This Guide
- What you need
- Instructions
- Tips and common mistakes
- Wrapping up and next steps
What you need
- ● pH test strips (soil-specific) – 1 pack (50–100 strips recommended). Look for strips labeled for soil pH testing (e.g., blank">LaMotte, blank">API, or blank">MySoil). Avoid generic pH strips—they’re not calibrated for soil!
- ● Fresh soil sample – 2–3 tbsp of moist (not wet) topsoil. Avoid contaminated or treated areas (e.g., near fertilizers or pesticides).
- ● Small plastic container or ziplock bag – For mixing soil with water (if needed). Size: ~4 oz (120 mL) or larger.
- ● Distilled or dechlorinated water – 1–2 tbsp. Tap water can skew results due to minerals.
- ● Timer or stopwatch – To track the 30–60 seconds required for accurate color development.
- ● White plate or paper towel – A bright, non-absorbent surface for comparing strip colors. Avoid dark or textured surfaces!
- ● pH color chart reference – Some strips include one, but a blank">digital guide (or your phone’s camera) can help with precision.
- ● Gloves (nitrile or latex) – Keeps your hands clean, especially if testing multiple samples.
- ● Soil pH adjustment kit – If you plan to amend your soil, have lime (to raise pH) or sulfur (to lower pH) on hand.
- ● Notebook or app – To log results over time (e.g., blank">Gardenate or blank">PlantNet).
Step-by-step instructions for testing soil pH with strips
Here's how I get reliable readings every time—no guesswork, just science.
💧 Step 1: Collect a Fresh Soil Sample
Grab a clean trowel or small shovel and dig about 4-6 inches deep in multiple spots around your garden bed. Mix these samples together in a clean bucket—this gives you an accurate overall reading rather than testing just one spot. I like to take 3-4 samples from different areas and combine them.
Remove any large debris like rocks or plant roots. You want pure soil for the most accurate test. If your soil feels dry, add just enough water to make it damp but not soggy—this helps the strips absorb moisture evenly. A handful of soil should hold together when squeezed but not crumble apart.
🧪 Step 2: Prepare the Soil and Test Strip
Place a small amount of soil—about 1 teaspoon—into a clean, shallow container like a small bowl or plastic lid. Flatten the soil gently with your finger to create an even surface. This prevents uneven moisture distribution that could skew your results.
Remove a pH strip from its packaging and hold it by the edges—never touch the test area with your fingers. The strip is now ready to interact with your soil. I always test strips immediately after opening to avoid contamination from air or moisture in the package.
🔍 Step 3: Apply Soil to the Strip and Wait
Press the test area of the strip firmly into the soil, making sure the entire reactive surface makes contact. Hold it there for 10-15 seconds—this ensures the soil's moisture and minerals fully interact with the chemicals on the strip. You'll see the color begin to change almost immediately.
Remove the strip and lay it flat on a clean, white surface. Compare the color to the chart provided with your test kit within 30 seconds. Colors fade quickly, so act fast. I keep my test kit in a small plastic bag with the chart taped to the outside for quick reference.
✂️ Step 4: Interpret the Results and Adjust if Needed
Match the strip's color to the closest shade on the chart. Most vegetable gardens thrive in the 6.0-7.0 pH range, while blueberries and azaleas prefer 4.5-5.5. If your reading falls outside the ideal range for your plants, note whether it's too acidic (below 6.0) or alkaline (above 7.0).
For acidic soil, add elemental sulfur or peat moss. For alkaline soil, work in lime or wood ash. I like to retest after 4-6 weeks to confirm the adjustment worked. Keep a simple logbook with dates and pH readings—you'll spot patterns over time, like how rainfall affects your soil's pH.
⏰ Step 5: Clean Up and Store Strips Properly
Dispose of used strips in a sealed container to prevent contamination. Wipe your tools and container with a damp cloth to remove any soil residue. Store unused strips in their original packaging or an airtight container with a desiccant packet to absorb moisture. I keep mine in a small plastic box with a tight lid.
Test your soil every 1-2 years or whenever you notice plants struggling. Seasonal changes can shift pH levels, especially in areas with heavy rainfall or drought. This quick test gives you the confidence to make informed adjustments before planting season.
Tips & tricks for perfect soil pH testing
These little tricks will help you get consistent, accurate readings every single time—no more guessing games in your garden.
Sample Selection: Don't just test one spot! The 4-6 inch depth rule matters because surface soil can be different from deeper layers. I've found that taking 3-4 samples from different areas and mixing them gives me a true picture of my garden's overall health. If you're testing a large area, divide it into zones—each might have different pH levels.
Moisture Matters: Your soil should be damp but not soggy when testing—think of it like a wrung-out sponge. If your soil feels dry, add just enough water to make it hold together when squeezed. Too dry and the strips won't react properly; too wet and you'll get false readings. This is especially important in sandy soils that drain quickly or clay soils that hold moisture.
Timing is Everything: Those 10-15 seconds of contact time are critical for accurate results. I set a timer on my phone so I don't accidentally hold the strip too long or too short. The color change happens fast, but rushing can give you inconsistent readings. Also remember to compare within 30 seconds—colors fade quickly, and that's when you want to be precise.
Cleanliness Prevents Errors: Never touch the test area of the strip with your fingers! Oil from your skin can contaminate the chemicals and give you false readings. I keep a small container of rubbing alcohol handy to quickly clean tools between tests. And always use clean containers—old soil residue can affect your results. This might seem obvious, but I've seen people skip this step and wonder why their readings were all over the place.
Pro Tips for Test Soil Ph With Ph Strips
- These little tricks will help you get consistent, accurate readings every single time—no more guessing games in your garden.
- Sample Selection: Don't just test one spot!
- Moisture Matters: Your soil should be damp but not soggy when testing—think of it like a wrung-out sponge.
Frequently asked questions
Got questions about testing soil pH with strips? You’re not alone—here are answers to the most common ones to help you get accurate results every time!
How accurate are pH strips compared to a pH meter?
pH strips are pretty accurate for general gardening (within ±0.5 pH units), but they’re not as precise as a digital meter. For critical crops or hydroponics, consider using strips as a quick check, then verify with a meter for fine-tuning. Most gardeners find strips reliable enough for routine monitoring!
How long do pH strips stay accurate after opening?
Once opened, pH strips typically last 3–6 months if stored properly (in a cool, dry place, sealed in their original packaging). Exposure to moisture or heat can degrade them faster. Check the expiration date on the bottle—if it’s expired, toss them and grab a fresh pack!
Do I need to rinse the soil sample before testing?
Nope! Just take a small, dry sample—no rinsing required. Wet soil can dilute the pH reading, so let it air-dry for a few hours first. For best results, test soil that’s been sitting in the garden (not freshly watered) to avoid skewed results.
What if my pH strip turns a weird color or doesn’t match the chart?
If the strip looks fuzzy, faded, or inconsistent, it might be expired, contaminated, or exposed to light. Double-check storage conditions and try a fresh strip. For stubborn cases, compare your result to a second strip or use a soil test kit for backup.
Can I test pH in potted plants or just garden soil?
pH strips work for both garden beds and potted plants. Just scoop a spoonful of soil from the root zone (top 2–3 inches) and test as usual. Potted mixes often need more frequent checks since they drain faster and can become acidic or alkaline quickly.
Wrapping up and next steps
Testing your soil’s pH with strips is a quick, budget-friendly way to ensure your plants thrive! 🌱 With just a few simple steps, you’ll gain insights that help you adjust nutrients and create the perfect growing conditions. Now that you’re armed with this knowledge, it’s time to take action: grab those strips, test your soil, and start fine-tuning your garden for healthier, happier plants!
Want to go a step further? Consider investing in a digital pH meter for even more precise readings—or share your results with fellow gardening enthusiasts for tips on optimizing your soil! 🌟