
Succulent
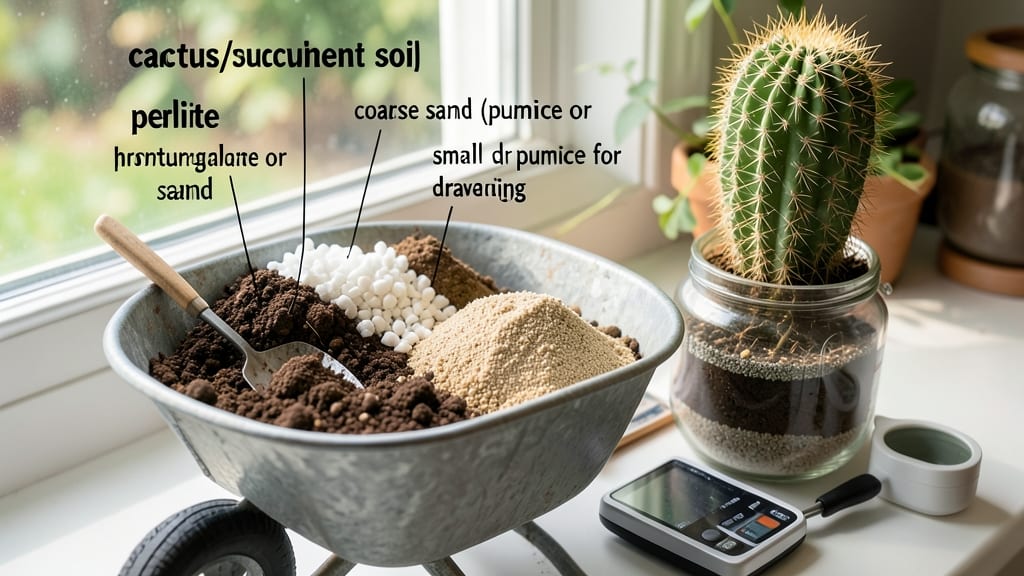
Creating your own cactus soil mix DIY saves money and grows plants that look like they’re on a desert vacation. 🌵 The right blend prevents root rot by letting water drain like a sieve—no more soggy, sad cacti.
I’ve perfected this mix after watching my first prickly pear turn into a mushy mess from store-bought soil.
You’ll need 3 parts potting soil (cactus/succulent mix if available), 2 parts perlite, and 1 part coarse sand or gravel. The perlite creates air pockets, while the sand mimics mineral-rich desert soil.
Most garden centers sell these ingredients, and a single batch costs less than a bag of pre-mixed cactus soil.
Mix everything in a wheelbarrow or large bucket, then fluff it with your hands to distribute the grit evenly. The result should feel light, crumbly, and slightly gritty—like damp sand at the beach.
This texture keeps roots oxygenated and prevents the dreaded rot that kills cacti faster than a sunburn.
Pro tip: Sterilize your mix by baking it at 200°F for 30 minutes to kill pests or fungi lurking in old soil. Use this blend for all succulents—even those finicky ones that refuse to thrive in regular potting mix.
Your plants will thank you with bold colors and rapid growth in just a few weeks.
📚 In This Guide
- What you need
- Instructions
- Tips and common mistakes
- Wrapping up and next steps
What you need
- ● Potting soil (base): 50% cactus/succulent mix (store-bought or homemade). Pro tip: Avoid heavy garden soil—it compacts and suffocates roots! 🌡️
- ● Perlite: 20% (expands for aeration). Use fine-grade perlite (1–2mm particles) for even distribution.
- ● Pumice or coarse sand: 20% (improves drainage). Skip fine sand—it clumps and stays wet. 💡
- ○ Coco coir or peat moss: 10% (optional but helps retain just enough moisture). Tip: Coco coir is eco-friendly and pH-neutral!
- ● Large bucket or wheelbarrow: For mixing (5+ gallons capacity).
- ● Garden trowel or shovel: For blending ingredients thoroughly.
- ● Gloves & dust mask: Perlite and pumice can be dusty—protect your lungs! 😷
- ● Spray bottle: To mist ingredients if they’re too dry.
- ○ Optional: Worm castings (5%) for extra nutrients (great for flowering cacti!).
Step-by-Step guide for crafting a DIY cactus soil mix
Here's how I create the perfect blend—lightweight, fast-draining, and packed with air pockets for happy cacti.
🪴 Step 1: Gather the Core Components
Start with 2 parts potting soil (a high-quality, sterile mix without added fertilizer). This forms the base but needs amendment for proper drainage. I use a cactus-specific mix if available, or a standard potting soil with 20% perlite already added as a starting point.
Add 1 part coarse sand—not fine beach sand, but horticultural-grade sand with gritty particles. This prevents compaction and mimics the mineral-rich desert soils cacti thrive in. Sift it to remove any fine particles that could clog the mix.
🌱 Step 2: Incorporate Porosity Boosters
Mix in 1 part pumice or lava rock (about ¼ inch to ½ inch pieces). These volcanic materials create air pockets and prevent soil from becoming waterlogged. Break larger chunks into smaller pieces if needed—they should be roughly the size of a pea.
For extra fluffiness, add ½ part coarse vermiculite (not fine). This mineral expands when wet, holding moisture near roots while still allowing excess water to drain. Combine everything in a large bin and stir thoroughly with a shovel or gloved hands.
💧 Step 3: Test and Adjust for Drainage
Fill a small container (like a 6-inch pot) with your mix and pour water over it until it’s thoroughly saturated. If water pools at the bottom after 10 minutes, add more perlite or coarse sand to improve drainage. The ideal mix should drain completely within 1-2 minutes.
Run a handful through your fingers—it should feel gritty, not smooth. If it clumps, add more pumice or vermiculite. The goal is a blend that holds just enough moisture for roots while preventing rot. Store the remaining mix in a sealed container for future use.
✂️ Step 4: Customize for Specific Cactus Types
For forest cacti (like Rhipsalis), reduce the sand to ½ part and increase the potting soil to 3 parts—they prefer slightly more moisture retention. For desert cacti (like Saguaro or Barrel), stick with the original 2:1:1:½ ratio but add a ¼ part of charcoal to prevent bacterial buildup.
Charcoal also helps neutralize odors if your cacti occasionally develop fungal issues. Sprinkle it lightly over the top layer of soil after repotting. Avoid overdoing it—too much charcoal can make the mix too alkaline for sensitive species.
☀️ Step 5: Repot With Confidence
Use your mix in pots with multiple drainage holes—cacti despise soggy roots. Fill the container ⅓ full, place your cactus, then top with more mix, pressing gently around the base but not compacting. Leave a ½ inch gap at the top to prevent water from spilling over during irrigation.
Water immediately after repotting to settle the soil, but avoid overwatering. Let the top 1-2 inches dry out completely before watering again. Watch for signs of stress—wrinkled skin or yellowing indicates either overwatering or poor drainage, both fixable by adjusting your mix.
Tips & tricks for perfect cactus soil mix
A few simple adjustments can transform your DIY cactus mix from good to exceptional. Here's what I've learned after years of trial and error with my collection.
Texture is Everything: When combining your 2 parts potting soil with 1 part coarse sand in Step 1, don't just eyeball it—use a kitchen scale for precision. The ideal ratio creates that perfect balance of moisture retention and aeration. I've found that sifting both components through a ¼-inch mesh screen removes any clumps that could disrupt drainage later. The goal is a mix that feels like coarse beach sand when dry, not compacted dirt.
Porosity Boosters Matter: In Step 2, when adding your pumice or lava rock, aim for pieces no larger than a pea. Larger chunks create uneven air pockets that can lead to inconsistent moisture distribution. For the ½ part coarse vermiculite, I recommend pre-moistening it slightly before mixing—this helps it distribute more evenly throughout the blend. The combination of these volcanic materials creates those crucial air pockets that prevent root rot while still holding enough moisture.
Drainage Test Accuracy: The 10-minute water test in Step 3 is your best quality control measure. If water still pools after that time, you need more perlite or coarse sand—these are your drainage heroes. For a quicker test, try the "squeeze method": Grab a handful of your mix and press firmly. If water beads up on your fingers after 30 seconds, your drainage needs improvement. The ideal mix should feel dry to the touch even after saturation, with water draining completely within the 1-2 minute window.
Customization Secrets: When adjusting for specific cactus types in Step 4, remember that charcoal isn't just for odor control—it also helps prevent bacterial buildup. For desert cacti, I've found that adding a pinch of gypsum (about 1 tablespoon per gallon of mix) can improve calcium availability without altering the pH significantly. This subtle addition has helped my Saguaro cacti grow more robustly without requiring any other changes to the basic 2:1:1:½ ratio.
Pro Tips for Cactus Soil Mix Diy
- A few simple adjustments can transform your DIY cactus mix from good to exceptional.
- Texture is Everything: When combining your 2 parts potting soil with 1 part coarse sand in Step 1, don't just eyeball it—use a kitchen scale for precision.
- Porosity Boosters Matter: In Step 2, when adding your pumice or lava rock, aim for pieces no larger than a pea.
Frequently asked questions
Got questions about crafting the perfect cactus soil mix DIY? You’re in the right place! Here are answers to the most common concerns—from timing to troubleshooting—to help your succulents thrive in their ideal airy, well-draining home.
How often should I repot my cactus with this DIY mix?
Repot your cactus every 2–3 years (or when roots crowd the pot). This DIY mix stays lightweight and drains well, so it won’t compact like regular potting soil. Spring is the best time—your plant will thank you with fresh growth!
Can I use regular potting soil instead of perlite or pumice?
Nope! Regular potting soil holds too much moisture, leading to root rot. Perlite, pumice, or coarse sand are non-negotiable for aeration. If you’re short on materials, try a 50/50 mix of cactus soil and coarse sand—but monitor drainage closely.
How long does a homemade cactus mix last before it breaks down?
This mix stays effective for 1–2 years if stored dry in a sealed container. Over time, organic matter (like coconut coir) may degrade, but the perlite/pumice remains intact. Refresh with extra coarse sand if the blend feels denser.
Why does my cactus look wilted even with the right soil?
Wilting in cacti often means overwatering or poor drainage. Double-check your mix for clumps, and ensure pots have drainage holes. Let soil dry completely between waterings—stick your finger in: if it’s damp past 1 inch, wait longer!
What’s a quick fix if I don’t have perlite or pumice?
No problem! Use crushed gravel, chicken grit, or even clean aquarium stones as a last resort. Avoid fine sand (it compacts) and never skip the grit—your cactus’s roots need airflow to breathe!
Wrapping up and next steps
Creating your own cactus soil mix DIY is simpler—and more rewarding—than you think! With the right blend of pumice, perlite, and coarse sand, you’ll give your succulents the airy, well-draining environment they crave.
Whether you’re a seasoned plant parent or just starting, this project puts you in control of your cacti’s happiness—no store-bought shortcuts needed!
Now that you’re armed with the know-how, roll up your sleeves and mix up a batch.
Your plants will thank you with vibrant growth and fewer root rot worries—plus, you’ll save money and reduce waste. Ready to get started? Grab your supplies and let’s make that perfect cactus soil! 🌵✨